Sona Blanket – 70 Tunisian Mosaic Squares
Years ago, during one of my many visits to the library, I stumbled upon a book on blackwork embroidery tucked away in the arts and crafts section. It was one of those unexpected finds that just stays with you — the intricate, geometric patterns were unlike anything I had seen before and I couldn’t stop thinking about them. At the time, I hadn’t even discovered Tunisian crochet yet. It’s funny how things have a way of coming together when the time is right!
I finally found a way to bring those patterns to life — through Tunisian Mosaic Crochet. It wasn’t a straightforward process by any means. There were countless swatches, tiny adjustments, and more tweaks than I can count, but working through all of that was absolutely worth it. The Sona Blanket is the result of that journey — a design that I truly believe brings together the best of two fiber crafts, drawing inspiration from the world of blackwork embroidery and reimagining it through the lens of modern crochet.
Fun Fact: The name “Sona” means Gold in Hindi, inspired by the golden tones I used in my blanket. It reflects the warmth and joy this project brought me, and I hope it brings the same to you.
This blanket pattern was originally hosted as a CAL in 2025.
The CAL-specific information has since been removed from this page,
leaving just the free pattern for easy reference and readability.

Disclaimer: this post may contain affiliate links – please see my affiliate disclosure for details.
If you’re looking for color and yarn inspiration, the KnitterKnotter Facebook group is a great place to start! So many people have shared their completed squares and blankets there — head to the albums and you’ll find an amazing variety of colors and yarns to spark your creativity. It’s such a great resource!
Why Tunisian Mosaic Crochet?
Mosaic crochet is a beautiful technique, and if you’ve ever wondered whether Tunisian crochet is a good match for it — it absolutely is! Here are 3 reasons why the two go so perfectly together:
- It is a beautiful yet simple technique. You only work with two stitches and you can create some very intricate patterns with it!
- There are no color changes in the middle of a row. All the color-work magic happens through the stitches only.
- We don’t have a million ends to weave in or create an envelope border! Since Tunisian crochet is worked on one side only — there’s no turning the project after each row — the number of ends to weave in is kept to a minimum. For each square, I had just 4 ends to weave in, plus 2 ends per row for the border. That’s it!
Blackwork with Tunisian Mosaic Crochet
This is an intermediate-level pattern, as it involves working diagonal overlaid stitches to create beautiful Blackwork designs. If you’re new to this technique, I offer a detailed course covering Blackwork with Tunisian Mosaic Crochet, where I share everything I’ve learned from my own experiences.

Pattern
There are 3 ways to get the pattern:
- Free on the blog – Scroll down for the individual square patterns.
- Ebook – Here is why you’d want the Ebook:
- You’ll have lifetime access to work at your own pace.
- There will be no ads!
- The PDF version is print friendly and contains the following
- List of supplies and general information about the blanket.
- Written instructions for every square and the border.
- Charts for every square with extended stitch indicators.
- Bonus empty charts (one of each size) for creating your own square patterns.
- Long-term access to work at your own pace.
- Ebook with Ad-free Video Support – You will get everything mentioned in #2 along with access to ad-free video tutorials with all the material presented in a course format so you can download the PDFs and view the videos all in one place.
Purchase the Ebook
Purchase on ThriveCart
Purchase on Ravelry
Purchase on Etsy
Here’s a comparison of all the different options for you to decide which one will work best for you:
All Squares (Click on individual squares to jump to instructions)
The Sona blanket is made up of 69 squares:
- 25 large squares
- 44 small squares
- Plus, a practice square to help you get started with the technique.
Each square has its own unique design, and together with a mosaic border, they create a lovely Tunisian mosaic blanket.
Technique and Difficulty
Note: This blanket is created using the Tunisian Mosaic Crochet technique. For those who participated in my 2023 CAL or completed my course A Beginner’s Guide to Tunisian Mosaic Crochet, please note that this technique differs significantly. I made several key adjustments to the original method I taught in 2023, making this an intermediate-level technique. The pattern will come with video support to guide you through the process.
Intermediate – This pattern is classified as intermediate, but it can be considered advanced if you choose to use black yarn.
Size
The final size of your squares will vary depending on the yarn you select. The following measurements are based on the gauge mentioned in this pattern:
Note: If your squares aren’t perfectly square, that’s okay! This will result in a slightly rectangular blanket without requiring any adjustments to the pattern or the border.
What you will need (with clickable affiliate links)
Yarn
You can use any yarn for this blanket, but I recommend choosing DK or sport weight yarn in at least two contrasting colors to really make the pattern pop – Be sure to check that the yarn doesn’t bleed color before starting your final project.
For my blanket, I used Hawthorne DK yarn by WeCrochet in the following colors:
- Gold Hill Tonal: 2900 yards / 2650 m / 46 oz / 1300 gm (13 skeins)
- Blackbird Kettle: 3100 yards / 2850 m / 50 oz / 1400 gm (14 skeins)
This yardage mentioned is for the entire blanket as shown in the picture. If you’d prefer a different layout or want to make only one size of squares (either small or large), you can calculate the amount of yarn needed using the yardage listed below.
Hook
Pick a hook that is compatible with the yarn you chose. I usually make a gauge swatch with a few different hooks before I pick one. The gauge swatch will give you a good idea of how the fabric will work up and if you would like it to be more or less drapey.
For my squares and the border, I used a 6.5 mm (K-10.5) Tunisian crochet hook. To join the squares and add the finishing touches to the blanket, I used a 5.5 mm (I-9) crochet hook.
Note: This project does NOT require a double-ended hook. The border is worked flat and will need a long cord that can accommodate 265 stitches at once.
Notions
A measuring tape, a scissors to cut yarn and a tapestry needle to weave in tails.
Note: While it is not required, I highly recommend using a focused reading light if you’re working with dark yarn. Without one, creating my squares would have been much more challenging—having that extra light made a huge difference!
Colors
This technique uses two colors—one to create the blackwork design and the other to build the fabric. I’ve referred to the two colors as BC (Blackwork Color) and FC (Fabric Color) for easier reference.
Large Squares and Border:
BC: Blackbird Kettle
FC: Gold Hill Tonal
Small Squares:
BC: Gold Hill Tonal
FC: Blackbird Kettle
Support Videos
All support videos for this CAL can be found on my YouTube channel.
Abbreviations and Stitches
- ch – chain
- fs – First Stitch – Skip the first vertical bar of the previous row (the one right under the one on the hook). The loop on the hook will count as the first stitch for every row.
- ls – Last Stitch – Pick up the two vertical bars of the last stitch of the previous row, yarn over, pull through both the vertical bars into a loop on the hook.
- tss – Tunisian Simple Stitch– Insert hook in the vertical bar, yarn over, pull up a loop on the hook.
- yo – yarn over
- FR – Foundation Row
- BOR – Bind off Row
The extended stitches (with the abbreviations) are listed separately in the “Blackwork Stitches” section.
Blackwork Stitches
Notes for the Blackwork Stitches in this pattern:
- The stitch count begins from the next stitch where the upcoming stitch will be created.
- When extended stitches need to be combined, they are listed together with a hyphen ‘-‘ separating them. To create these, work each stitch without extensions first, then combine them during the extension step, anchoring them to the previous row.
- For a visual reference of all stitches, please see the included tutorials.
A – Extended Tunisian Simple Stitch
A – Locate the stitch that’s two rows below the next stitch, pick up the two vertical bars (both the front and back bars) from within the return pass chain, yo, pull through 2 loops on hook, ch 1 (anchor with the previous row here).
B – Extended Tunisian Double Crochet Stitch
B1 – Locate the stitch two rows below, two stitches further for the appropriate tilt, yo, pick up the two vertical bars (both the front and back bars) from within the return pass chain, yo, pull through, yo, pull through 2 loops on hook, ch 1 (anchor with the previous row here).
B2 – Locate the stitch two rows below, two stitches closer for the appropriate tilt, yo, pick up the two vertical bars (both the front and back bars) from within the return pass chain, yo, pull through, yo, pull through 2 loops on hook, ch 1 (anchor with the previous row here).
C – Extended Tunisian Treble Crochet Stitch
C1 – Locate the stitch four rows below, two stitches further for the appropriate tilt, yo twice, pick up the two vertical bars (both the front and back bars) from within the return pass chain, yo, pull through, (yo, pull through 2 loops on hook) twice, ch 1 (anchor with the previous row here).
C2 – Locate the stitch four rows below, two stitches closer for the appropriate tilt, yo twice, pick up the two vertical bars (both the front and back bars) from within the return pass chain, yo, pull through, (yo, pull through 2 loops on hook) twice, ch 1 (anchor with the previous row here).
D – Extended Tunisian Treble Crochet Stitch
D1 – Locate the stitch two rows below, four stitches further for the appropriate tilt, yo twice, pick up the two vertical bars (both the front and back bars) from within the return pass chain, yo, pull through, (yo, pull through 2 loops on hook) twice, ch 1 (anchor with the previous row here).
D2 – Locate the stitch two rows below, four stitches closer for the appropriate tilt, yo twice, pick up the two vertical bars (both the front and back bars) from within the return pass chain, yo, pull through, (yo, pull through 2 loops on hook) twice, ch 1 (anchor with the previous row here).
Pattern notes
- This pattern is written in US Terms.
- Every square is worked flat.
- Row 1 is the Foundation Row for all the squares in this pattern.
- The written instructions are only for the forward pass. The return pass for every row is the same:
ch1, (yo, pull through two loops)* until one loop remains on the hook. - There is no return pass for the bind off row (BOR).
- Work all odd numbered rows and the BOR with color BC and all even numbered rows with color FC.
- Every stitch you make adds one loop to the hook, including the combination stitches.
- All tall stitches are represented by capitalized letters, with “1” and “2” indicating the direction of the tilt.
Pattern Repeats
Repeats are mentioned in this pattern in three different ways:
- 3 tss ->
tss in the next 3 stitches - (tss, A) * 2 -> tss, A, tss, A
- [tss, (tss, A) * 2] * 2 ->
[tss, tss, A, tss, A] * 2 ->
tss, tss, A, tss, A, tss, tss, A, tss, A
Charts
Note: This section may be challenging to follow without a visual reference. Please refer to the included tutorials for additional guidance.
- The stitch counts are not marked on the chart, so I recommend noting the number of stitches in both the small and large squares before you begin. Since the stitch count remains the same throughout each square, you can always refer to your notes to keep track as you go.
- The Bind Off Row is not shown in the charts. After completing the last row from the chart, make a row of Tunisian Simple Stitches and make a slip stitch every time you pick up a loop on your hook. Fasten off and weave in ends.
- Right handed people will work from right to left, bottom to top. Left handed people will work from left to right, bottom to top.
- The edge stitches are not included in the chart. You will need to add 2 extra stitches beyond what is shown in the chart.
- Rows and Stitches (refer to the included tutorials for a visual reference)
- Rows: Each horizontal line in the grid represents a row, which is worked in color BC. Between these horizontal lines, there’s an additional row worked in color FC.
- Stitches: Stitches are placed at every vertical line and between each pair of vertical lines. All stitches in a row are made with the same color.
- Identifying the stitch
- Rows worked with color BC (odd rows) create the Blackwork design, with stitches represented by solid black lines. Any vertical or diagonal line signifies an extended stitch (A, B1/B2, C1/C2, D1/D1), while all other stitches are Tunisian Simple Stitches (tss).
- Rows worked with color FC (even rows) build the background fabric. If you see a grey line, it indicates an Extended Tunisian Simple Stitch (A), while all other stitches are Tunisian Simple Stitches (tss).
Adding Extended Stitch indicators to a Blackwork Embroidery Chart
You can read a Blackwork Embroidery chart and directly create a Tunisian crochet project from it, but I’ve found it’s much easier to follow the chart if you add extended stitch indicators before you start. This video shows you how to do it easily. Once you know this, you can take any Blackwork chart and turn it into a Tunisian crochet project!
Instructions
Practice Square
Note: Remember to change colors after every row. Odd-numbered rows are worked with BC, and even-numbered rows are worked with FC.
Row 1 (FR): This is the Foundation Row.
Chain 19, make the foundation row stitches in the back loops of the chain.
Row 2: fs, 17 tss, ls.
Row 3: fs, A-B1, 15 tss, B2-A, ls.
Row 4: fs, tss, 15 A, tss, ls.
Row 5: fs, A, 15 tss, A, ls.
Row 6: fs, tss, (3 A, 3 tss) * 2, 3 A, tss, ls.
Row 7: fs, A, (3 tss, A, tss, A) * 2, 3 tss, A, ls.
Row 8: Repeat Row 6.
Row 9: fs, A, 7 tss, B2-B1, 7 tss, A, ls.
Row 10: fs, (tss, 7 A) * 2, tss, ls.
Row 11: fs, A, 5 tss, B1, 3 tss, B2, 5 tss, A, ls.
Row 12: Repeat Row 6.
Row 13: Repeat Row 7.
Row 14: Repeat Row 6.
Row 15: Repeat Row 5.
Row 16: Repeat Row 4.
Row 17: fs, A, tss, B2, 11 tss, B1, tss, A, ls.
BOR: fs, 17 tss, ls.
This will be the bind off row. You will make a slip stitch every time you pick up a loop on your hook. Fasten off and weave in ends.
Large Square #1

Row 1 (FR): This is the Foundation Row.
Chain 39, make the foundation row stitches in the back loops of the chain.
Row 2: fs, 37 tss, ls.
Row 3: fs, A-B1, 3 tss, B2, 27 tss, B1, 3 tss, B2-A, ls.
Row 4: fs, tss, 3 A, 29 tss, 3 A, tss, ls.
Row 5: fs, A, tss, B2-B1, 31 tss, B2-B1, tss, A, ls.
Row 6: fs, (tss, A) * 2, 3 tss, 9 A, 5 tss, 9 A, 3 tss, (A, tss) * 2, ls.
Row 7: fs, (A, tss) * 3, A, 9 tss, (A, tss) * 2, A, 9 tss, A, (tss, A) * 3, ls.
Row 8: fs, (tss, A) * 2, 3 tss, 9 A, 5 tss, 9 A, 3 tss, (A, tss) * 2, ls.
Row 9: fs, A, tss, A, 13 tss, (A, tss) * 2, A, 13 tss, A, tss, A, ls.
Row 10: fs, tss, A, tss, 5 A, (3 tss, A) * 2, 5 tss, (A, 3 tss) * 2, 5 A, tss, A, tss, ls.
Row 11: fs, A, tss, A, 5 tss, (A, tss) * 3, A, 7 tss, A, (tss, A) * 3, 5 tss, A, tss, A, ls.
Row 12: fs, tss, A, tss, 5 A, 7 tss, 7 A, 7 tss, 5 A, tss, A, tss, ls.
Row 13: fs, A, tss, A, 7 tss, A, tss, A, 11 tss, A, tss, A, 7 tss, A, tss, A, ls.
Row 14: fs, tss, A, tss, 5 A, 7 tss, 7 A, 7 tss, 5 A, tss, A, tss, ls.
Row 15: fs, A, tss, A, 5 tss, (A, tss) * 3, A, 7 tss, (A, tss) * 3, A, 5 tss, A, tss, A, ls.
Row 16: fs, tss, A, tss, 5 A, 3 tss, A, 13 tss, A, 3 tss, 5 A, tss, A, tss, ls.
Row 17: fs, A, tss, A, 11 tss, A, 7 tss, A, 11 tss, A, tss, A, ls.
Row 18: fs, (tss, A) * 2, 5 tss, 5 A, tss, A, 5 tss, A, tss, 5 A, 5 tss, (A, tss) * 2, ls.
Row 19: fs, (A, tss) * 4, A, 5 tss, A, tss, A, 3 tss, A, tss, A, 5 tss, A, (tss, A) * 4, ls.
Row 20: fs, (tss, A) * 2, 5 tss, 5 A, tss, A, tss, 3 A, tss, A, tss, 5 A, 5 tss, (A, tss) * 2, ls.
Row 21: fs, (A, tss) * 4, A, 5 tss, A, tss, A, 3 tss, A, tss, A, 5 tss, A, (tss, A) * 4, ls.
Row 22: fs, (tss, A) * 2, 5 tss, 5 A, tss, A, 5 tss, A, tss, 5 A, 5 tss, (A, tss) * 2, ls.
Row 23: fs, A, tss, A, 11 tss, A, 7 tss, A, 11 tss, A, tss, A, ls.
Row 24: fs, tss, A, tss, 5 A, 3 tss, A, 13 tss, A, 3 tss, 5 A, tss, A, tss, ls.
Row 25: fs, A, tss, A, 5 tss, (A, tss) * 3, A, 7 tss, (A, tss) * 3, A, 5 tss, A , tss, A, ls.
Row 26: fs, tss, A, tss, 5 A, 7 tss, 7 A, 7 tss, 5 A, tss, A, tss, ls.
Row 27: fs, A, tss, A, 7 tss, A, tss, A, 11 tss, A, tss, A, 7 tss, A, tss, A, ls.
Row 28: fs, tss, A, tss, 5 A, 7 tss, 7 A, 7 tss, 5 A, tss, A, tss, ls.
Row 29: fs, A, tss, A, 5 tss, (A, tss) * 3, A, 7 tss, (A, tss) * 3, A, 5 tss, A, tss, A, ls.
Row 30: fs, tss, A, tss, 5 A, (3 tss, A) * 2, 5 tss, (A, 3 tss) * 2, 5 A, tss, A, tss, ls.
Row 31: fs, A, tss, A, 13 tss, (A, tss) * 2, A, 13 tss, A, tss, A, ls.
Row 32: fs, (tss, A) * 2, 3 tss, 9 A, 5 tss, 9 A, 3 tss, (A, tss) * 2, ls.
Row 33: fs, (A, tss) * 3, A, 9 tss, (A, tss) * 2, A, 9 tss, (A, tss) * 3, A, ls.
Row 34: fs, (tss, A) * 2, 3 tss, 9 A, 5 tss, 9 A, 3 tss, (A, tss) * 2, ls.
Row 35: fs, A-B1, 3 tss, B2, 27 tss, B1, 3 tss, B2-A, ls.
Row 36: fs, tss, 3 A, 29 tss, 3 A, tss, ls.
Row 37: fs, A, tss, B2-B1, 31 tss, B2-B1, tss, A, ls
BOR: fs, 37 tss, ls.
This will be the bind off row. You will make a slip stitch every time you pick up a loop on your hook. Fasten off and weave in ends.

Large Square #2

Row 1 (FR): This is the Foundation Row.
Chain 39, make the foundation row stitches in the back loops of the chain.
Row 2: fs, 37 tss, ls.
Row 3: fs, A-B1, 3 tss, B2, 27 tss, B1, 3 tss, B2-A, ls.
Row 4: fs, tss, 3 A, 29 tss, 3 A, tss, ls.
Row 5: fs, A, tss, B2-B1, 31 tss, B2-B1, tss, A, ls.
Row 6: fs, tss, A, tss, 11 A, 3 tss, 3 A, 3 tss, 11 A, tss, A, tss, ls.
Row 7: fs, A, tss, A, 11 tss, A, tss, A, 3 tss, A, tss, A, 11 tss, A, tss, A, ls.
Row 8: fs, tss, A, tss, 3 A, tss, 5 A, 3 tss, A, tss, 3 A, tss, A, 3 tss, 5 A, tss, 3 A, tss, A, tss, ls.
Row 9: fs, A, tss, A, 5 tss, B2, 3 tss, A, 3 tss, B2, 3 tss, B1, 3 tss, A, 3 tss, B1, 5 tss, A, tss, A, ls.
Row 10: fs, tss, A, tss, 5 A, 3 tss, A, 3 tss, A, tss, 3 A, tss, A, 3 tss, A, 3 tss, 5 A, tss, A, tss, ls.
Row 11: fs, A, tss, A, 5 tss, A, tss, A, 7 tss, B2-B1, 7 tss, A, tss, A, 5 tss, A, tss, A, ls.
Row 12: fs, tss, A, tss, 5 A, 3 tss, 7 A, tss, 7 A, 3 tss, 5 A, tss, A, tss, ls.
Row 13: fs, A, tss, A, 9 tss, B2, 5 tss, A, 5 tss, B1, 9 tss, A, tss, A, ls.
Row 14: fs, tss, A, tss, 3 A, 3 tss, 3 A, tss, A, 3 tss, A, tss, A, 3 tss, A, tss, 3 A, 3 tss, 3 A, tss, A, tss, ls.
Row 15: fs, A, tss, A, 3 tss, A, tss, A, 5 tss, B2-A, (tss, A) * 3, tss, A-B1, 5 tss, A, tss, A, 3 tss, A, tss, A, ls.
Row 16: fs, (tss, A) * 2, 3 tss, A, tss, 3 A, 3 tss, (A, tss) * 3, A, 3 tss, 3 A, tss, A, 3 tss, (A, tss) * 2, ls.
Row 17: fs, (A, tss) * 2, A, 3 tss, B2, 3 tss, A, 3 tss, B2, tss, A, tss, B1, 3 tss, A, 3 tss, B1, 3 tss, A, (tss, A) * 2, ls.
Row 18: fs, (tss, A) * 2, 3 tss, A, tss, 3 A, 3 tss, A, 5 tss, A, 3 tss, 3 A, tss, A, 3 tss, (A, tss) * 2, ls.
Row 19: fs, A, tss, A, 7 tss, B2, 5 tss, A, 3 tss, A, 5 tss, B1, 7 tss, A, tss, A, ls.
Row 20: fs, tss, A, tss, 7 A, 7 tss, 3 A, 7 tss, 7 A, tss, A, tss, ls.
Row 21: fs, A, tss, A, 5 tss, B1, 7 tss, A, 3 tss, A, 7 tss, B2, 5 tss, A, tss, A, ls.
Row 22: fs, (tss, A) * 2, 3 tss, A, tss, 3 A, 3 tss, A, 5 tss, A, 3 tss, 3 A, tss, A, 3 tss, (A, tss) * 2, ls.
Row 23: fs, (A, tss) * 3, B1, 5 tss, A, tss, B1, 3 tss, A, 3 tss, B2, tss, A, 5 tss, B2, (tss, A) * 3, ls.
Row 24: fs, (tss, A) * 2, 3 tss, A, tss, 3 A, 3 tss, (A, tss) * 3, A, 3 tss, 3 A, tss, A, 3 tss, (A, tss) * 2, ls.
Row 25: fs, A, tss, A, 3 tss, A, tss, A, 3 tss, B1, (tss, A) * 5, tss, B2, 3 tss, A, tss, A, 3 tss, A, tss, A, ls.
Row 26: fs, tss, A, tss, 3 A, 3 tss, 3 A, tss, A, 3 tss, A, tss, A, 3 tss, A, tss, 3 A, 3 tss, 3 A, tss, A, tss, ls.
Row 27: fs, A, tss, A, 7 tss, B1, 7 tss, A, 7 tss, B2, 7 tss, A, tss, A, ls.
Row 28: fs, tss, A, tss, 5 A, 3 tss, 7 A, tss, 7 A, 3 tss, 5 A, tss, A, tss, ls.
Row 29: fs, (A, tss, A, 5 tss) * 2, B1, 3 tss, B2, (5 tss, A, tss, A) * 2, ls.
Row 30: fs, tss, A, tss, 5 A, 3 tss, A, 3 tss, A, tss, 3 A, tss, A, 3 tss, A, 3 tss, 5 A, tss, A, tss, ls.
Row 31: fs, A, tss, A, 3 tss, B1, 5 tss, A, tss, B1, 7 tss, B2, tss, A, 5 tss, B2, 3 tss, A, tss, A, ls.
Row 32: fs, tss, A, tss, 3 A, tss, 5 A, 3 tss, A, tss, 3 A, tss, A, 3 tss, 5 A, tss, 3 A, tss, A, tss, ls.
Row 33: fs, A, tss, A, 11 tss, A, tss, A, 3 tss, A, tss, A, 11 tss, A, tss, A, ls.
Row 34: fs, tss, A, tss, 11 A, 3 tss, 3 A, 3 tss, 11 A, tss, A, tss, ls.
Row 35: fs, A-B1, 3 tss, B2, 27 tss, B1, 3 tss, B2-A, ls.
Row 36: fs, tss, 3 A, 29 tss, 3 A, tss, ls.
Row 37: fs, A, tss, B2-B1, 31 tss, B2-B1, tss, A, ls
BOR: fs, 37 tss, ls.
This will be the bind off row. You will make a slip stitch every time you pick up a loop on your hook. Fasten off and weave in ends.

Large Square #3

Row 1 (FR): This is the Foundation Row.
Chain 39, make the foundation row stitches in the back loops of the chain.
Row 2: fs, 37 tss, ls.
Row 3: fs, A-B1, 3 tss, B2, 27 tss, B1, 3 tss, B2-A, ls.
Row 4: fs, tss, 3 A, 29 tss, 3 A, tss, ls.
Row 5: fs, A, tss, B2-B1, 31 tss, B2-B1, tss, A, ls.
Row 6: fs, (tss, A) * 2, 7 tss, 5 A, 5 tss, 5 A, 7 tss, (A, tss) * 2, ls.
Row 7: fs, (A, tss) * 2, A, 3 tss, B1, 7 tss, A, 3 tss, A, 7 tss, B2, 3 tss, A, (tss, A) * 2, ls.
Row 8: fs, (tss, A) * 3, 3 tss, A, 5 tss, A, tss, 3 A, tss, A, 5 tss, A, 3 tss, (A, tss) * 3, ls.
Row 9: fs, (A, tss) * 3, A, (3 tss, A) * 2, tss, A, 3 tss, A, tss, A, (3 tss, A) * 2, (tss, A) * 3, ls.
Row 10: fs, (tss, A) * 3, (tss, 3 A) * 2, tss, A, 5 tss, A, (tss, 3 A) * 2, tss, (A, tss) * 3, ls.
Row 11: fs, (A, tss) * 2, A-B1, 5 tss, A, 3 tss, A, 7 tss, A, 3 tss, A, 5 tss, B2-A, (tss, A) * 2, ls.
Row 12: fs, (tss, A) * 3, 9 tss, 3 A, tss, 3 A, 9 tss, (A, tss) * 3, ls.
Row 13: fs, A, tss, A, (3 tss, A) *2, 5 tss, B1, 3 tss, B2, 5 tss, (A, 3 tss) * 2, A, tss, A, ls.
Row 14: fs, tss, A, tss, (3 A, tss) * 2, 5 A, tss, 3 A, tss, 5 A, (tss, 3 A) * 2, tss, A, tss, ls.
Row 15: fs, A, tss, A, (3 tss, A) * 2, 3 tss, B1, tss, A, 3 tss, A, tss, B2, 3 tss, (A, 3 tss) * 2, A, tss, A, ls.
Row 16: fs, tss, A, tss, 3 A, 5 tss, (3 A, tss, A, tss) * 2, 3 A, 5 tss, 3 A, tss, A, tss, ls.
Row 17: fs, A, tss, A, 9 tss, B1, (3 tss, A) * 2, 3 tss, B2, 9 tss, A, tss, A, ls.
Row 18: fs, (tss, A) * 2, 5 tss, 3 A, 5 tss, A, tss, A, 5 tss, 3 A, 5 tss, (A, tss) * 2, ls.
Row 19: fs, (A, tss) * 2, A, 3 tss, A, tss, B1, 5 tss, B1, 3 tss, B2, 5 tss, B2, tss, A, 3 tss, A, (tss, A) * 2, ls.
Row 20: fs, (tss, A) * 2, tss, 3 A, tss, A, tss, 5 A, tss, 3 A, tss, 5 A, tss, A, tss, 3 A, tss, (A, tss) * 2, ls.
Row 21: fs, (A, tss) * 2, (A, 3 tss) * 2, B2, 5 tss, B2-B1, 5 tss, B1, (3 tss, A) * 2, (tss, A) * 2, ls.
Row 22: fs, (tss, A) * 2, 5 tss, 3 A, 5 tss, A, tss, A, 5 tss, 3 A, 5 tss, (A, tss) * 2, ls.
Row 23: fs, A, tss, A, 11 tss, B2, tss, A, 3 tss, A, tss, B1, 11 tss, A, tss, A, ls.
Row 24: fs, tss, A, tss, 3 A, 5 tss, 3 A, tss, A, tss, 3 A, tss, A, tss, 3 A, 5 tss, 3 A, tss, A, tss, ls.
Row 25: fs, A, tss, A, (3 tss, A) * 2, 5 tss, B2-A, 3 tss, A-B1, 5 tss, (A, 3 tss) * 2, A, tss, A, ls.
Row 26: fs, tss, A, tss, (3 A, tss) * 2, 5 A, tss, 3 A, tss, 5 A, (tss, 3 A) * 2, tss, A, tss, ls.
Row 27: fs, A, tss, A, (3 tss, A) * 2, 7 tss, B2-B1, 7 tss, (A, 3 tss) * 2, A, tss, A, ls.
Row 28: fs, (tss, A) * 3, 9 tss, 3 A, tss, 3 A, 9 tss, (A, tss) * 3, ls.
Row 29: fs, (A, tss) * 3, B2, (3 tss, A) * 2, 7 tss, (A, 3 tss) * 2, B1, (tss, A) * 3, ls.
Row 30: fs, (tss, A) * 3, tss, (3 A, tss) * 2, A, 5 tss, A, (tss, 3 A) * 2, tss, (A, tss) * 3, ls.
Row 31: fs, (A, tss) * 3, (A, 3 tss) * 2, A, tss, A, 3 tss, A, tss, A, (3 tss, A) * 2, (tss, A) * 3, ls.
Row 32: fs, (tss, A) * 3, 3 tss, A, 5 tss, A, tss, 3 A, tss, A, 5 tss, A, 3 tss, (A, tss) * 3, ls.
Row 33: fs, (A, tss) * 2, A, 5 tss, B2, 5 tss, A, 3 tss, A, 5 tss, B1, 5 tss, A, (tss, A) * 2, ls.
Row 34: fs, (tss, A) * 2, 7 tss, 5 A, 5 tss, 5 A, 7 tss, (A, tss) * 2, ls.
Row 35: fs, A-B1, 3 tss, B2, 27 tss, B1, 3 tss, B2-A, ls.
Row 36: fs, tss, 3 A, 29 tss, 3 A, tss, ls.
Row 37: fs, A, tss, B2-B1, 31 tss, B2-B1, tss, A, ls
BOR: fs, 37 tss, ls.
This will be the bind off row. You will make a slip stitch every time you pick up a loop on your hook. Fasten off and weave in ends.

Large Square #4

Row 1 (FR): This is the Foundation Row.
Chain 39, make the foundation row stitches in the back loops of the chain.
Row 2: fs, 37 tss, ls.
Row 3: fs, A-B1, 3 tss, B2, 27 tss, B1, 3 tss, B2-A, ls.
Row 4: fs, tss, 3 A, 29 tss, 3 A, tss, ls.
Row 5: fs, A, tss, B2-B1, 31 tss, B2-B1, tss, A, ls.
Row 6: fs, tss, A, (tss, 5 A) * 2, (tss, 3 A) * 2, tss, (5 A, tss) * 2, A, tss, ls.
Row 7: fs, A, tss, A, 3 tss, B1, tss, A, 5 tss, A, tss, B2-B1, 3 tss, B2-B1, tss, A, 5 tss, A, tss, B2, 3 tss, A, tss, A, ls.
Row 8: fs, tss, A, tss, 3 A, tss, A, tss, 5 A, tss, A, tss, 3 A, tss, A, tss, 5 A, tss, A, tss, 3 A, tss, A, tss, ls.
Row 9: fs, (A, tss) * 2, B1, 3 tss, A, 5 tss, A-B1, 3 tss, B2-B1, 3 tss, B2-A, 5 tss, A, 3 tss, B2, (tss, A) * 2, ls.
Row 10: fs, (tss, A) * 2, 9 tss, A, (tss, 3 A) * 2, tss, A, 9 tss, (A, tss) * 2, ls.
Row 11: fs, A, tss, A, 5 tss, A, 3 tss, A, 11 tss, A, 3 tss, A, 5 tss, A, tss, A, ls.
Row 12: fs, tss, A, tss, 5 A, tss, 3 A, tss, 11 A, tss, 3 A, tss, 5 A, tss, A, tss, ls.
Row 13: fs, A, tss, A, 5 tss, A, 3 tss, A, 11 tss, A, 3 tss, A, 5 tss, A, tss, A, ls.
Row 14: fs, tss, A, tss, 5 A, 9 tss, 3 A, 9 tss, 5 A, tss, A, tss, ls.
Row 15: fs, A, tss, A, 9 tss, A, tss, B1, 7 tss, B2, tss, A, 9 tss, A, tss, A, ls.
Row 16: fs, (tss, A) * 2, 5 tss, 3 A, tss, A, 9 tss, A, tss, 3 A, 5 tss, (A, tss) * 2, ls.
Row 17: fs, A, tss, A, 3 tss, B2-B1, 5 tss, A-B1, tss, A, 7 tss, A, tss, B2-A, 5 tss, B2-B1, 3 tss, A, tss, A, ls.
Row 18: fs, tss, A, tss, 3 A, tss, 5 A, (tss, A) * 2, 5 tss, (A, tss) * 2, 5 A, tss, 3 A, tss, A, tss, ls.
Row 19: fs, (A, tss) * 2, B1, 3 tss, B2, 5 tss, A, tss, A, 3 tss, A, tss, A, 5 tss, B1, 3 tss, B2, (tss, A) * 2, ls.
Row 20: fs, (tss, A) * 2, tss, 3 A, tss, 5 A, tss, A, tss, 3 A, tss, A, tss, 5 A, tss, 3 A, tss, (A, tss) * 2, ls.
Row 21: fs, A, tss, A, 3 tss, B2-B1, 7 tss, A, tss, A, 3 tss, A, tss, A, 7 tss, B2-B1, 3 tss, A, tss, A, ls.
Row 22: fs, tss, A, tss, 3 A, tss, 5 A, (tss, A) * 2, 5 tss, (A, tss) * 2, 5 A, tss, 3 A, tss, A, tss, ls.
Row 23: fs, (A, tss) * 2, B1, 3 tss, B2, 3 tss, A, tss, B2-A, 7 tss, A-B1, tss, A, 3 tss, B1, 3 tss, B2, (tss, A) * 2, ls.
Row 24: fs, (tss, A) * 2, 5 tss, 3 A, tss, A, 9 tss, A, tss, 3 A, 5 tss, (A, tss) * 2, ls.
Row 25: fs, A, tss, A, 9 tss, A, 3 tss, B2, 3 tss, B1, 3 tss, A, 9 tss, A, tss, A, ls.
Row 26: fs, tss, A, tss, 5 A, 9 tss, 3 A, 9 tss, 5 A, tss, A, tss, ls.
Row 27: fs, A, tss, A, 5 tss, A, 3 tss, A, 11 tss, A, 3 tss, A, 5 tss, A, tss, A, ls.
Row 28: fs, tss, A, tss, 5 A, tss, 3 A, tss, 11 A, tss, 3 A, tss, 5 A, tss, A, tss, ls.
Row 29: fs, A, tss, A, 5 tss, A, 3 tss, A, 11 tss, A, 3 tss, A, 5 tss, A, tss, A, ls.
Row 30: fs, (tss, A) * 2, 9 tss, A, tss, (3 A, tss) * 2, A, 9 tss, (A, tss) * 2, ls.
Row 31: fs, A, tss, A, 3 tss, B2, tss, A, 5 tss, A, tss, B2-B1, 3 tss, B2-B1, tss, A, 5 tss, A, tss, B1, 3 tss, A, tss, A, ls.
Row 32: fs, tss, A, tss, 3 A, tss, A, tss, 5 A, tss, A, tss, 3 A, tss, A, tss, 5 A, tss, A, tss, 3 A, tss, A, tss, ls.
Row 33: fs, A, tss, A, 5 tss, B2-A, 5 tss, A-B1, 3 tss, B2-B1, 3 tss, B2-A, 5 tss, A-B1, 5 tss, A, tss, A, ls.
Row 34: fs, tss, A, (tss, 5 A) * 2, (tss, 3 A) * 2, (tss, 5 A) * 2, tss, A, tss, ls.
Row 35: fs, A-B1, 3 tss, B2, 27 tss, B1, 3 tss, B2-A, ls.
Row 36: fs, tss, 3 A, 29 tss, 3 A, tss, ls.
Row 37: fs, A, tss, B2-B1, 31 tss, B2-B1, tss, A, ls
BOR: fs, 37 tss, ls.
This will be the bind off row. You will make a slip stitch every time you pick up a loop on your hook. Fasten off and weave in ends.

Large Square #5

Row 1 (FR): This is the Foundation Row.
Chain 39, make the foundation row stitches in the back loops of the chain.
Row 2: fs, 37 tss, ls.
Row 3: fs, A-B1, 3 tss, B2, 27 tss, B1, 3 tss, B2-A, ls.
Row 4: fs, tss, 3 A, 29 tss, 3 A, tss, ls.
Row 5: fs, A, tss, B2-B1, 31 tss, B2-B1, tss, A, ls.
Row 6: fs, tss, A, tss, 7 A, 3 tss, 11 A, 3 tss, 7 A, tss, A, tss, ls.
Row 7: fs, A, tss, A, 5 tss, B1, 3 tss, A, 11 tss, A, 3 tss, B2, 5 tss, A, tss, A, ls.
Row 8: fs, tss, A, tss, 3 A, 3 tss, 3 A, (tss, 5 A) * 2, tss, 3 A, 3 tss, 3 A, tss, A, tss, ls.
Row 9: fs, A, tss, (A, 3 tss) * 2, B1, 5 tss, B1, 3 tss, B2, 5 tss, B2, (3 tss, A) * 2, tss, A, ls.
Row 10: fs, tss, A, tss, 3 A, tss, A, (3 tss, 3 A) * 3, 3 tss, A, tss, 3 A, tss, A, tss, ls.
Row 11: fs, (A, tss) * 2, B1, 3 tss, A, 3 tss, B1, 11 tss, B2, 3 tss, A, 3 tss, B2, (tss, A) * 2, ls.
Row 12: fs, (tss, A) * 2, tss, 3 A, tss, A, 3 tss, 11 A, 3 tss, A, tss, 3 A, tss, (A, tss) * 2, ls.
Row 13: fs, (A, tss) * 3, B1, 3 tss, A, 15 tss, A, 3 tss, B2, (tss, A) * 3, ls.
Row 14: fs, (tss, A) * 2, 3 tss, 3 A, tss, (7 A, tss) * 2, 3 A, 3 tss, (A, tss) * 2, ls.
Row 15: fs, A, tss, A, 5 tss, B1, 7 tss, B1, 3 tss, B2, 7 tss, B2, 5 tss, A, tss, A, ls.
Row 16: fs, tss, A, (tss, 5 A) * 2, 3 tss, 3 A, 3 tss, (5 A, tss) * 2, A, tss, ls.
Row 17: fs, A, tss, A, (5 tss, A) * 2, 7 tss, (A, 5 tss) * 2, A, tss, A, ls.
Row 18: fs, tss, A, tss, (5 A, tss) * 2, (3 A, tss) * 2, (5 A, tss) * 2, A, tss, ls.
Row 19: fs, A, tss, A, 3 tss, B1, 5 tss, B1, 3 tss, B1, 3 tss, B2, 3 tss, B2, 5 tss, B2, 3 tss, A, tss, A, ls.
Row 20: fs, tss, A, tss, 3 A, tss, 5 A, (tss, 3 A) * 3, tss, 5 A, tss, 3 A, tss, A, tss, ls.
Row 21: fs, A, tss, A, (5 tss, B2) * 2, 3 tss, B2-B1, 3 tss, (B1, 5 tss) * 2, A, tss, A, ls.
Row 22: fs, tss, A, (tss, 5 A) * 2, (tss, 3 A) * 2, (tss, 5 A) * 2, tss, A, tss, ls.
Row 23: fs, A, tss, (A, 5 tss) * 2, A, 7 tss, A, (5 tss, A) * 2, tss, A, ls.
Row 24: fs, tss, A, (tss, 5 A) * 2, 3 tss, 3 A, 3 tss, (5 A, tss) * 2, A, tss, ls.
Row 25: fs, A, tss, A, 7 tss, B2, 7 tss, B2-B1, 7 tss, B1, 7 tss, A, tss, A, ls.
Row 26: fs, (tss, A) * 2, 3 tss, 3 A, (tss, 7 A) * 2, tss, 3 A, 3 tss, (A, tss) * 2, ls.
Row 27: fs, (A, tss) * 2, A, 3 tss, B2, tss, A, 15 tss, A, tss, B1, 3 tss, A, (tss, A) * 2, ls.
Row 28: fs, (tss, A) * 2, tss, 3 A, tss, A, 3 tss, 11 A, 3 tss, A, tss, 3 A, tss, (A, tss) * 2, ls.
Row 29: fs, A, tss, A, 3 tss, B2, tss, A, 5 tss, B2, 7 tss, B1, 5 tss, A, tss, B1, 3 tss, A, tss, A, ls.
Row 30: fs, tss, A, tss, 3 A, tss, A, (3 tss, 3 A) * 3, 3 tss, A, tss, 3 A, tss, A, tss, ls.
Row 31: fs, A, tss, A, 3 tss, A, 5 tss, B2, 5 tss, B2-B1, 5 tss, B1, 5 tss, A, 3 tss, A, tss, A, ls.
Row 32: fs, tss, A, tss, 3 A, 3 tss, 3 A, tss, (5 A, tss) * 2, 3 A, 3 tss, 3 A, tss, A, tss, ls.
Row 33: fs, A, tss, A, 7 tss, B2, tss, A, 11 tss, A, tss, B1, 7 tss, A, tss, A, ls.
Row 34: fs, tss, A, tss, 7 A, 3 tss, 11 A, 3 tss, 7 A, tss, A, tss, ls.
Row 35: fs, A-B1, 3 tss, B2, 27 tss, B1, 3 tss, B2-A, ls.
Row 36: fs, tss, 3 A, 29 tss, 3 A, tss, ls.
Row 37: fs, A, tss, B2-B1, 31 tss, B2-B1, tss, A, ls
BOR: fs, 37 tss, ls.
This will be the bind off row. You will make a slip stitch every time you pick up a loop on your hook. Fasten off and weave in ends.

Large Square #6

Row 1 (FR): This is the Foundation Row.
Chain 39, make the foundation row stitches in the back loops of the chain.
Row 2: fs, 37 tss, ls.
Row 3: fs, A-B1, 3 tss, B2, 27 tss, B1, 3 tss, B2-A, ls.
Row 4: fs, tss, 3 A, 29 tss, 3 A, tss, ls.
Row 5: fs, A, tss, B2-B1, 31 tss, B2-B1, tss, A, ls.
Row 6: fs, tss, A, tss, 5 A, tss, 3 A, (tss, A) * 2, tss, 3 A, tss, (A, tss) * 2, 3 A, tss, 5 A, tss, A, tss, ls.
Row 7: fs, A, tss, (A, 5 tss) * 2, (B2, tss) * 2, B2-B1, (tss, B1) * 2, (5 tss, A) * 2, tss, A, ls.
Row 8: fs, tss, A, tss, 3 A, 9 tss, (A, tss) * 3, A, 9 tss, 3 A, tss, A, tss, ls.
Row 9: fs, A, tss, A, 3 tss, A, tss, A, 5 tss, A, tss, B2, tss, B2-B1, tss, B1, tss, A, 5 tss, A, tss, A, 3 tss, A, tss, A, ls.
Row 10: fs, (tss, A) * 2, 9 tss, (A, tss) * 5, A, 9 tss, (A, tss) * 2, ls.
Row 11: fs, A, tss, A, (3 tss, A, tss, A) * 2, 3 tss, B2-B1, 3 tss, (A, tss, A, 3 tss) * 2, A, tss, A, ls.
Row 12: fs, (tss, A, tss, 3 A) * 3, tss, (3 A, tss, A, tss) * 3, ls.
Row 13: fs, A, tss, A, (3 tss, A, tss, A) * 2, 7 tss, (A, tss, A, 3 tss) * 2, A, tss, A, ls.
Row 14: fs, (tss, A) * 4, 21 tss, (A, tss) * 4, ls.
Row 15: fs, A, tss, A, 3 tss, B2-A, 5 tss, A, tss, A, 7 tss, A, tss, A, 5 tss, A-B1, 3 tss, A, tss, A, ls.
Row 16: fs, (tss, A) * 3, 9 tss, 3 A, tss, 3 A, 9 tss, (A, tss) * 3, ls.
Row 17: fs, A, tss, A, 3 tss, B2, tss, B2, 3 tss, A, 3 tss, B1, 3 tss, B2, 3 tss, A, 3 tss, B1, tss, B1, 3 tss, A, tss, A, ls.
Row 18: fs, (tss, A) * 4, tss, (3 A, tss) * 5, (A, tss) * 4, ls.
Row 19: fs, A, tss, A, 3 tss, (B2, tss) * 3, A, tss, B1, 3 tss, B2-B1, 3 tss, B2, tss, A, (tss, B1) * 3, 3 tss, A, tss, A, ls.
Row 20: fs, tss, A, tss, 3 A, (tss, A) * 4, (tss, 3 A) * 2, (tss, A) * 4, tss, 3 A, tss, A, tss, ls.
Row 21: fs, A, tss, A, (tss, B1) * 3, 3 tss, A, 3 tss, B2-B1, 3 tss, B2-B1, 3 tss, A, 3 tss, (B2, tss) * 3, A, tss, A, ls.
Row 22: fs, (tss, A) * 4, (tss, 3 A) * 5, tss, (A, tss) * 4, ls.
Row 23: fs, (A, tss) * 2, B1, tss, B1, 5 tss, A, 5 tss, B2-B1, 5 tss, A, 5 tss, B2, tss, B2, (tss, A) * 2, ls.
Row 24: fs, (tss, A) * 3, 9 tss, 3 A, tss, 3 A, 9 tss, (A, tss) * 3, ls.
Row 25: fs, (A, tss) * 2, B1, tss, A, 5 tss, A, tss, A, 7 tss, A, tss, A, 5 tss, A, tss, B2, (tss, A) * 2, ls.
Row 26: fs, (tss, A) * 4, 21 tss, (A, tss) * 4, ls.
Row 27: fs, (A, tss, A, 3 tss) * 2, A, tss, A, 7 tss, A, tss, A, (3 tss, A, tss, A) * 2, ls.
Row 28: fs, (tss, A, tss, 3 A) * 3, tss, (3 A, tss, A, tss) * 3, ls.
Row 29: fs, (A, tss, A, 3 tss) * 2, (A, tss) * 2, B1, 3 tss, B2, (tss, A) * 2, (3 tss, A, tss, A) * 2 , ls.
Row 30: fs, (tss, A) * 2, 9 tss, (A, tss) * 5, A, 9 tss, (A, tss) * 2, ls.
Row 31: fs, A, tss, A, 3 tss, A, tss, A, 5 tss, A-B1, tss, B1, 3 tss, B2, tss, B2-A, 5 tss, A, tss, A, 3 tss, A, tss, A, ls.
Row 32: fs, tss, A, tss, 3 A, 9 tss, (A, tss) * 3, A, 9 tss, 3 A, tss, A, tss, ls.
Row 33: fs, A, tss, A, 5 tss, A, 3 tss, (B1, tss) * 2, B1, 3 tss, B2, (tss, B2) * 2, 3 tss, A, 5 tss, A, tss, A, ls.
Row 34: fs, tss, A, tss, 5 A, tss, 3 A, (tss, A) * 2, tss, 3 A, tss, (A, tss) * 2, 3 A, tss, 5 A, tss, A, tss, ls.
Row 35: fs, A-B1, 3 tss, B2, 27 tss, B1, 3 tss, B2-A, ls.
Row 36: fs, tss, 3 A, 29 tss, 3 A, tss, ls.
Row 37: fs, A, tss, B2-B1, 31 tss, B2-B1, tss, A, ls
BOR: fs, 37 tss, ls.
This will be the bind off row. You will make a slip stitch every time you pick up a loop on your hook. Fasten off and weave in ends.

Large Square #7

Row 1 (FR): This is the Foundation Row.
Chain 39, make the foundation row stitches in the back loops of the chain.
Row 2: fs, 37 tss, ls.
Row 3: fs, A-B1, 3 tss, B2, 27 tss, B1, 3 tss, B2-A, ls.
Row 4: fs, tss, 3 A, 29 tss, 3 A, tss, ls.
Row 5: fs, A, tss, B2-B1, 31 tss, B2-B1, tss, A, ls.
Row 6: fs, tss, A, tss, 3 A, 3 tss, 5 A, 3 tss, 3 A, 3 tss, 5 A, 3 tss, 3 A, tss, A, tss, ls.
Row 7: fs, A, tss, A, 3 tss, A, tss, A, 5 tss, A, tss, A, 3 tss, A, tss, A, 5 tss, A, tss, A, 3 tss, A, tss, A, ls.
Row 8: fs, (tss, A) * 2, 3 tss, A, tss, 5 A, (tss, A) * 4, tss, 5 A, tss, A, 3 tss, (A, tss) * 2, ls.
Row 9: fs, (A, tss) * 2, A, 3 tss, B2, 7 tss, B2-B1, 3 tss, B2-B1, 7 tss, B1, 3 tss, A, (tss, A) * 2, ls.
Row 10: fs, (tss, A) * 2, 3 tss, A, 3 tss, 5 A, tss, 3 A, tss, 5 A, 3 tss, A, 3 tss, (A, tss) * 2, ls.
Row 11: fs, A, tss, A, 5 tss, A, tss, A, 7 tss, B2-B1, 7 tss, A, tss, A, 5 tss, A, tss, A, ls.
Row 12: fs, tss, A, tss, 5 A, 5 tss, A, 3 tss, A, tss, A, 3 tss, A, 5 tss, 5 A, tss, A, tss, ls.
Row 13: fs, A, tss, A, 7 tss, (A, tss) * 8, A, 7 tss, A, tss, A, ls.
Row 14: fs, tss, A, tss, 7 A, 3 tss, (A, tss) * 5, A, 3 tss, 7 A, tss, A, tss, ls.
Row 15: fs, A, tss, A, 11 tss, B2, tss, B2-B1, 3 tss, B2-B1, tss, B1, 11 tss, A, tss, A, ls.
Row 16: fs, (tss, A) * 2, 3 tss, 3 A, 3 tss, (A, tss) * 2, 3 A, (tss, A) * 2, 3 tss, 3 A, 3 tss, (A, tss) * 2, ls.
Row 17: fs, (A, tss) * 2, A, 3 tss, B2, tss, A, 3 tss, (B2, tss) * 2, B2-B1, (tss, B1) * 2, 3 tss, A, tss, B1, 3 tss, A, (tss, A) * 2, ls.
Row 18: fs, (tss, A) * 2, (3 tss, A, tss, A) * 2, 5 tss, (A, tss, A, 3 tss) * 2, (A, tss) * 2, ls.
Row 19: fs, A, tss, A, 3 tss, B1, 3 tss, B2, tss, B1, 3 tss, B2-A, 3 tss, A-B1, 3 tss, B2, tss, B1, 3 tss, B2, 3 tss, A, tss, A, ls.
Row 20: fs, tss, A, (tss, 3 A) * 2, 3 tss, 3 A, tss, 3 A, tss, 3 A, 3 tss, (3 A, tss) * 2, A, tss, ls.
Row 21: fs, A, tss, A, (5 tss, B2-B1) * 2, tss, A, 3 tss, A, tss, (B2-B1, 5 tss) * 2, A, tss, A, ls.
Row 22: fs, (tss, A) * 2, (3 tss, A, tss, A) * 2, 5 tss, (A, tss, A, 3 tss) * 2, (A, tss) * 2, ls.
Row 23: fs, (A, tss) * 3, B1, 3 tss, A, (tss, B1) * 3, 3 tss, (B2, tss) * 3, A, 3 tss, B2, (tss, A) * 3, ls.
Row 24: fs, (tss, A) * 2, 3 tss, 3 A, 3 tss, (A, tss) * 2, 3 A, (tss, A) * 2, 3 tss, 3 A, 3 tss, (A, tss) * 2, ls.
Row 25: fs, A, tss, A, 9 tss, B1, tss, B1, 3 tss, B2-B1, 3 tss, B2, tss, B2, 9 tss, A, tss, A, ls.
Row 26: fs, tss, A, tss, 7 A, 3 tss, (A, tss) * 5, A, 3 tss, 7 A, tss, A, tss, ls.
Row 27: fs, A, tss, A, 7 tss, (A, tss) * 8, A, 7 tss, A, tss, A, ls.
Row 28: fs, tss, A, tss, 5 A, 5 tss, A, 3 tss, A, tss, A, 3 tss, A, 5 tss, 5 A, tss, A, tss, ls.
Row 29: fs, (A, tss, A, 5 tss) * 2, B1, 3 tss, B2, (5 tss, A, tss, A) * 2, ls.
Row 30: fs, (tss, A) * 2, 3 tss, A, 3 tss, 5 A, tss, 3 A, tss, 5 A, 3 tss, A, 3 tss, (A, tss) * 2, ls.
Row 31: fs, (A, tss) * 3, B1, 7 tss, B1, 3 tss, B2-B1, 3 tss, B2, 7 tss, B2, (tss, A) * 3, ls.
Row 32: fs, (tss, A) * 2, 3 tss, A, tss, 5 A, (tss, A) * 4, tss, 5 A, tss, A, 3 tss, (A, tss) * 2, ls.
Row 33: fs, A, tss, A, 3 tss, A, tss, A, 5 tss, A, tss, A, 3 tss, A, tss, A, 5 tss, A, tss, A, 3 tss, A, tss, A ls.
Row 34: fs, tss, A, tss, 3 A, 3 tss, 5 A, 3 tss, 3 A, 3 tss, 5 A, 3 tss, 3 A, tss, A, tss, ls.
Row 35: fs, A-B1, 3 tss, B2, 27 tss, B1, 3 tss, B2-A, ls.
Row 36: fs, tss, 3 A, 29 tss, 3 A, tss, ls.
Row 37: fs, A, tss, B2-B1, 31 tss, B2-B1, tss, A, ls
BOR: fs, 37 tss, ls.
This will be the bind off row. You will make a slip stitch every time you pick up a loop on your hook. Fasten off and weave in ends.

Large Square #8
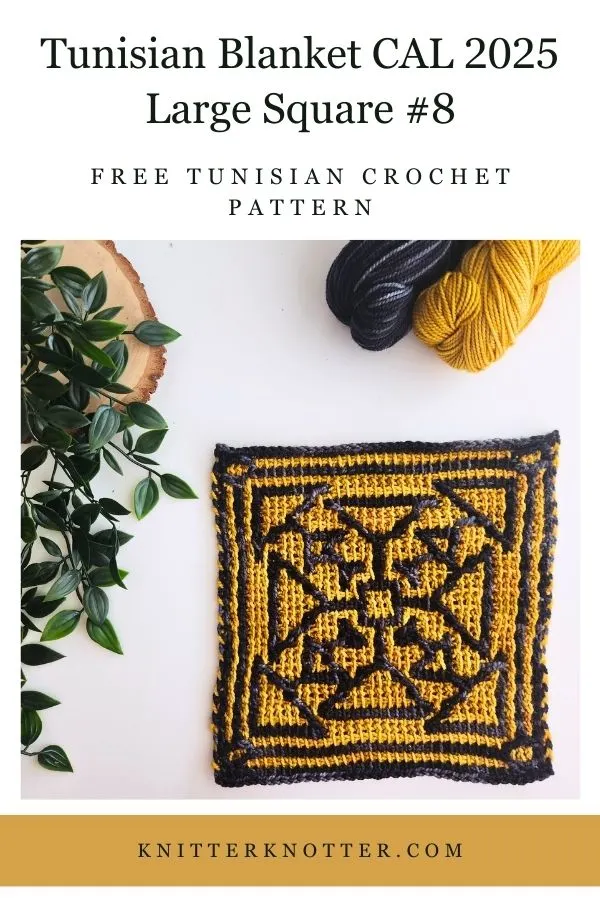
Row 1 (FR): This is the Foundation Row.
Chain 39, make the foundation row stitches in the back loops of the chain.
Row 2: fs, 37 tss, ls.
Row 3: fs, A-B1, 3 tss, B2, 27 tss, B1, 3 tss, B2-A, ls.
Row 4: fs, tss, 3 A, 29 tss, 3 A, tss, ls.
Row 5: fs, A, tss, B2-B1, 31 tss, B2-B1, tss, A, ls.
Row 6: fs, (tss, A) * 2, 9 tss, 11 A, 9 tss, (A, tss) * 2, ls.
Row 7: fs, (A, tss) * 2, A, 5 tss, B1, 15 tss, B2, 5 tss, A, (tss, A) * 2, ls.
Row 8: fs, (tss, A) * 2, tss, 5 A, tss, A, 13 tss, A, tss, 5 A, tss, (A, tss) * 2, ls.
Row 9: fs, (A, tss) * 2, A, 3 tss, B1, 5 tss, B2, 7 tss, B1, 5 tss, B2, 3 tss, A, (tss, A) * 2, ls.
Row 10: fs, (tss, A) * 2, tss, 3 A, tss, 5 A, tss, 7 A, tss, 5 A, tss, 3 A, tss, (A, tss) * 2, ls.
Row 11: fs, (A, tss) * 3, B1, 3 tss, B2, 5 tss, B2, 3 tss, B1, 5 tss, B1, 3 tss, B2, (tss, A) * 3, ls.
Row 12: fs, (tss, A) * 3, tss, 3 A, 5 tss, A, tss, 3 A, tss, A, 5 tss, 3 A, tss, (A, tss) * 3, ls.
Row 13: fs, (A, tss) * 2, A-B1, 5 tss, A, tss, B1, 5 tss, B2-B1, 5 tss, B2, tss, A, 5 tss, B2-A, (tss, A) * 2, ls.
Row 14: fs, (tss, A) * 3, tss, 3 A, tss, A, (tss, 5 A) * 2, tss, A, tss, 3 A, (tss, A) * 3, tss, ls.
Row 15: fs, A, tss, A, 3 tss, A, tss, B2, tss, A-B1, 3 tss, B2, 3 tss, A, 3 tss, B1, 3 tss, B2-A, tss, B1, tss, A, 3 tss, A, tss, A, ls.
Row 16: fs, tss, A, tss, 3 A, (tss, A) * 2, tss, 3 A, 3 tss, A, tss, A, 3 tss, 3 A, (tss, A) * 2, tss, 3 A, tss, A, tss, ls.
Row 17: fs, A, tss, (A, 3 tss) * 2, B2, 3 tss, A-B1, 3 tss, A, 3 tss, B2-A, 3 tss, B1, (3 tss, A) * 2, tss, A , ls.
Row 18: fs, tss, A, tss, (3 A, tss) * 3, A, 5 tss, A, (tss, 3 A) * 3, tss, A, tss, ls.
Row 19: fs, A, tss, A, 3 tss, A, 5 tss, B2, (3 tss, A) * 2, 3 tss, B1, 5 tss, A, 3 tss, A, tss, A, ls.
Row 20: fs, tss, A, tss, 3 A, tss, 5 A, 5 tss, 3 A, 5 tss, 5 A, tss, 3 A, tss, A, tss, ls.
Row 21: fs, A, tss, (A, 3 tss) * 2, B1, 5 tss, A, 3 tss, A, 5 tss, B2, (3 tss, A) * 2, tss, A, ls.
Row 22: fs, tss, A, tss, (3 A, tss) * 3, A, 5 tss, A, (tss, 3 A) * 3, tss, A, tss, ls.
Row 23: fs, A, tss, A, 3 tss, A, tss, B1, 5 tss, A, tss, B2, tss, A, tss, B1, tss, A, 5 tss, B2, tss, A, 3 tss, A, tss, A, ls.
Row 24: fs, tss, A, tss, 3 A, (tss, A) * 2, tss, 3 A, 3 tss, A, tss, A, 3 tss, 3 A, (tss, A) * 2, tss, 3 A, tss, A, tss, ls.
Row 25: fs, A, tss, A, 3 tss, A-B1, 3 tss, A, tss, B2-B1, 5 tss, A, 5 tss, B2-B1, tss, A, 3 tss, B2-A, 3 tss, A, tss, A, ls.
Row 26: fs, (tss, A) * 3, tss, 3 A, tss, A, tss, (5 A, tss) * 2, A, tss, 3 A, tss, (A, tss) * 3, ls.
Row 27: fs, (A, tss) * 3, B2, 3 tss, A, 3 tss, B2, tss, B1, 3 tss, B2, tss, B1, 3 tss, A, 3 tss, B1, (tss, A) * 3, ls.
Row 28: fs, (tss, A) * 3, tss, 3 A, 5 tss, A, tss, 3 A, tss, A, 5 tss, 3 A, tss, (A, tss) * 3, ls.
Row 29: fs, (A, tss) * 2, A, 3 tss, B2-B1, 5 tss, B1, 7 tss, B2, 5 tss, B2-B1, 3 tss, A, (tss, A) * 2, ls.
Row 30: fs, (tss, A) * 2, tss, 3 A, tss, 5 A, tss, 7 A, tss, 5 A, tss, 3 A, tss, (A, tss) * 2, ls.
Row 31: fs, (A, tss) * 2, A, 5 tss, B2, tss, B1, 11 tss, B2, tss, B1, 5 tss, A, (tss, A) * 2, ls.
Row 32: fs, (tss, A) * 2, tss, 5 A, tss, A, 13 tss, A, tss, 5 A, tss, (A, tss) * 2, ls.
Row 33: fs, (A, tss) * 2, A, 7 tss, B2, 11 tss, B1, 7 tss, A, (tss, A) * 2, ls.
Row 34: fs, (tss, A) * 2, 9 tss, 11 A, 9 tss, (A, tss) * 2, ls.
Row 35: fs, A-B1, 3 tss, B2, 27 tss, B1, 3 tss, B2-A, ls.
Row 36: fs, tss, 3 A, 29 tss, 3 A, tss, ls.
Row 37: fs, A, tss, B2-B1, 31 tss, B2-B1, tss, A, ls
BOR: fs, 37 tss, ls.
This will be the bind off row. You will make a slip stitch every time you pick up a loop on your hook. Fasten off and weave in ends.

Large Square #9
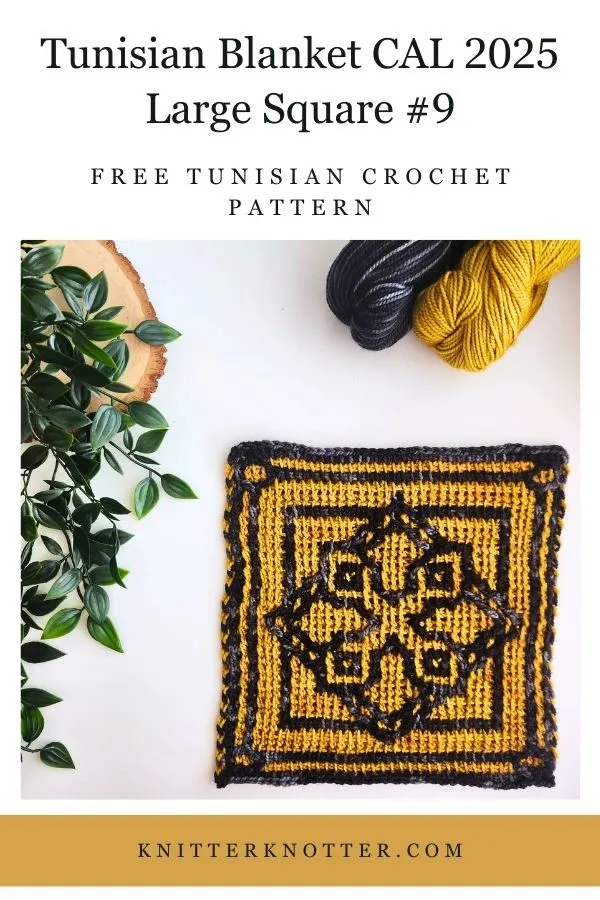
Row 1 (FR): This is the Foundation Row.
Chain 39, make the foundation row stitches in the back loops of the chain.
Row 2: fs, 37 tss, ls.
Row 3: fs, A-B1, 3 tss, B2, 27 tss, B1, 3 tss, B2-A, ls.
Row 4: fs, tss, 3 A, 29 tss, 3 A, tss, ls.
Row 5: fs, A, tss, B2-B1, 31 tss, B2-B1, tss, A, ls.
Row 6: fs, tss, A, tss, (15 A, tss) * 2, A, tss, ls.
Row 7: fs, A, tss, A, 13 tss, B1, 3 tss, B2, 13 tss, A, tss, A, ls.
Row 8: fs, tss, A, tss, 3 A, 11 tss, A, tss, A, 11 tss, 3 A, tss, A, tss, ls.
Row 9: fs, A, tss, A, 3 tss, A, 7 tss, B1, tss, B1, 3 tss, B2, tss, B2, 7 tss, A, 3 tss, A, tss, A, ls.
Row 10: fs, tss, A, tss, 3 A, tss, 7 A, tss, A, tss, 3 A, tss, A, tss, 7 A, tss, 3 A, tss, A, tss, ls.
Row 11: fs, A, tss, A, 3 tss, A, 5 tss, B1, tss, B1, 7 tss, B2, tss, B2, 5 tss, A, 3 tss, A, tss, A, ls.
Row 12: fs, tss, A, (tss, 3 A) * 2, 5 tss, 7 A, 5 tss, (3 A, tss) * 2, A, tss, ls.
Row 13: fs, A, tss, A, (3 tss, A) * 2, 5 tss, B2, 3 tss, B1, 5 tss, (A, 3 tss) * 2, A, tss, A, ls.
Row 14: fs, tss, A, (tss, 3 A) * 2, tss, A, 3 tss, A, tss, 3 A, tss, A, 3 tss, A, tss, (3 A, tss) * 2, A, tss, ls.
Row 15: fs, A, tss, A, 3 tss, A, tss, B1, (tss, A) * 4, 3 tss, (A, tss) * 4, B2, tss, A, 3 tss, A, tss, A, ls.
Row 16: fs, tss, A, tss, 3 A, (tss, A) * 3, 3 tss, A, tss, 3 A, tss, A, 3 tss, (A, tss) * 3, 3 A, tss, A, tss, ls.
Row 17: fs, A, tss, A, 3 tss, A-B1, tss, B1, 3 tss, B2, 5 tss, B2-B1, 5 tss, B1, 3 tss, B2, tss, B2-A, 3 tss, A, tss, A, ls.
Row 18: fs, tss, (A, tss, 3 A, tss) * 2, tss, (tss, 3 A) * 2, 2 tss, (tss, 3 A, tss, A) * 2, tss, ls.
Row 19: fs, (A, tss) * 2, B1, tss, B1, 9 tss, B2, 3 tss, B1, 9 tss, B2, tss, B2, (tss, A) * 2, ls.
Row 20: fs, (tss, A) * 3, tss, 9 A, tss, 3 A, tss, 9 A, tss, (A, tss) * 3, ls.
Row 21: fs, A, tss, A, 3 tss, B2, tss, B2, 5 tss, B1, 7 tss, B2, 5 tss, B1, tss, B1, 3 tss, A, tss, A, ls.
Row 22: fs, (tss, A, tss, 3 A) * 2, 3 tss, 3 A, tss, 3 A, 3 tss, (3 A, tss, A, tss) * 2, ls.
Row 23: fs, A, tss, A, 3 tss, A, tss, B2, tss, B2-B1, 5 tss, B1, 3 tss, B2, 5 tss, B2-B1, tss, B1, tss, A, 3 tss, A, tss, A, ls.
Row 24: fs, tss, A, tss, 3 A, (tss, A) * 3, 3 tss, A, tss, 3 A, tss, A, 3 tss, (A, tss) * 3, 3 A, tss, A, tss, ls.
Row 25: fs, A, tss, (A, 3 tss) * 2, B2-A, (tss, A) * 3, 3 tss, (A, tss) * 3, A-B1, (3 tss, A) * 2, tss, A, ls.
Row 26: fs, tss, A, tss, (3 A, tss) * 2, A, 3 tss, A, tss, 3 A, tss, A, 3 tss, A, (tss, 3 A) * 2, tss, A, tss, ls.
Row 27: fs, A, tss, (A, 3 tss) * 3, B1, 7 tss, B2, (3 tss, A) * 3, tss, A, ls.
Row 28: fs, tss, A, (tss, 3 A) * 2, 5 tss, 7 A, 5 tss, (3 A, tss) * 2, A, tss, ls.
Row 29: fs, A, tss, A, 3 tss, A, 7 tss, B2, tss, B2, 3 tss, B1, tss, B1, 7 tss, A, 3 tss, A, tss, A, ls.
Row 30: fs, tss, A, tss, 3 A, tss, 7 A, tss, A, tss, 3 A, tss, A, tss, 7 A, tss, 3 A, tss, A, tss, ls.
Row 31: fs, A, tss, A, 3 tss, A, 9 tss, B2, tss, B2-B1, tss, B1, 9 tss, A, 3 tss, A, tss, A, ls.
Row 32: fs, tss, A, tss, 3 A, 11 tss, A, tss, A, 11 tss, 3 A, tss, A, tss, ls.
Row 33: fs, A, tss, A, 15 tss, B2-B1, 15 tss, A, tss, A, ls.
Row 34: fs, tss, A, tss, 15 A, tss, 15 A, tss, A, tss, ls.
Row 35: fs, A-B1, 3 tss, B2, 27 tss, B1, 3 tss, B2-A, ls.
Row 36: fs, tss, 3 A, 29 tss, 3 A, tss, ls.
Row 37: fs, A, tss, B2-B1, 31 tss, B2-B1, tss, A, ls
BOR: fs, 37 tss, ls.
This will be the bind off row. You will make a slip stitch every time you pick up a loop on your hook. Fasten off and weave in ends.

Large Square #10

Row 1 (FR): This is the Foundation Row.
Chain 39, make the foundation row stitches in the back loops of the chain.
Row 2: fs, 37 tss, ls.
Row 3: fs, A-B1, 3 tss, B2, 27 tss, B1, 3 tss, B2-A, ls.
Row 4: fs, tss, 3 A, 29 tss, 3 A, tss, ls.
Row 5: fs, A, tss, B2-B1, 31 tss, B2-B1, tss, A, ls.
Row 6: fs, (tss, A) * 2, 5 tss, 9 A, tss, 9 A, 5 tss, (A, tss) * 2, ls.
Row 7: fs, (A, tss) * 2, A, 5 tss, B2, 5 tss, B1, 3 tss, B2, 5 tss, B1, 5 tss, A, (tss, A) * 2, ls.
Row 8: fs, (tss, A) * 3, 3 tss, A, tss, 5 A, tss, 3 A, tss, 5 A, tss, A, 3 tss, (A, tss) * 3, ls.
Row 9: fs, (A, tss) * 4, A, 3 tss, B2, (3 tss, A) * 2, 3 tss, B1, 3 tss, A, (tss, A) * 4, ls.
Row 10: fs, (tss, A) * 3, 3 tss, (3 A, tss) * 2, (A, tss) * 2, 3 A, tss, 3 A, 3 tss, (A, tss) * 3, ls.
Row 11: fs, A, tss, A, (3 tss, B2) * 3, tss, A-B1, 3 tss, B2-A, tss, (B1, 3 tss) * 3, A, tss, A, ls.
Row 12: fs, tss, A, tss, (3 A, tss) * 3, A, tss, 3 A, tss, A, (tss, 3 A) * 3, tss, A, tss, ls.
Row 13: fs, A, tss, A, 5 tss, (B2, 3 tss) * 2, B2-A, tss, B2-B1, tss, A-B1, (3 tss, B1) * 2, 5 tss, A, tss, A, ls.
Row 14: fs, tss, A, tss, 5 A, (tss, 3 A) * 2, (tss, A) * 2, (tss, 3 A) * 2, tss, 5 A, tss, A, tss, ls.
Row 15: fs, A, tss, A, 7 tss, B2, 3 tss, B2, tss, A, 3 tss, A, tss, B1, 3 tss, B1, 7 tss, A, tss, A, ls.
Row 16: fs, tss, A, tss, 7 A, tss, 3 A, (tss, A) * 4, tss, 3 A, tss, 7 A, tss, A, tss, ls.
Row 17: fs, A, tss, A, 9 tss, B2, 3 tss, B2-A-B1, 3 tss, B2-A-B1, 3 tss, B1, 9 tss, A, tss, A ls.
Row 18: fs, tss, A, tss, 3 A, 11 tss, A, tss, A, 11 tss, 3 A, tss, A, tss, ls.
Row 19: fs, (A, tss) * 2, (B1, 3 tss) * 2, B2, (tss, B1) * 2, 3 tss, (B2, tss) * 2, B1, (3 tss, B2) * 2, (tss, A) * 2, ls.
Row 20: fs, (tss, A) * 2, (tss, 3 A) * 2, (tss, A) * 2, tss, 3 A, tss, (A, tss) * 2, (3 A, tss) * 2, (A, tss) * 2, ls.
Row 21: fs, A, tss, A, 3 tss, B2, 3 tss, B2-B1, 5 tss, B2, tss, B2-B1, tss, B1, 5 tss, B2-B1, 3 tss, B1, 3 tss, A, tss, A, ls.
Row 22: fs, tss, A, tss, 3 A, 11 tss, A, tss, A, 11 tss, 3 A, tss, A, tss, ls.
Row 23: fs, A, tss, A, 7 tss, B1, 3 tss, B1, tss, A, tss, B2-B1, tss, A, tss, B2, 3 tss, B2, 7 tss, A, tss, A, ls.
Row 24: fs, tss, A, tss, 7 A, tss, 3 A, (tss, A) * 4, tss, 3 A, tss, 7 A, tss, A, tss, ls.
Row 25: fs, A, tss, A, 5 tss, (B1, 3 tss) * 2, A, 3 tss, A, (3 tss, B2) * 2, 5 tss, A, tss, A, ls.
Row 26: fs, tss, A, tss, 5 A, (tss, 3 A) * 2, (tss, A) * 2, tss, (3 A, tss) * 2, 5 A, tss, A, tss, ls.
Row 27: fs, A, tss, A, (3 tss, B1) * 3, tss, A-B1, 3 tss, B2-A, tss, (B2, 3 tss) * 3, A, tss, A , ls.
Row 28: fs, tss, A, tss, (3 A, tss) * 3, A, tss, 3 A, tss, A, (tss, 3 A) * 3, tss, A, tss, ls.
Row 29: fs, (A, tss) * 2, (B1, 3 tss) * 3, A, tss, B2-B1, tss, A, (3 tss, B2) * 3, (tss, A) * 2, ls.
Row 30: fs, (tss, A) * 3, 3 tss, (3 A, tss) * 2, A, tss, A, (tss, 3 A) * 2, 3 tss, (A, tss) * 3, ls.
Row 31: fs, (A, tss) * 5, B1, 5 tss, A, 3 tss, A, 5 tss, B2, (tss, A) * 5, ls.
Row 32: fs, (tss, A) * 3, 3 tss, A, tss, 5 A, tss, 3 A, tss 5 A, tss, A, 3 tss, (A, tss) * 3, ls.
Row 33: fs, (A, tss) * 2, A, 3 tss, B1, 9 tss, B2-B1, 9 tss, B2, 3 tss, A, (tss, A) * 2, ls.
Row 34: fs, (tss, A) * 2, 5 tss, 9 A, tss, 9 A, 5 tss, (A, tss) * 2, ls.
Row 35: fs, A-B1, 3 tss, B2, 27 tss, B1, 3 tss, B2-A, ls.
Row 36: fs, tss, 3 A, 29 tss, 3 A, tss, ls.
Row 37: fs, A, tss, B2-B1, 31 tss, B2-B1, tss, A, ls
BOR: fs, 37 tss, ls.
This will be the bind off row. You will make a slip stitch every time you pick up a loop on your hook. Fasten off and weave in ends.

Large Square #11

Row 1 (FR): This is the Foundation Row.
Chain 39, make the foundation row stitches in the back loops of the chain.
Row 2: fs, 37 tss, ls.
Row 3: fs, A-B1, 3 tss, B2, 27 tss, B1, 3 tss, B2-A, ls.
Row 4: fs, tss, 3 A, 29 tss, 3 A, tss, ls.
Row 5: fs, A, tss, B2-B1, 31 tss, B2-B1, tss, A, ls.
Row 6: fs, (tss, A) * 2, tss, 3 A, (3 tss, A) * 2, 5 tss, (A, 3 tss) * 2, 3 A, tss, (A, tss) * 2, ls.
Row 7: fs, A, tss, A, 3 tss, B2, (tss, A) * 2, (3 tss, A) * 4, tss, A, tss, B1, 3 tss, A, tss, A, ls.
Row 8: fs, tss, A, tss, 3 A, (tss, A) * 2, (3 tss, A) * 2, tss, (A, 3 tss) * 2, (A, tss) * 2, 3 A, tss, A, tss, ls.
Row 9: fs, A, tss, A, 5 tss, B2-B1, (3 tss, A) * 4, 3 tss, B2-B1, 5 tss, A, tss, A, ls.
Row 10: fs, (tss, A) * 2, 3 tss, A, tss, A, 3 tss, 3 A, 5 tss, 3 A, 3 tss, A, tss, A, 3 tss, (A, tss) * 2, ls.
Row 11: fs, (A, tss) * 3, B1, 3 tss, B2, 7 tss, A, 7 tss, B1, 3 tss, B2, (tss, A) * 3, ls.
Row 12: fs, (tss, A) * 2, 3 tss, (A, tss) * 2, A, 3 tss, 3 A, tss, 3 A, 3 tss, A, (tss, A) * 2, 3 tss, (A, tss) * 2, ls.
Row 13: fs, (A, tss, A, 3 tss) * 2, B2, tss, A, 7 tss, A, tss, B1, (3 tss, A, tss, A) * 2, ls.
Row 14: fs, (tss, A) * 3, 3 tss, A, tss, A, 3 tss, 7 A, 3 tss, A, tss, A, 3 tss, (A, tss) * 3, ls.
Row 15: fs, (A, tss) * 2, A, 5 tss, A, tss, A, 11 tss, A, tss, A, 5 tss, A, (tss, A) * 2, ls.
Row 16: fs, (tss, A) * 2, (3 tss, 3 A) * 2, 5 tss, (3 A, 3 tss) * 2, (A, tss) * 2, ls.
Row 17: fs, A, tss, A, 3 tss, A, 9 tss, (A, tss) * 2, A, 9 tss, A, 3 tss, A, tss, A, ls.
Row 18: fs, (tss, A) * 3, 3 tss, 5 A, 3 tss, A, tss, A, 3 tss, 5 A, 3 tss, (A, tss) * 3, ls.
Row 19: fs, (A, tss) * 2, A, 3 tss, A, 5 tss, A, 3 tss, B2-B1, 3 tss, A, 5 tss, A, 3 tss, A, (tss, A) * 2, ls.
Row 20: fs, (tss, A) * 2, 3 tss, A, 3 tss, 3 A, 3 tss, A, tss, A, 3 tss, 3 A, 3 tss, A, 3 tss, (A, tss) * 2, ls.
Row 21: fs, (A, tss) * 2, A, 3 tss, A, 5 tss, A, tss, B1, 3 tss, B2, tss, A, 5 tss, A, 3 tss, A, (tss, A) * 2, ls.
Row 22: fs, (tss, A) * 3, 3 tss, 5 A, 3 tss, A, tss, A, 3 tss, 5 A, 3 tss, (A, tss) * 3, ls.
Row 23: fs, A, tss, A, 3 tss, A, 9 tss, (A, tss) * 2, A, 9 tss, A, 3 tss, A, tss, A, ls.
Row 24: fs, (tss, A) * 2, (3 tss, 3 A) * 2, 5 tss, (3 A, 3 tss) * 2, (A, tss) * 2, ls.
Row 25: fs, (A, tss) * 2, A, 5 tss, A, tss, A, 11 tss, A, tss, A, 5 tss, A, (tss, A) * 2, ls.
Row 26: fs, (tss, A) * 3, 3 tss, A, tss, A, 3 tss, 7 A, 3 tss, A, tss, A, 3 tss, (A, tss) * 3, ls.
Row 27: fs, A, tss, A, 3 tss, (A, tss) * 2, B1, 3 tss, A, 7 tss, A, 3 tss, B2, (tss, A) * 2, 3 tss, A, tss, A, ls.
Row 28: fs, (tss, A) * 2, 3 tss, (A, tss) * 2, A, 3 tss, 3 A, tss, 3 A, 3 tss, A, (tss, A) * 2, 3 tss, (A, tss) * 2, ls.
Row 29: fs, (A, tss) * 2, A, 3 tss, B2-B1, 9 tss, A, 9 tss, B2-B1, 3 tss, A, (tss, A) * 2, ls.
Row 30: fs, (tss, A) * 2, 3 tss, A, tss, A, 3 tss, 3 A, 5 tss, 3 A, 3 tss, A, tss, A, 3 tss, (A, tss) * 2, ls.
Row 31: fs, A, tss, A, 3 tss, B1, 3 tss, B2, tss, A, (3 tss, A) * 3, tss, B1, 3 tss, B2, 3 tss, A, tss, A, ls.
Row 32: fs, tss, A, tss, 3 A, (tss, A) * 2, (3 tss, A) * 2, tss, (A, 3 tss) * 2, (A, tss) * 2, 3 A, tss, A, tss, ls.
Row 33: fs, (A, tss) * 2, B1, 3 tss, A, tss, A, (3 tss, A) * 4, tss, A, 3 tss, B2, (tss, A) * 2, ls.
Row 34: fs, (tss, A) * 2, tss, 3 A, (3 tss, A) * 2, 5 tss, (A, 3 tss) * 2, 3 A, tss, (A, tss) * 2, ls.
Row 35: fs, A-B1, 3 tss, B2, 27 tss, B1, 3 tss, B2-A, ls.
Row 36: fs, tss, 3 A, 29 tss, 3 A, tss, ls.
Row 37: fs, A, tss, B2-B1, 31 tss, B2-B1, tss, A, ls
BOR: fs, 37 tss, ls.
This will be the bind off row. You will make a slip stitch every time you pick up a loop on your hook. Fasten off and weave in ends.

Large Square #12

Row 1 (FR): This is the Foundation Row.
Chain 39, make the foundation row stitches in the back loops of the chain.
Row 2: fs, 37 tss, ls.
Row 3: fs, A-B1, 3 tss, B2, 27 tss, B1, 3 tss, B2-A, ls.
Row 4: fs, tss, 3 A, 29 tss, 3 A, tss, ls.
Row 5: fs, A, tss, B2-B1, 31 tss, B2-B1, tss, A, ls.
Row 6: fs, tss, A, tss, 15 A, tss, 15 A, tss, A, tss, ls.
Row 7: fs, A, tss, A, 31 tss, A, tss, A, ls.
Row 8: fs, tss, A, tss, 31 A, tss, A, tss, ls.
Row 9: fs, A, tss, A, 13 tss, C1, 3 tss, C2, 13 tss, A, tss, A, ls.
Row 10: fs, tss, A, tss, 5 A, tss, 7 A, tss, 3 A, tss, 7 A, tss, 5 A, tss, A, tss, ls.
Row 11: fs, A, tss, A, 9 tss, D2, 5 tss, B2-B1, 5 tss, D1, 9 tss, A, tss, A, ls.
Row 12: fs, tss, A, tss, 9 A, tss, 5 A, tss, 5 A, tss, 9 A, tss, A, tss, ls.
Row 13: fs, A, tss, A, 7 tss, C2, tss, A, 3 tss, B1, 3 tss, B2, 3 tss, A, tss, C1, 7 tss, A, tss, A, ls.
Row 14: fs, tss, A, tss, 7 A, 5 tss, A, tss, 3 A, tss, A, 5 tss, 7 A, tss, A, tss, ls.
Row 15: fs, A, tss, A, 9 tss, A, tss, A, 3 tss, B2-B1, 3 tss, A, tss, A, 9 tss, A, tss, A, ls.
Row 16: fs, tss, A, tss, 9 A, 3 tss, 3 A, tss, 3 A, 3 tss, 9 A, tss, A, tss, ls.
Row 17: fs, A, tss, A, 13 tss, B1, 3 tss, B2, 13 tss, A, tss, A, ls.
Row 18: fs, tss, A, tss, 5 A, (tss, 3 A) * 2, 5 tss, (3 A, tss) * 2, 5 A, tss, A, tss, ls.
Row 19: fs, (A, tss) * 2, D1, 5 tss, B2-B1, 3 tss, B2-B1, tss, A, 3 tss, A, tss, B2-B1, 3 tss, B2-B1, 5 tss, D2, (tss, A) * 2, ls.
Row 20: fs, (tss, A) * 2, tss, 5 A, tss, 3 A, tss, A, tss, 3 A, tss, A, tss, 3 A, tss, 5 A, tss, (A, tss) * 2, ls.
Row 21: fs, A, tss, A, 5 tss, D2-B1, 3 tss, B2-B1, 3 tss, B2-A, 3 tss, A-B1, 3 tss, B2-B1, 3 tss, B2-D1, 5 tss, A, tss, A, ls.
Row 22: fs, tss, A, tss, 5 A, (tss, 3 A) * 2, 5 tss, (3 A, tss) * 2, 5 A, tss, A, tss, ls.
Row 23: fs, A, tss, A, 15 tss, B2-B1, 15 tss, A, tss, A, ls.
Row 24: fs, tss, A, tss, 9 A, 3 tss, 3 A, tss, 3 A, 3 tss, 9 A, tss, A, tss, ls.
Row 25: fs, A, tss, A, 9 tss, (A, tss) * 2, B1, 3 tss, B2, (tss, A) * 2, 9 tss, A, tss, A, ls.
Row 26: fs, tss, A, tss, 7 A, 5 tss, A, tss, 3 A, tss, A, 5 tss, 7 A, tss, A, tss, ls.
Row 27: fs, A, tss, A, 9 tss, A, 5 tss, B2-B1, 5 tss, A, 9 tss, A, tss, A, ls.
Row 28: fs, tss, A, tss, 9 A, tss, 5 A, tss, 5 A, tss, 9 A, tss, A, tss, ls.
Row 29: fs, A, tss, A, 5 tss, C1-D1, 7 tss, B1, 3 tss, B2, 7 tss, D2-C2, 5 tss, A, tss, A, ls.
Row 30: fs, tss, A, tss, 5 A, tss, 7 A, tss, 3 A, tss, 7 A, tss, 5 A, tss, A, tss, ls.
Row 31: fs, A, tss, A, 31 tss, A, tss, A, ls.
Row 32: fs, tss, A, tss, 31 A, tss, A, tss, ls.
Row 33: fs, A, tss, A, 15 tss, C2-C1, 15 tss, A, tss, A, ls.
Row 34: fs, tss, A, tss, 15 A, tss, 15 A, tss, A, tss, ls.
Row 35: fs, A-B1, 3 tss, B2, 27 tss, B1, 3 tss, B2-A, ls.
Row 36: fs, tss, 3 A, 29 tss, 3 A, tss, ls.
Row 37: fs, A, tss, B2-B1, 31 tss, B2-B1, tss, A, ls
BOR: fs, 37 tss, ls.
This will be the bind off row. You will make a slip stitch every time you pick up a loop on your hook. Fasten off and weave in ends.

Large Square #13

Row 1 (FR): This is the Foundation Row.
Chain 39, make the foundation row stitches in the back loops of the chain.
Row 2: fs, 37 tss, ls.
Row 3: fs, A-B1, 3 tss, B2, 27 tss, B1, 3 tss, B2-A, ls.
Row 4: fs, tss, 3 A, 29 tss, 3 A, tss, ls.
Row 5: fs, A, tss, B2-B1, 31 tss, B2-B1, tss, A, ls.
Row 6: fs, tss, A, tss, (15 A, tss) * 2, A, tss, ls.
Row 7: fs, A, tss, A, 13 tss, B1, tss, A, tss, B2, 13 tss, A, tss, A, ls.
Row 8: fs, tss, A, tss, 13 A, (tss, A) * 2, tss, 13 A, tss, A, tss, ls.
Row 9: fs, A, tss, A, 11 tss, B1, (tss, A) * 3, tss, B2, 11 tss, A, tss, A, ls.
Row 10: fs, tss, A, tss, 5 A, 7 tss, (A, tss) * 3, A, 7 tss, 5 A, tss, A, tss, ls.
Row 11: fs, A, tss, A, 5 tss, A, (tss, A) * 10, 5 tss, A, tss, A, ls.
Row 12: fs, tss, A, tss, 5 A, 3 tss, (A, tss) * 7, A, 3 tss, 5 A, tss, A, tss, ls.
Row 13: fs, A, tss, A, 5 tss, A, 3 tss, (A, tss) * 6, A, 3 tss, A, 5 tss, A, tss, A, ls.
Row 14: fs, tss, A, tss, 5 A, 5 tss, (A, tss) * 5, A, 5 tss, 5 A, tss, A, tss, ls.
Row 15: fs, A, tss, (A, 5 tss) * 2, A, tss, A-B1, tss, A, tss, B2-A, tss, A, (5 tss, A) * 2, tss, A, ls.
Row 16: fs, tss, A, tss, 5 A, 7 tss, (A, tss) * 3, A, 7 tss, 5 A, tss, A, tss, ls.
Row 17: fs, A, tss, A, 3 tss, B1, 7 tss, B1, 3 tss, A, 3 tss, B2, 7 tss, B2, 3 tss, A, tss, A, ls.
Row 18: fs, tss, A, tss, 3 A, 9 tss, 3 A, tss, 3 A, 9 tss, 3 A, tss, A, tss, ls.
Row 19: fs, (A, tss) * 2, B1, 7 tss, B1, 5 tss, D2-C2-A-C1-D1, 5 tss, B2, 7 tss, B2, (tss, A) * 2, ls.
Row 20: fs, (tss, A) * 2, 29 tss, (A, tss) * 2, ls.
Row 21: fs, A, tss, A, 3 tss, B2, 7 tss, B2-D1, 3 tss, A, 3 tss, D2-B1, 7 tss, B1, 3 tss, A, tss, A, ls.
Row 22: fs, tss, A, tss, 3 A, 9 tss, 3 A, tss, 3 A, 9 tss, 3 A, tss, A, tss, ls.
Row 23: fs, A, tss, A, 5 tss, B2, 7 tss, B2-C1, tss, A, tss, C2-B1, 7 tss, B1, 5 tss, A, tss, A, ls.
Row 24: fs, tss, A, tss, 5 A, 7 tss, (A, tss) * 3, A, 7 tss, 5 A, tss, A, tss, ls.
Row 25: fs, A, tss, A, 5 tss, A, 5 tss, (A, tss) * 2, B2-A-B1, (tss, A) * 2, 5 tss, A, 5 tss, A, tss, A, ls.
Row 26: fs, tss, A, tss, 5 A, 5 tss, (A, tss) * 5, A, 5 tss, 5 A, tss, A, tss, ls.
Row 27: fs, A, tss, A, 5 tss, A, 3 tss, (A, tss) * 6, A, 3 tss, A, 5 tss, A, tss, A, ls.
Row 28: fs, tss, A, tss, 5 A, 3 tss, (A, tss) * 7, A, 3 tss, 5 A, tss, A, tss, ls.
Row 29: fs, A, tss, A, 5 tss, (A, tss) * 10, A, 5 tss, A, tss, A, ls.
Row 30: fs, tss, A, tss, 5 A, 7 tss, (A, tss) * 3, A, 7 tss, 5 A, tss, A, tss, ls.
Row 31: fs, A, tss, A, 13 tss, B2-A, tss, A, tss, A-B1, 13 tss, A, tss, A, ls.
Row 32: fs, tss, A, tss, 13 A, (tss, A) * 2, tss, 13 A, tss, A, tss, ls.
Row 33: fs, A, tss, A, 15 tss, B2-A-B1, 15 tss, A, tss, A, ls.
Row 34: fs, tss, A, tss, (15 A, tss) * 2, A, tss, ls.
Row 35: fs, A-B1, 3 tss, B2, 27 tss, B1, 3 tss, B2-A, ls.
Row 36: fs, tss, 3 A, 29 tss, 3 A, tss, ls.
Row 37: fs, A, tss, B2-B1, 31 tss, B2-B1, tss, A, ls
BOR: fs, 37 tss, ls.
This will be the bind off row. You will make a slip stitch every time you pick up a loop on your hook. Fasten off and weave in ends.

Large Square #14

Row 1 (FR): This is the Foundation Row.
Chain 39, make the foundation row stitches in the back loops of the chain.
Row 2: fs, 37 tss, ls.
Row 3: fs, A-B1, 3 tss, B2, 27 tss, B1, 3 tss, B2-A, ls.
Row 4: fs, tss, 3 A, 29 tss, 3 A, tss, ls.
Row 5: fs, A, tss, B2-B1, 31 tss, B2-B1, tss, A, ls.
Row 6: fs, tss, A, tss, 31 A, tss, A, tss, ls.
Row 7: fs, A, tss, A, 31 tss, A, tss, A, ls.
Row 8: fs, tss, A, tss, 3 A, 7 tss, 3 A, 5 tss, 3 A, 7 tss, 3 A, tss, A, tss, ls.
Row 9: fs, A, tss, A, 3 tss, A, (7 tss, B2-B1) * 2, 7 tss, A, 3 tss, A, tss, A, ls.
Row 10: fs, tss, A, tss, (3 A, tss) * 8, A, tss, ls.
Row 11: fs, A, tss, A, 3 tss, A, tss, B1, (3 tss, B2-B1, 3 tss, B1) * 2, 3 tss, B2, tss, A, 3 tss, A, tss, A, ls.
Row 12: fs, tss, A, tss, 3 A, tss, A, (tss, 3 A) * 5, tss, A, tss, 3 A, tss, A, tss, ls.
Row 13: fs, A, tss, A, 3 tss, A, 3 tss, (B2-B1, 3 tss, B1, 3 tss) * 2, B2-B1, 3 tss, A, 3 tss, A, tss, A, ls.
Row 14: fs, tss, A, (tss, 3 A) * 8, tss, A, tss, ls.
Row 15: fs, A, tss, A, 5 tss, B2, (3 tss, B2-B1, 3 tss, B2) * 2, 3 tss, B2-B1, 5 tss, A, tss, A, ls.
Row 16: fs, tss, A, tss, 5 A, (tss, 3 A) * 5, tss, 5 A, tss, A, tss, ls.
Row 17: fs, A, tss, A, 3 tss, B1, (3 tss, B2, 3 tss, B2-B1) * 2, (3 tss, B2) * 2, 3 tss, A, tss, A, ls.
Row 18: fs, tss, A, tss, (3 A, tss) * 8, A, tss, ls.
Row 19: fs, A, tss, A, 3 tss, A, tss, B1, (3 tss, B2-B1, 3 tss, B1) * 2, 3 tss, B2, tss, A, 3 tss, A, tss, A, ls.
Row 20: fs, tss, A, tss, 3 A, tss, A, (tss, 3 A) * 5, tss, A, tss, 3 A, tss, A, tss, ls.
Row 21: fs, A, tss, A, 3 tss, A, 3 tss, B2-B1, (3 tss, B1, 3 tss, B2-B1) * 2, (3 tss, A) * 2, tss, A, ls.
Row 22: fs, tss, A, tss, (3 A, tss) * 8, A, tss, ls.
Row 23: fs, A, tss, A, 5 tss, B2, (3 tss, B2-B1, 3 tss, B2) * 2, 3 tss, B2-B1, 5 tss, A, tss, A, ls.
Row 24: fs, tss, A, tss, 5 A, (tss, 3 A) * 5, tss, 5 A, tss, A, tss, ls.
Row 25: fs, A, tss, A, 3 tss, B1, (3 tss, B2, 3 tss, B2-B1) * 2, (3 tss, B2) * 2, 3 tss, A, tss, A, ls.
Row 26: fs, tss, A, tss, (3 A, tss) * 8, A, tss, ls.
Row 27: fs, A, tss, A, 3 tss, A, tss, (B1, 3 tss, B2-B1, 3 tss) * 2, B1, 3 tss, B2, tss, A, 3 tss, A, tss, A, ls.
Row 28: fs, tss, A, tss, 3 A, tss, A, (tss, 3 A) * 5, tss, A, tss, 3 A, tss, A, tss, ls.
Row 29: fs, A, tss, A, 3 tss, A, 3 tss, B2-B1, (3 tss, B1, 3 tss, B2-B1) * 2, 3 tss, A, 3 tss, A, tss, A, ls.
Row 30: fs, tss, A, tss, (3 A, tss) * 8, A, tss, ls.
Row 31: fs, A, tss, A, 3 tss, A, 5 tss, B1, 3 tss, B2, 3 tss, B1, 3 tss, B2, 5 tss, A, 3 tss, A, tss, A, ls.
Row 32: fs, tss, A, tss, 3 A, 7 tss, 3 A, 5 tss, 3 A, 7 tss, 3 A, tss, A, tss, ls.
Row 33: fs, A, tss, A, 31 tss, A, tss, A, ls.
Row 34: fs, tss, A, tss, 31 A, tss, A, tss, ls.
Row 35: fs, A-B1, 3 tss, B2, 27 tss, B1, 3 tss, B2-A, ls.
Row 36: fs, tss, 3 A, 29 tss, 3 A, tss, ls.
Row 37: fs, A, tss, B2-B1, 31 tss, B2-B1, tss, A, ls
BOR: fs, 37 tss, ls.
This will be the bind off row. You will make a slip stitch every time you pick up a loop on your hook. Fasten off and weave in ends.

Large Square #15

Row 1 (FR): This is the Foundation Row.
Chain 39, make the foundation row stitches in the back loops of the chain.
Row 2: fs, 37 tss, ls.
Row 3: fs, A-B1, 3 tss, B2, 27 tss, B1, 3 tss, B2-A, ls.
Row 4: fs, tss, 3 A, 29 tss, 3 A, tss, ls.
Row 5: fs, A, tss, B2-B1, 31 tss, B2-B1, tss, A, ls.
Row 6: fs, tss, A, tss, 15 A, tss, 15 A, tss, A, tss, ls.
Row 7: fs, A, tss, A, 13 tss, B1, 3 tss, B2, 13 tss, A, tss, A, ls.
Row 8: fs, tss, A, tss, (3 A, 3 tss) * 2, A, tss, 3 A, tss, A, (3 tss, 3 A) * 2, tss, A, tss, ls.
Row 9: fs, A, tss, A, 3 tss, A, tss, A, 5 tss, (B2, tss) * 2, B2-B1, (tss, B1) * 2, 5 tss, A, tss, A, 3 tss, A, tss, A, ls.
Row 10: fs, tss, A, tss, 3 A, 5 tss, 3 A, (tss, A) * 4, tss, 3 A, 5 tss, 3 A, tss, A, tss, ls.
Row 11: fs, A, tss, A, 5 tss, A, tss, A, 3 tss, (A, tss) * 4, A, 3 tss, A, tss , A, 5 tss, A, tss, A, ls.
Row 12: fs, tss, A, tss, 5 A, 5 tss, (A, tss) * 5, A, 5 tss, 5 A, tss, A, tss, ls.
Row 13: fs, A, tss, A, 7 tss, A, tss, A, 3 tss, B2, tss, B2-B1, tss, B1, 3 tss, A, tss, A, 7 tss, A, tss, A, ls.
Row 14: fs, tss, A, (tss, 3 A) * 2, 3 tss, 3 A, (tss, A) * 2, tss, 3 A, 3 tss, (3 A, tss) * 2, A, tss, ls.
Row 15: fs, A, tss, A, 3 tss, A, tss, B2, 7 tss, (A, tss) * 2, A, 7 tss, B1, tss, A, 3 tss, A, tss, A, ls.
Row 16: fs, tss, A, tss, 3 A, tss, A, 3 tss, 5 A, (tss, A) * 2, tss, 5 A, 3 tss, A, tss, 3 A, tss, A, tss, ls.
Row 17: fs, A, tss, A, 5 tss, B2, 3 tss, B2, 5 tss, B2-B1, 5 tss, B1, 3 tss, B1, 5 tss, A, tss, A, ls.
Row 18: fs, tss, A, tss, 3 A, tss, A, 3 tss, A, 3 tss, 3 A, tss, 3 A, 3 tss, A, 3 tss, A, tss, 3 A, tss, A, tss, ls.
Row 19: fs, (A, tss) * 2, B1, 3 tss, (B2, 3 tss) * 2, B2, tss, A, tss, B1, (3 tss, B1) * 2, 3 tss, B2, (tss, A) * 2, ls.
Row 20: fs, (tss, A) * 2, tss, 3 A, (3 tss, A) * 2, 5 tss, (A, 3 tss) * 2, 3 A, (tss, A) * 2, tss, ls.
Row 21: fs, A, tss, A, 3 tss, B2-B1, (3 tss, B1) * 2, 3 tss, A, (3 tss, B2) * 2, 3 tss, B2-B1, 3 tss, A, tss, A, ls.
Row 22: fs, tss, A, tss, 3 A, tss, (A, 3 tss) * 2, 3 A, tss, 3 A, (3 tss, A) * 2, tss, 3 A, tss, A, tss, ls.
Row 23: fs, A, tss, A, (3 tss, B1) * 2, 5 tss, B1, 3 tss, B2, 5 tss, (B2, 3 tss) * 2, A, tss, A, ls.
Row 24: fs, tss, A, tss, 3 A, tss, A, 3 tss, 5 A, (tss, A) * 2, tss, 5 A, 3 tss, A, tss, 3 A, tss, A, tss, ls.
Row 25: fs, A, tss, A, 3 tss, A-B1, 9 tss, (A, tss) * 2, A, 9 tss, B2-A, 3 tss, A, tss, A, ls.
Row 26: fs, tss, A, (tss, 3 A) * 2, 3 tss, 3 A, (tss, A) * 2, tss, 3 A, 3 tss, (3 A, tss) * 2, A, tss, ls.
Row 27: fs, A, tss, A, 7 tss, A, tss, A, (tss, B1) * 2, 3 tss, (B2, tss) * 2, A, tss, A, 7 tss, A, tss, A, ls.
Row 28: fs, tss, A, tss, 5 A, 5 tss, (A, tss) * 5, A, 5 tss, 5 A, tss, A, tss ls.
Row 29: fs, A, tss, A, 5 tss, A, tss, A, 3 tss, (A, tss) * 4, A, 3 tss, A, tss, A, 5 tss, A, tss, A, ls.
Row 30: fs, tss, A, tss, 3 A, 5 tss, 3 A, (tss, A) * 4, tss, 3 A, 5 tss, 3 A, tss, A, tss, ls.
Row 31: fs, (A, tss, A, 3 tss) * 2, (B1, tss) * 2, B1, 3 tss, B2, (tss, B2) * 2, (3 tss, A, tss, A) * 2, ls.
Row 32: fs, tss, A, tss, (3 A, 3 tss) * 2, A, tss, 3 A, tss, A, (3 tss, 3 A) * 2, tss, A, tss, ls.
Row 33: fs, A, tss, A, 15 tss, B2-B1, 15 tss, A, tss, A, ls.
Row 34: fs, tss, A, tss, 15 A, tss, 15 A tss, A, tss, ls.
Row 35: fs, A-B1, 3 tss, B2, 27 tss, B1, 3 tss, B2-A, ls.
Row 36: fs, tss, 3 A, 29 tss, 3 A, tss, ls.
Row 37: fs, A, tss, B2-B1, 31 tss, B2-B1, tss, A, ls
BOR: fs, 37 tss, ls.
This will be the bind off row. You will make a slip stitch every time you pick up a loop on your hook. Fasten off and weave in ends.

Large Square #16

Row 1 (FR): This is the Foundation Row.
Chain 39, make the foundation row stitches in the back loops of the chain.
Row 2: fs, 37 tss, ls.
Row 3: fs, A-B1, 3 tss, B2, 27 tss, B1, 3 tss, B2-A, ls.
Row 4: fs, tss, 3 A, 29 tss, 3 A, tss, ls.
Row 5: fs, A, tss, B2-B1, 31 tss, B2-B1, tss, A, ls.
Row 6: fs, tss, A, tss, 31 A, tss, A, tss, ls.
Row 7: fs, A, tss, A, 31 tss, A, tss, A, ls.
Row 8: fs, tss, A, tss, 5 A, (tss, A) * 3, tss, 7 A, tss, (A, tss) * 3, 5 A, tss, A, tss, ls.
Row 9: fs, A, tss, A, 5 tss, A, (tss, A) * 3, 7 tss, (A, tss) * 3, A, 5 tss, A, tss, A, ls.
Row 10: fs, tss, A, tss, 5 A, (tss, A) * 3, tss, 7 A, tss, (A, tss) * 3, 5 A, tss, A, tss, ls.
Row 11: fs, A, tss, A, 5 tss, A, (tss, A) * 3, 7 tss, (A, tss) * 3, A, 5 tss, A, tss, A, ls.
Row 12: fs, tss, A, tss, 5 A, 3 tss, A, 3 tss, 7 A, 3 tss, A, 3 tss, 5 A, tss, A, tss, ls.
Row 13: fs, A, tss, A, 7 tss, A, tss, A, 11 tss, A, tss, A, 7 tss, A, tss, A, ls.
Row 14: fs, tss, A, tss, 7 A, tss, A, tss, 11 A, tss, A, tss, 7 A, tss, A, tss, ls.
Row 15: fs, A, tss, A, 5 tss, B1, 5 tss, B2, 7 tss, B1, 5 tss, B2, 5 tss, A, tss, A, ls.
Row 16: fs, tss, A, tss, 5 A, tss, A, 3 tss, A, tss, 7 A, tss, A, 3 tss, A, tss, 5 A, tss, A, tss, ls.
Row 17: fs, A, tss, A, 3 tss, B1, tss, B1, 5 tss, B2, tss, B2, 3 tss, B1, tss, B1, 5 tss, B2, tss, B2, 3 tss, A, tss, A, ls.
Row 18: fs, tss, A, tss, 3 A, (tss, A) * 2, 3 tss, (A, tss) * 2, 3 A, (tss, A) * 2, 3 tss, (A, tss) * 2, 3 A, tss, A, tss, ls.
Row 19: fs, A, tss, A, 3 tss, (A, tss) * 5, A, 3 tss, A, (tss, A) * 5, 3 tss, A, tss, A, ls.
Row 20: fs, tss, A, tss, 3 A, tss, A, 3 tss, (A, tss) * 3, 3 A, (tss, A) * 3, 3 tss, A, tss, 3 A, tss, A, tss, ls.
Row 21: fs, A, tss, A, 5 tss, B2, tss, (B1, tss) * 2, B1, 7 tss, B2, (tss, B2) * 2, tss, B1, 5 tss, A, tss, A, ls.
Row 22: fs, tss, A, tss, 3 A, 5 tss, (A, tss) * 2, 3 A, tss, 3 A, (tss, A) * 2, 5 tss, 3 A, tss, A, tss, ls.
Row 23: fs, A, tss, A, 3 tss, (A, tss) * 2, B1, tss, (B1, 3 tss) * 2, B2, 3 tss, B2, tss, B2, (tss, A) * 2, 3 tss, A, tss, A, ls.
Row 24: fs, tss, A, tss, 3 A, 3 tss, (A, tss) * 2 , A, 3 tss, 3 A, 3 tss, A, (tss, A) * 2, 3 tss, 3 A, tss, A, tss, ls.
Row 25: fs, (A, tss) * 2, B1, 5 tss, (A, tss) * 3, A, 3 tss, A, (tss, A) * 3, 5 tss, B2, (tss, A) * 2, ls.
Row 26: fs, (tss, A) * 2, tss, 3 A, (3 tss, A) * 2, tss, 3 A, tss, (A, 3 tss) * 2, 3 A, tss, (A, tss) * 2, ls.
Row 27: fs, A, tss, A, 5 tss, (A, tss) * 2, B2, tss, B1, 7 tss, B2, tss, B1, (tss, A) * 2, 5 tss, A, tss, A, ls.
Row 28: fs, tss, A, tss, 5 A, 3 tss, A, 3 tss, 7 A, 3 tss, A, 3 tss, 5 A, tss, A, tss, ls.
Row 29: fs, A, tss, A, 3 tss, B1, 5 tss, A, tss, A, 7 tss, A, tss, A, 5 tss, B2, 3 tss, A, tss, A, ls.
Row 30: fs, tss, A, tss, 3 A, tss, 3 A, 3 tss, A, 3 tss, 3 A, 3 tss, A, 3 tss, 3 A, tss, 3 A, tss, A, tss, ls.
Row 31: fs, A, tss, A, 7 tss, (A, tss) * 3, A, 3 tss, A, (tss, A) * 3, 7 tss, A, tss, A, ls.
Row 32: fs, tss, A, tss, 7 A, (tss, A) * 3, tss, 3 A, tss, (A, tss) * 3, 7 A, tss, A, tss, ls.
Row 33: fs, A, tss, A, 31 tss, A, tss, A, ls.
Row 34: fs, tss, A, tss, 31 A, tss, A, tss, ls.
Row 35: fs, A-B1, 3 tss, B2, 27 tss, B1, 3 tss, B2-A, ls.
Row 36: fs, tss, 3 A, 29 tss, 3 A, tss, ls.
Row 37: fs, A, tss, B2-B1, 31 tss, B2-B1, tss, A, ls
BOR: fs, 37 tss, ls.
This will be the bind off row. You will make a slip stitch every time you pick up a loop on your hook. Fasten off and weave in ends.

Large Square #17

Row 1 (FR): This is the Foundation Row.
Chain 39, make the foundation row stitches in the back loops of the chain.
Row 2: fs, 37 tss, ls.
Row 3: fs, A-B1, 3 tss, B2, 27 tss, B1, 3 tss, B2-A, ls.
Row 4: fs, tss, 3 A, 29 tss, 3 A, tss, ls.
Row 5: fs, A, tss, B2-B1, 31 tss, B2-B1, tss, A, ls.
Row 6: fs, tss, A, tss, 11 A, 9 tss, 11 A, tss, A, tss, ls.
Row 7: fs, A, tss, A, 13 tss, B2, 3 tss, B1, 13 tss, A, tss, A, ls.
Row 8: fs, tss, A, tss, 3 A, 5 tss, 5 A, tss, 3 A, tss, 5 A, 5 tss, 3 A, tss, A, tss, ls.
Row 9: fs, A, tss, A, 3 tss, A, 5 tss, B2, 5 tss, B2-B1, 5 tss, B1, 5 tss, A, 3 tss, A, tss, A, ls.
Row 10: fs, tss, A, tss, 3 A, tss, 5 A, tss, A, tss, 3 A, tss, 3 A, tss, A, tss, 5 A, tss, 3 A, tss, A, tss, ls.
Row 11: fs, A, tss, A, 3 tss, A, 7 tss, B2-A, tss, B2, tss, A, tss, B1, tss, A-B1, 7 tss, A, 3 tss, A, tss, A, ls.
Row 12: fs, tss, A, tss, 3 A, tss, 7 A, (tss, A) * 4, tss, 7 A, tss, 3 A, tss, A, tss, ls.
Row 13: fs, A, tss, A, 5 tss, B2, 5 tss, (A, tss) * 4, A, 5 tss, B1, 5 tss, A, tss, A, ls.
Row 14: fs, tss, A, tss, 5 A, tss, 5 A, (tss, A) * 4, tss, 5 A, tss, 5 A, tss, A, tss, ls.
Row 15: fs, A, tss, A, 7 tss, B2, 3 tss, (A, tss) * 4, A, 3 tss, B1, 7 tss, A, tss, A, ls.
Row 16: fs, (tss, A) * 2, tss, 3 A, 9 tss, A, tss, A, 9 tss, 3 A, tss, (A, tss) * 2, ls.
Row 17: fs, (A, tss) * 3, (B2, 3 tss) * 2, A, 7 tss, A, (3 tss, B1) * 2, (tss, A) * 3, ls.
Row 18: fs, (tss, A) * 3, tss, 3 A, 5 tss, 7 A, 5 tss, 3 A, tss, (A, tss) * 3, ls.
Row 19: fs, (A, tss) * 2, A, 3 tss, B2, 9 tss, D2-C2-C1-D1, 9 tss, B1, 3 tss, A, (tss, A) * 2, ls.
Row 20: fs, (tss, A) * 2, tss, 3 A, 7 tss, 3 A, tss, 3 A, 7 tss, 3 A, tss, (A, tss) * 2, ls.
Row 21: fs, (A, tss) * 3, B1, 7 tss, D1, 7 tss, D2, 7 tss, B2, (tss, A) * 3, ls.
Row 22: fs, (tss, A) * 3, tss, 3 A, 5 tss, 7 A, 5 tss, 3 A, tss, (A, tss) * 3, ls.
Row 23: fs, (A, tss) * 2, A-B1, 3 tss, B1, 5 tss, A, tss, C1, 3 tss, C2, tss, A, 5 tss, B2, 3 tss, B2-A, (tss, A) * 2, ls.
Row 24: fs, (tss, A) * 2, tss, 3 A, 9 tss, A, tss, A, 9 tss, 3 A, tss, (A, tss) * 2, ls.
Row 25: fs, A, tss, A, 5 tss, B1, 5 tss, (A, tss) * 4, A, 5 tss, B2, 5 tss, A, tss, A, ls.
Row 26: fs, tss, A, tss, 5 A, tss, 5 A, (tss, A) * 4, tss, 5 A, tss, 5 A, tss, A, tss, ls.
Row 27: fs, A, tss, A, 3 tss, B1, 7 tss, (A, tss) * 4, A, 7 tss, B2, 3 tss, A, tss, A, ls.
Row 28: fs, tss, A, tss, 3 A, tss, 7 A, (tss, A) * 4, tss, 7 A, tss, 3 A, tss, A, tss, ls.
Row 29: fs, A, tss, A, 3 tss, A, 5 tss, B1, tss, A-B1, 3 tss, A, 3 tss, B2-A, tss, B2, 5 tss, A, 3 tss, A, tss, A, ls.
Row 30: fs, tss, A, tss, 3 A, tss, 5 A, tss, A, (tss, 3 A) * 2, tss, A, tss, 5 A, tss, 3 A, tss, A, tss, ls.
Row 31: fs, A, tss, (A, 3 tss) * 2, B1, 5 tss, B1, 3 tss, B2, 5 tss, B2, (3 tss, A) * 2, tss, A, ls.
Row 32: fs, tss, A, tss, 3 A, 5 tss, 5 A, tss, 3 A, tss, 5 A, 5 tss, 3 A, tss, A, tss, ls.
Row 33: fs, A, tss, A, 11 tss, B1, 7 tss, B2, 11 tss, A, tss, A, ls.
Row 34: fs, tss, A, tss, 11 A, 9 tss, 11 A, tss, A, tss, ls.
Row 35: fs, A-B1, 3 tss, B2, 27 tss, B1, 3 tss, B2-A, ls.
Row 36: fs, tss, 3 A, 29 tss, 3 A, tss, ls.
Row 37: fs, A, tss, B2-B1, 31 tss, B2-B1, tss, A, ls
BOR: fs, 37 tss, ls.
This will be the bind off row. You will make a slip stitch every time you pick up a loop on your hook. Fasten off and weave in ends.

Large Square #18

Row 1 (FR): This is the Foundation Row.
Chain 39, make the foundation row stitches in the back loops of the chain.
Row 2: fs, 37 tss, ls.
Row 3: fs, A-B1, 3 tss, B2, 27 tss, B1, 3 tss, B2-A, ls.
Row 4: fs, tss, 3 A, 29 tss, 3 A, tss, ls.
Row 5: fs, A, tss, B2-B1, 31 tss, B2-B1, tss, A, ls.
Row 6: fs, tss, A, tss, 15 A, tss, 15 A, tss, A, tss, ls.
Row 7: fs, A, tss, A, 13 tss, B1, 3 tss, B2, 13 tss, A, tss, A, ls.
Row 8: fs, tss, A, tss, 3 A, tss, 9 A, (tss, A) * 2, tss, 9 A, tss, 3 A, tss, A, tss, ls.
Row 9: fs, A, tss, A, 7 tss, D2, 3 tss, B1, tss, B1, 3 tss, B2, tss, B2, 3 tss, D1, 7 tss, A, tss, A, ls.
Row 10: fs, tss, A, tss, 7 A, tss, (3 A, tss, A, tss) * 2, 3 A, tss, 7 A, tss, A, tss, ls.
Row 11: fs, A, tss, A, 5 tss, C2, 5 tss, D2, 7 tss, D1, 5 tss, C1, 5 tss, A, tss, A, ls.
Row 12: fs, tss, A, tss, 5 A, tss, A, tss, 3 A, tss, 7 A, tss, 3 A, tss, A, tss, 5 A, tss, A, tss, ls.
Row 13: fs, A, tss, A, 11 tss, D2, 3 tss, D2-C2-C1-D1, 3 tss, D1, 11 tss, A, tss, A, ls.
Row 14: fs, tss, A, tss, 11 A, (tss, 3 A) * 2, tss, 11 A, tss, A, tss, ls.
Row 15: fs, A, tss, A, 7 tss, C2, tss, C2, 5 tss, D2-D1, 5 tss, C1, tss, C1, 7 tss, A, tss, A, ls.
Row 16: fs, tss, A, tss, 5 A, (tss, A) * 3, (tss, 3 A) * 2, (tss, A) * 3, tss, 5 A, tss, A, tss, ls.
Row 17: fs, A, tss, A, 3 tss, B1, 11 tss, D2-D1, 11 tss, B2, 3 tss, A, tss, A, ls.
Row 18: fs, tss, A, tss, 3 A, tss, A, tss, (9 A, tss) * 2, A, tss, 3 A, tss, A, tss, ls.
Row 19: fs, (A, tss) * 2, B1, tss, B1, 5 tss, D2-C2, (tss, C2) * 2, 3 tss, (C1, tss) * 2, C1-D1, 5 tss, B2, tss, B2, (tss, A) * 2, ls.
Row 20: fs, (tss, A) * 3, tss, 5 A, (tss, A) * 2, tss, 3 A, tss, (A, tss) * 2, 5 A, tss, (A, tss) * 3, ls.
Row 21: fs, A, tss, A, 3 tss, B2, tss, B2-D1, 19 tss, D2-B1, tss, B1, 3 tss, A, tss, A, ls.
Row 22: fs, tss, A, tss, 3 A, tss, A, (tss, 9 A) * 2, tss, A, tss, 3 A, tss, A, tss, ls.
Row 23: fs, A, tss, A, 5 tss, B2, (tss, C1) * 2, tss, C1-D1, 7 tss, D2-C2, tss, (C2, tss) * 2, B1, 5 tss, A, tss, A, ls.
Row 24: fs, tss, A, tss, 5 A, (tss, A) * 3, (tss, 3 A) * 2, (tss, A) * 3, tss, 5 A, tss, A, tss, ls.
Row 25: fs, A, tss, A, 11 tss, D1, 7 tss, D2, 11 tss, A, tss, A, ls.
Row 26: fs, tss, A, tss, 11 A, tss, (3 A, tss) * 2, 11 A, tss, A, tss, ls.
Row 27: fs, A, tss, A, 5 tss, C1, tss, C1-D1, 3 tss, D1, 7 tss, D2, 3 tss, D2-C2, tss, C2, 5 tss, A, tss, A, ls.
Row 28: fs, tss, A, tss, 5 A, tss, A, tss, 3 A, tss, 7 A, tss, 3 A, tss, A, tss, 5 A, tss, A, tss, ls.
Row 29: fs, A, tss, A, 7 tss, D1, 5 tss, C1, 3 tss, C2, 5 tss, D2, 7 tss, A, tss, A, ls.
Row 30: fs, tss, A, tss, 7 A, tss, (3 A, tss, A, tss) * 2, 3 A, tss, 7 A, tss, A, tss, ls.
Row 31: fs, A, tss, A, 3 tss, C1-D1, 9 tss, B2, tss, B2-B1, tss, B1, 9 tss, D2-C2, 3 tss, A, tss, A, ls.
Row 32: fs, tss, A, tss, 3 A, tss, 9 A, (tss, A) * 2, tss, 9 A, tss, 3 A, tss, A, tss, ls.
Row 33: fs, A, tss, A, 15 tss, B2-B1, 15 tss, A, tss, A, ls.
Row 34: fs, tss, A, (tss, 15 A) * 2, tss, A, tss, ls.
Row 35: fs, A-B1, 3 tss, B2, 27 tss, B1, 3 tss, B2-A, ls.
Row 36: fs, tss, 3 A, 29 tss, 3 A, tss, ls.
Row 37: fs, A, tss, B2-B1, 31 tss, B2-B1, tss, A, ls
BOR: fs, 37 tss, ls.
This will be the bind off row. You will make a slip stitch every time you pick up a loop on your hook. Fasten off and weave in ends.

Large Square #19
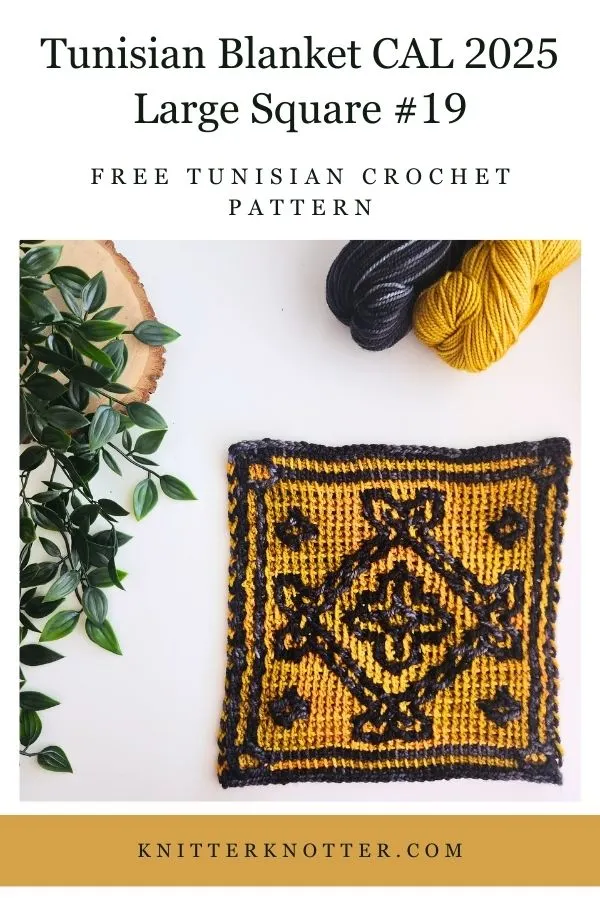
Row 1 (FR): This is the Foundation Row.
Chain 39, make the foundation row stitches in the back loops of the chain.
Row 2: fs, 37 tss, ls.
Row 3: fs, A-B1, 3 tss, B2, 27 tss, B1, 3 tss, B2-A, ls.
Row 4: fs, tss, 3 A, 29 tss, 3 A, tss, ls.
Row 5: fs, A, tss, B2-B1, 31 tss, B2-B1, tss, A, ls.
Row 6: fs, tss, A, tss, 11 A, 3 tss, 3 A, 3 tss, 11 A, tss, A, tss, ls.
Row 7: fs, A, tss, A, 11 tss, A, 3 tss, B2-B1, 3 tss, A, 11 tss, A, tss, A, ls.
Row 8: fs, tss, A, tss, 3 A, tss, 7 A, (tss, A) * 4, tss, 7 A, tss, 3 A, tss, A, tss, ls.
Row 9: fs, (A, tss) * 2, B1, 3 tss, B2, 7 tss, B2, tss, B2-B1, tss, B1, 7 tss, B1, 3 tss, B2, (tss, A) * 2, ls.
Row 10: fs, (tss, A) * 2, tss, 3 A, tss, 7 A, (tss, A) * 2, tss, 7 A, tss, 3 A, tss, (A, tss) * 2, ls.
Row 11: fs, A, tss, A, 3 tss, B2-B1, 7 tss, B1, tss, B1, 3 tss, B2, tss, B2, 7 tss, B2-B1, 3 tss, A, tss, A, ls.
Row 12: fs, tss, A, tss, 3 A, tss, 7 A, tss, A, tss, 3 A, tss, A, tss, 7 A, tss, 3 A, tss, A, tss, ls.
Row 13: fs, A, tss, A, 9 tss, B1, tss, B1, 7 tss, B2, tss, B2, 9 tss, A, tss, A, ls.
Row 14: fs, tss, A, tss, 9 A, tss, A, (tss, 3 A) * 2, tss, A, tss, 9 A, tss, A, tss, ls.
Row 15: fs, A, tss, A, 7 tss, B1, tss, (B1, 3 tss) * 2, B2, 3 tss, B2, tss, B2, 7 tss, A, tss, A, ls.
Row 16: fs, (tss, A) * 2, 3 tss, 3 A, tss, A, tss, 3 A, (tss, A) * 2, tss, 3 A, tss, A, tss, 3 A, 3 tss, (A, tss) * 2, ls.
Row 17: fs, (A, tss) * 2, A, 3 tss, B2-B1, tss, B1, 5 tss, (A, tss) * 2, A, 5 tss, B2, tss, B2-B1, 3 tss, A, (tss, A) * 2, ls.
Row 18: fs, (tss, A) * 5, tss, 3 A, 3 tss, A, tss, A, 3 tss, 3 A, tss, (A, tss) * 5, ls.
Row 19: fs, A, tss, A, 3 tss, B2, tss, B2-B1, (3 tss, B1) * 2, 3 tss, (B2, 3 tss) * 2, B2-B1, tss, B1, 3 tss, A, tss, A, ls.
Row 20: fs, (tss, A, tss, 3 A) * 2, tss, A, 3 tss, 3 A, 3 tss, A, tss, (3 A, tss, A, tss) * 2, ls.
Row 21: fs, (A, tss) * 2, B1, tss, B1, (3 tss, B2) * 2, 3 tss, B2-B1, (3 tss, B1) * 2, 3 tss, B2, tss, B2, (tss, A) * 2, ls.
Row 22: fs, (tss, A) * 5, tss, 3 A, 3 tss, A, tss, A, 3 tss, 3 A, tss, (A, tss) * 5, ls.
Row 23: fs, (A, tss) * 3, B1, 3 tss, B2, tss, B2, 3 tss, (A, tss) * 2, A, 3 tss, B1, tss, B1, 3 tss, B2, (tss, A) * 3, ls.
Row 24: fs, (tss, A) * 2, 3 tss, 3 A, tss, A, tss, 3 A, (tss, A) * 2, tss, 3 A, tss, A, tss, 3 A, 3 tss, (A, tss) * 2, ls.
Row 25: fs, A, tss, A, 9 tss, B2, tss, B2, 3 tss, B2-B1, 3 tss, B1, tss, B1, 9 tss, A, tss, A, ls.
Row 26: fs, tss, A, tss, 9 A, tss, A, tss, 3 A, tss, 3 A, tss, A, tss, 9 A, tss, A, tss, ls.
Row 27: fs, A, tss, A, 11 tss, B2, tss, B2, 3 tss, B1, tss, B1, 11 tss, A, tss, A, ls.
Row 28: fs, tss, A, tss, 3 A, tss, 7 A, tss, A, tss, 3 A, tss, A, tss, 7 A, tss, 3 A, tss, A, tss, ls.
Row 29: fs, (A, tss) * 2, B1, 3 tss, B2, 7 tss, B2, tss, B2-B1, tss, B1, 7 tss, B1, 3 tss, B2, (tss, A) * 2, ls.
Row 30: fs, (tss, A) * 2, tss, 3 A, tss, 7 A, (tss, A) * 2, tss, 7 A, tss, 3 A, tss, (A, tss) * 2, ls.
Row 31: fs, A, tss, A, 3 tss, B2-B1, 7 tss, B1, tss, B1, 3 tss, B2, tss, B2, 7 tss, B2-B1, 3 tss, A, tss, A, ls.
Row 32: fs, tss, A, tss, 3 A, tss, 7 A, (tss, A) * 4, tss, 7 A, tss, 3 A, tss, A, tss, ls.
Row 33: fs, A, tss, A, 11 tss, A, tss, B1, 3 tss, B2, tss, A, 11 tss, A, tss, A, ls.
Row 34: fs, tss, A, tss, 11 A, 3 tss, 3 A, 3 tss, 11 A, tss, A, tss, ls.
Row 35: fs, A-B1, 3 tss, B2, 27 tss, B1, 3 tss, B2-A, ls.
Row 36: fs, tss, 3 A, 29 tss, 3 A, tss, ls.
Row 37: fs, A, tss, B2-B1, 31 tss, B2-B1, tss, A, ls
BOR: fs, 37 tss, ls.
This will be the bind off row. You will make a slip stitch every time you pick up a loop on your hook. Fasten off and weave in ends.

Large Square #20
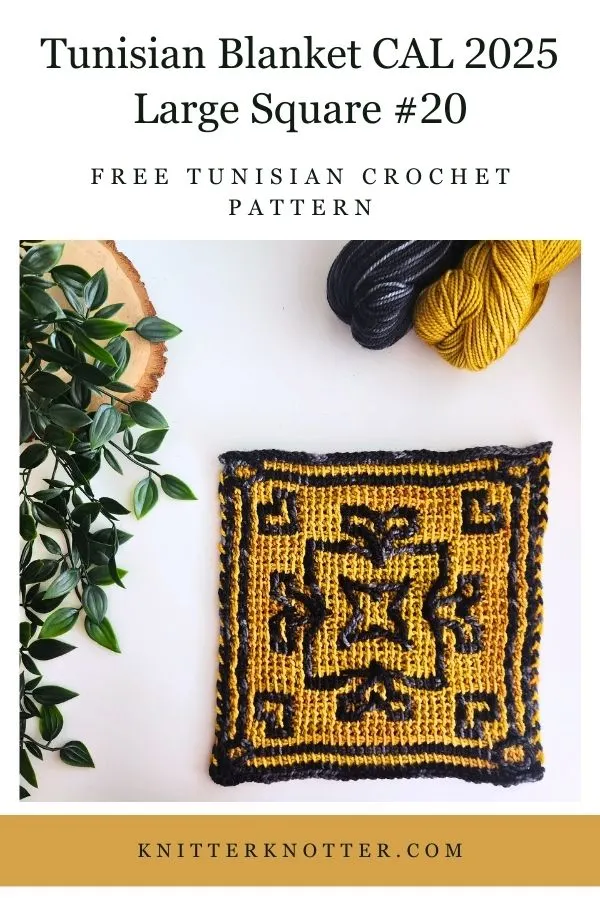
Row 1 (FR): This is the Foundation Row.
Chain 39, make the foundation row stitches in the back loops of the chain.
Row 2: fs, 37 tss, ls.
Row 3: fs, A-B1, 3 tss, B2, 27 tss, B1, 3 tss, B2-A, ls.
Row 4: fs, tss, 3 A, 29 tss, 3 A, tss, ls.
Row 5: fs, A, tss, B2-B1, 31 tss, B2-B1, tss, A, ls.
Row 6: fs, tss, A, tss, 3 A, 3 tss, 19 A, 3 tss, 3 A, tss, A, tss, ls.
Row 7: fs, A, tss, A, 3 tss, A, tss, A, 19 tss, A, tss, A, 3 tss, A, tss, A, ls.
Row 8: fs, (tss, A) * 2, 3 tss, A, tss, 5 A, 3 tss, 3 A, 3 tss, 5 A, tss, A, 3 tss, (A, tss) * 2, ls.
Row 9: fs, (A, tss) * 2, A, 3 tss, A, 5 tss, A, 3 tss, B2-B1, 3 tss, A, 5 tss, A, 3 tss, A, (tss, A) * 2, ls.
Row 10: fs, (tss, A) * 2, 5 tss, 5 A, 3 tss, A, tss, A, 3 tss, 5 A, 5 tss, (A, tss) * 2, ls.
Row 11: fs, A, tss, A, 31 tss, A, tss, A, ls.
Row 12: fs, tss, A, tss, (7 A, 5 tss) * 2, 7 A, tss, A, tss, ls.
Row 13: fs, A, tss, A, 7 tss, A, 7 tss, D2-C2-C1-D1, 7 tss, A, 7 tss, A, tss, A, ls.
Row 14: fs, tss, A, tss, (7 A, tss) * 4, A, tss, ls.
Row 15: fs, A, tss, A, 7 tss, A, 15 tss, A, 7 tss, A, tss, A, ls.
Row 16: fs, tss, A, tss, 3 A, 3 tss, A, tss, 3 A, tss, 7 A, tss, 3 A, tss, A, 3 tss, 3 A, tss, A, tss, ls.
Row 17: fs, A, tss, A, 3 tss, A, tss, A, 9 tss, D2-D1, 9 tss, A, tss, A, 3 tss, A, tss, A, ls.
Row 18: fs, tss, A, tss, 3 A, tss, A, tss, 9 A, tss, 9 A, tss, A, tss, 3 A, tss, A, tss, ls.
Row 19: fs, A, tss, A, 5 tss, B2, 3 tss, D2-C2, 3 tss, C2, 3 tss, C1, 3 tss, C1-D1, 3 tss, B1, 5 tss, A, tss, A, ls.
Row 20: fs, tss, A, tss, 5 A, (tss, 3 A) * 5, tss, 5 A, tss, A, tss, ls.
Row 21: fs, A, tss, A, 3 tss, B1, tss, D1, 19 tss, D2, tss, B2, 3 tss, A, tss, A, ls.
Row 22: fs, tss, A, tss, 3 A, tss, A, tss, 9 A, tss, 9 A, tss, A, tss, 3 A, tss, A, tss, ls.
Row 23: fs, A, tss, A, 3 tss, (A, tss) * 2, C1, 3 tss, C1-D1, 7 tss, D2-C2, 3 tss, C2, (tss, A) * 2, 3 tss, A, tss, A, ls.
Row 24: fs, tss, A, tss, 3 A, 3 tss, A, tss, 3 A, tss, 7 A, tss, 3 A, tss, A, 3 tss, 3 A, tss, A, tss, ls.
Row 25: fs, A, tss, A, 7 tss, A, 15 tss, A, 7 tss, A, tss, A, ls.
Row 26: fs, tss, A, tss, (7 A, tss) * 4, A, tss, ls.
Row 27: fs, A, tss, A, 7 tss, A, 3 tss, D1, 7 tss, D2, 3 tss, A, 7 tss, A, tss, A, ls.
Row 28: fs, tss, A, tss, (7 A, 5 tss) * 2, 7 A, tss, A, tss, ls.
Row 29: fs, A, tss, A, 13 tss, C1, 3 tss, C2, 13 tss, A, tss, A, ls.
Row 30: fs, (tss, A) * 2, 5 tss, 5 A, 3 tss, A, tss, A, 3 tss, 5 A, 5 tss, (A, tss) * 2, ls.
Row 31: fs, (A, tss) * 2, A, 3 tss, A, 5 tss, A, tss, B1, 3 tss, B2, tss, A, 5 tss, A, 3 tss, A, (tss, A) * 2, ls.
Row 32: fs, (tss, A) * 2, 3 tss, A, tss, 5 A, 3 tss, 3 A, 3 tss, 5 A, tss, A, 3 tss, (A, tss) * 2, ls.
Row 33: fs, A, tss, A, 3 tss, A, tss, A, 19 tss, A, tss, A, 3 tss, A, tss, A, ls.
Row 34: fs, tss, A, tss, 3 A, 3 tss, 19 A, 3 tss, 3 A, tss, A, tss, ls.
Row 35: fs, A-B1, 3 tss, B2, 27 tss, B1, 3 tss, B2-A, ls.
Row 36: fs, tss, 3 A, 29 tss, 3 A, tss, ls.
Row 37: fs, A, tss, B2-B1, 31 tss, B2-B1, tss, A, ls
BOR: fs, 37 tss, ls.
This will be the bind off row. You will make a slip stitch every time you pick up a loop on your hook. Fasten off and weave in ends.

Large Square #21
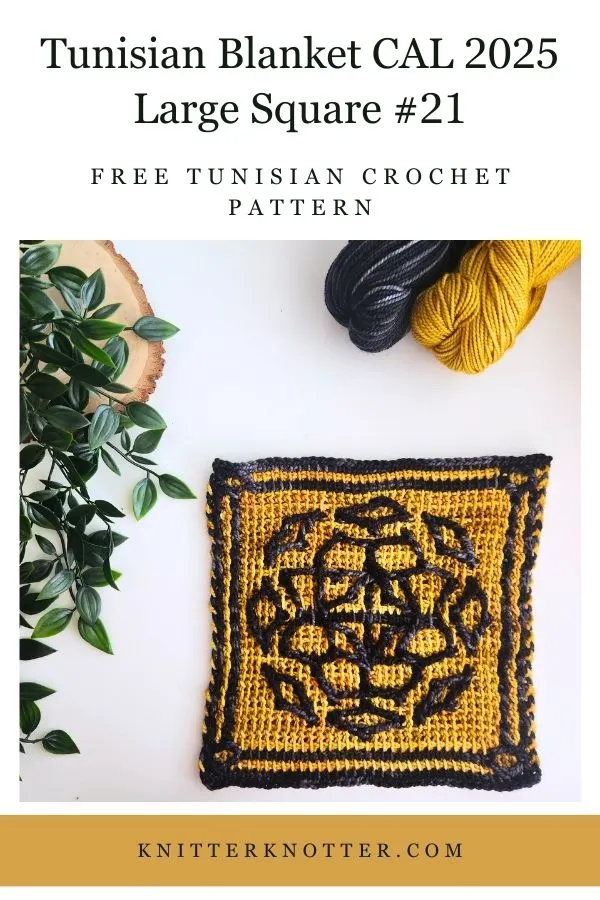
Row 1 (FR): This is the Foundation Row.
Chain 39, make the foundation row stitches in the back loops of the chain.
Row 2: fs, 37 tss, ls.
Row 3: fs, A-B1, 3 tss, B2, 27 tss, B1, 3 tss, B2-A, ls.
Row 4: fs, tss, 3 A, 29 tss, 3 A, tss, ls.
Row 5: fs, A, tss, B2-B1, 31 tss, B2-B1, tss, A, ls.
Row 6: fs, tss, A, (tss, 15 A) * 2, tss, A, tss, ls.
Row 7: fs, A, tss, A, 11 tss, D1, 7 tss, D2, 11 tss, A, tss, A, ls.
Row 8: fs, tss, A, tss, 9 A, tss, A, tss, 7 A, tss, A, tss, 9 A, tss, A, tss, ls.
Row 9: fs, A, tss, A, 5 tss, D1, 9 tss, D2-D1, 9 tss, D2, 5 tss, A, tss, A, ls.
Row 10: fs, tss, A, tss, (5 A, tss) * 2, 3 A, tss, 3 A, (tss, 5 A) * 2, tss, A, tss, ls.
Row 11: fs, A, tss, A, 7 tss, C1, 7 tss, D2-D1, 7 tss, C2, 7 tss, A, tss, A, ls.
Row 12: fs, tss, A, tss, (7 A, tss) * 4, A, tss, ls.
Row 13: fs, A, tss, A, 3 tss, C1-D1, 5 tss, C1, 5 tss, A, 5 tss, C2, 5 tss, D2-C2, 3 tss, A, tss, A, ls.
Row 14: fs, tss, A, tss, 3 A, tss, (5 A, tss) * 4, 3 A, tss, A, tss, ls.
Row 15: fs, A, tss, A, 5 tss, D1, 5 tss, B2-D1, 3 tss, A, 3 tss, D2-B1, 5 tss, D2, 5 tss, A, tss, A, ls.
Row 16: fs, tss, A, tss, 3 A, tss, A, tss, 5 A, tss, (3 A, tss) * 2, 5 A, tss, A, tss, 3 A, tss, A, tss, ls.
Row 17: fs, A, tss, A, 13 tss, C1, tss, A, tss, C2, 13 tss, A, tss, A, ls.
Row 18: fs, tss, A, tss, 13 A, (tss, A) * 2, tss, 13 A, tss, A, tss, ls.
Row 19: fs, (A, tss) * 2, C1, 3 tss, (C2, tss) * 2, C1-D1, 5 tss, A, 5 tss, D2-C2, (tss, C1) * 2, 3 tss, C2, (tss, A) * 2, ls.
Row 20: fs, (tss, A) * 2, tss, 3 A, tss, A, 17 tss, A, tss, 3 A, tss, (A, tss) * 2, ls.
Row 21: fs, A, tss, A, 13 tss, D2, tss, A, tss, D1, 13 tss, A, tss, A, ls.
Row 22: fs, tss, A, tss, 13 A, (tss, A) * 2, tss, 13 A, tss, A, tss, ls.
Row 23: fs, A, tss, A, 3 tss, C2-C1, tss, C1, 5 tss, C2, 3 tss, A, 3 tss, C1, 5 tss, C2, tss, C2-C1, 3 tss, A, tss, A, ls.
Row 24: fs, tss, A, tss, 3 A, tss, A, tss, 5 A, (tss, 3 A) * 2, tss, 5 A, tss, A, tss, 3 A, tss, A, tss, ls.
Row 25: fs, A, tss, A, 9 tss, D2-B1, 5 tss, D2-C2-A-C1-D1, 5 tss, B2-D1, 9 tss, A, tss, A, ls.
Row 26: fs, tss, A, tss, 3 A, (tss, 5 A) * 4, tss, 3 A, tss, A, tss, ls.
Row 27: fs, A, tss, A, 7 tss, D2, 7 tss, A, 7 tss, D1, 7 tss, A, tss, A, ls.
Row 28: fs, tss, A, tss, (7 A, tss) * 4, A, tss, ls.
Row 29: fs, A, tss, A, 5 tss, C2, 5 tss, C2-D1, 7 tss, D2-C1, 5 tss, C1, 5 tss, A, tss, A, ls.
Row 30: fs, tss, A, tss, (5 A, tss) * 2, 3 A, tss, 3 A, (tss, 5 A) * 2, tss, A, tss, ls.
Row 31: fs, A, tss, A, 9 tss, D2-C2, tss, D1, 7 tss, D2, tss, C1-D1, 9 tss, A, tss, A, ls.
Row 32: fs, tss, A, tss, 9 A, tss, A, tss, 7 A, tss, A, tss, 9 A, tss, A, tss, ls.
Row 33: fs, A, tss, A, 15 tss, D2-D1, 15 tss, A, tss, A, ls.
Row 34: fs, tss, A, (tss, 15 A) * 2, tss, A, tss, ls.
Row 35: fs, A-B1, 3 tss, B2, 27 tss, B1, 3 tss, B2-A, ls.
Row 36: fs, tss, 3 A, 29 tss, 3 A, tss, ls.
Row 37: fs, A, tss, B2-B1, 31 tss, B2-B1, tss, A, ls
BOR: fs, 37 tss, ls.
This will be the bind off row. You will make a slip stitch every time you pick up a loop on your hook. Fasten off and weave in ends.

Large Square #22

Row 1 (FR): This is the Foundation Row.
Chain 39, make the foundation row stitches in the back loops of the chain.
Row 2: fs, 37 tss, ls.
Row 3: fs, A-B1, 3 tss, B2, 27 tss, B1, 3 tss, B2-A, ls.
Row 4: fs, tss, 3 A, 29 tss, 3 A, tss, ls.
Row 5: fs, A, tss, B2-B1, 31 tss, B2-B1, tss, A, ls.
Row 6: fs, (tss, A) * 2, 5 tss, 19 A, 5 tss, (A, tss) * 2, ls.
Row 7: fs, (A, tss) * 2, A, 3 tss, A, 19 tss, A, 3 tss, A, (tss, A) * 2, ls.
Row 8: fs, (tss, A) * 3, 7 tss, 11 A, 7 tss, (A, tss) * 3, ls.
Row 9: fs, (A, tss) * 3, A, 3 tss, B1, 15 tss, B2, 3 tss, A, (tss, A) * 3, ls.
Row 10: fs, (tss, A) * 2, 3 tss, 3 A, tss, 5 A, 5 tss, 5 A, tss, 3 A, 3 tss, (A, tss) * 2, ls.
Row 11: fs, A, tss, A, 3 tss, A, tss, B1, tss, A, tss, D1, 11 tss, D2, tss, A, tss, B2, tss, A, 3 tss, A, tss, A, ls.
Row 12: fs, tss, A, tss, 3 A, tss, A, 3 tss, A, tss, 11 A, tss, A, 3 tss, A, tss, 3 A, tss, A, tss, ls.
Row 13: fs, A, tss, A, 3 tss, A-B1, 3 tss, B1, 15 tss, B2, 3 tss, B2-A, 3 tss, A, tss, A, ls.
Row 14: fs, tss, A, tss, (3 A, tss) * 2, 5 A, 5 tss, 5 A, (tss, 3 A) * 2, tss, A, tss, ls.
Row 15: fs, A, tss, A, 11 tss, B1, 7 tss, B2, 11 tss, A, tss, A, ls.
Row 16: fs, tss, A, tss, 11 A, tss, A, 5 tss, A, tss, 11 A, tss, A, tss, ls.
Row 17: fs, A, tss, A, 5 tss, C1, 3 tss, B1, tss, B1, 7 tss, B2, tss, B2, 3 tss, C2, 5 tss, A, tss, A, ls.
Row 18: fs, tss, A, tss, 5 A, tss, 3 A, tss, A, tss, 3 A, tss, 3 A, tss, A, tss, 3 A, tss, 5 A, tss, A, tss, ls.
Row 19: fs, A, tss, A, 5 tss, A, 3 tss, (A, tss) * 2, B1, 3 tss, B2, (tss, A) * 2, 3 tss, A, 5 tss, A, tss, A, ls.
Row 20: fs, tss, A, tss, 5 A, tss, 3 A, (tss, A) * 2, tss, 3 A, tss, (A, tss) * 2, 3 A, tss, 5 A, tss, A, tss, ls.
Row 21: fs, A, tss, A, 5 tss, A, 3 tss, A, tss, A, 3 tss, B2-B1, 3 tss, A, tss, A, 3 tss, A, 5 tss, A, tss, A, ls.
Row 22: fs, tss, A, tss, 5 A, tss, 3 A, tss, A, tss, 3 A, tss, 3 A, tss, A, tss, 3 A, tss, 5 A, tss, A, tss, ls.
Row 23: fs, A, tss, A, 11 tss, B2, tss, B2, 3 tss, B1, tss, B1, 11 tss, A, tss, A, ls.
Row 24: fs, tss, A, tss, 11 A, tss, A, 5 tss, A, tss, 11 A, tss, A, tss, ls.
Row 25: fs, A, tss, A, 7 tss, C2, 5 tss, B2, 3 tss, B1, 5 tss, C1, 7 tss, A, tss, A, ls.
Row 26: fs, tss, A, tss, (3 A, tss) * 2, 5 A, 5 tss, 5 A, (tss, 3 A) * 2, tss, A, tss, ls.
Row 27: fs, A, tss, A, 3 tss, A, tss, B2, 3 tss, B2, 11 tss, B1, 3 tss, B1, tss, A, 3 tss, A, tss, A, ls.
Row 28: fs, tss, A, tss, 3 A, tss, A, 3 tss, A, tss, 11 A, tss, A, 3 tss, A, tss, 3 A, tss, A, tss, ls.
Row 29: fs, A, tss, (A, 3 tss) * 2, B2-A, 5 tss, D2, 3 tss, D1, 5 tss, A-B1, (3 tss, A) * 2, tss, A, ls.
Row 30: fs, (tss, A) * 2, 3 tss, 3 A, tss, 5 A, 5 tss, 5 A, tss, 3 A, 3 tss, (A, tss) * 2, ls.
Row 31: fs, (A, tss) * 3, A, 5 tss, B2, 11 tss, B1, 5 tss, A, (tss, A) * 3, ls.
Row 32: fs, (tss, A) * 3, 7 tss, 11 A, 7 tss, (A, tss) * 3, ls.
Row 33: fs, (A, tss) * 2, A, 3 tss, A, 19 tss, A, 3 tss, A, (tss, A) * 2, ls.
Row 34: fs, (tss, A) * 2, 5 tss, 19 A, 5 tss, (A, tss) * 2, ls.
Row 35: fs, A-B1, 3 tss, B2, 27 tss, B1, 3 tss, B2-A, ls.
Row 36: fs, tss, 3 A, 29 tss, 3 A, tss, ls.
Row 37: fs, A, tss, B2-B1, 31 tss, B2-B1, tss, A, ls
BOR: fs, 37 tss, ls.
This will be the bind off row. You will make a slip stitch every time you pick up a loop on your hook. Fasten off and weave in ends.

Large Square #23

Row 1 (FR): This is the Foundation Row.
Chain 39, make the foundation row stitches in the back loops of the chain.
Row 2: fs, 37 tss, ls.
Row 3: fs, A-B1, 3 tss, B2, 27 tss, B1, 3 tss, B2-A, ls.
Row 4: fs, tss, 3 A, 29 tss, 3 A, tss, ls.
Row 5: fs, A, tss, B2-B1, 31 tss, B2-B1, tss, A, ls.
Row 6: fs, tss, A, tss, 3 A, tss, (7 A, tss) * 3, 3 A, tss, A, tss, ls.
Row 7: fs, A, tss, A, 3 tss, A, 7 tss, A, tss, B2, 3 tss, B1, tss, A, 7 tss, A, 3 tss, A, tss, A, ls.
Row 8: fs, (tss, A) * 2, 3 tss, 7 A, tss, A, tss, 3 A, tss, A, tss, 7 A, 3 tss, (A, tss) * 2, ls.
Row 9: fs, A, tss, A, 5 tss, D2-C2, 7 tss, B2, tss, B2-B1, tss, B1, 7 tss, C1-D1, 5 tss, A, tss, A, ls.
Row 10: fs, (tss, A, tss, 5 A) * 2, (tss, A) * 2, tss, (5 A, tss, A, tss) * 2, ls.
Row 11: fs, A, tss, A, 7 tss, B2-A, tss, B2, 5 tss, B2-B1, 5 tss, B1, tss, A-B1, 7 tss, A, tss, A, ls.
Row 12: fs, tss, A, tss, 5 A, 3 tss, (A, tss) * 2, 3 A, tss, 3 A, (tss, A) * 2, 3 tss, 5 A, tss, A, tss, ls.
Row 13: fs, A, tss, A, 7 tss, B2, 3 tss, B2-A, tss, B2, tss, A, tss, B1, tss, A-B1, 3 tss, B1, 7 tss, A, tss, A, ls.
Row 14: fs, tss, A, tss, 7 A, tss, 3 A, (tss, A) *4, tss, 3 A, tss, 7 A, tss, A, tss, ls.
Row 15: fs, A, tss, A, 9 tss, B2, tss, A, 3 tss, B2-A-B1, 3 tss, A, tss, B1, 9 tss, A, tss, A, ls.
Row 16: fs, (tss, A) * 2, 3 tss, 3 A, 5 tss, 3 A, tss, 3 A, 5 tss, 3 A, 3 tss, (A, tss) * 2, ls.
Row 17: fs, A, tss, A, 3 tss, B2, tss, (B2, 3 tss) * 3, (B1, 3 tss) * 2, B1, tss, B1, 3 tss, A, tss, A, ls.
Row 18: fs, (tss, A, tss, 3 A) * 2, (tss, 3 A) * 3, tss, (3 A, tss, A, tss) * 2, , ls.
Row 19: fs, A, tss, A, 5 tss, B2, tss, B2, 3 tss, B2, 3 tss, B2-B1, 3 tss, B1, 3 tss, B1, tss, B1, 5 tss, A, tss, A, ls.
Row 20: fs, tss, A, tss, 5 A, tss, A, 5 tss, 3 A, tss, 3 A, 5 tss, A, tss, 5 A, tss, A, tss, ls.
Row 21: fs, A, tss, A, 3 tss, B1, tss, B1, (3 tss, B1) * 2, 3 tss, (B2, 3 tss) * 2, B2, tss, B2, 3 tss, A, tss, A, ls.
Row 22: fs, (tss, A, tss, 3 A) * 2, (tss, 3 A) * 3, tss, (3 A, tss, A, tss) * 2, ls.
Row 23: fs, (A, tss) * 2, B1, tss, B1, (3 tss, B1) * 2, 7 tss, (B2, 3 tss) * 2, B2, tss, B2, (tss, A) * 2, ls.
Row 24: fs, (tss, A) * 2, 3 tss, 3 A, 5 tss, 3 A, tss, 3 A, 5 tss, 3 A, 3 tss, (A, tss) * 2, ls.
Row 25: fs, A, tss, A, 7 tss, B1, 3 tss, A, tss, B1, tss, A, tss, B2, tss, A, 3 tss, B2, 7 tss, A, tss, A, ls.
Row 26: fs, tss, A, tss, 7 A, tss, 3 A, (tss, A) * 4, tss, 3 A, tss, 7 A, tss, A, tss, ls.
Row 27: fs, A, tss, A, 5 tss, B1, 3 tss, B1, tss, A-B1, 3 tss, A, 3 tss, B2-A, tss, B2, 3 tss, B2, 5 tss, A, tss, A, ls.
Row 28: fs, tss, A, tss, 5 A, 3 tss, (A, tss) * 2, 3 A, tss, 3 A, (tss, A) * 2, 3 tss, 5 A, tss, A, tss, ls.
Row 29: fs, A, tss, A, 5 tss, B1, tss, A-B1, 5 tss, B1, 3 tss, B2, 5 tss, B2-A, tss, B2, 5 tss, A, tss, A, ls.
Row 30: fs, (tss, A, tss, 5 A) * 2, (tss, A) * 2, tss, (5 A, tss, A, tss) * 2, ls.
Row 31: fs, (A, tss) * 2, D1, 9 tss, B1, tss, B1, 3 tss, B2, tss, B2, 9 tss, D2, (tss, A) * 2, ls.
Row 32: fs, (tss, A) * 2, 3 tss, 7 A, tss, A, tss, 3 A, tss, A, tss, 7 A, 3 tss, (A, tss) * 2, ls.
Row 33: fs, A, tss, A, 3 tss, A-C1, 7 tss, A-B1, 7 tss, B2-A, 7 tss, C2-A, 3 tss, A, tss, A, ls.
Row 34: fs, tss, A, tss, 3 A, tss, (7 A, tss) * 3, 3 A, tss, A, tss, ls.
Row 35: fs, A-B1, 3 tss, B2, 27 tss, B1, 3 tss, B2-A, ls.
Row 36: fs, tss, 3 A, 29 tss, 3 A, tss, ls.
Row 37: fs, A, tss, B2-B1, 31 tss, B2-B1, tss, A, ls
BOR: fs, 37 tss, ls.
This will be the bind off row. You will make a slip stitch every time you pick up a loop on your hook. Fasten off and weave in ends.

Large Square #24

Row 1 (FR): This is the Foundation Row.
Chain 39, make the foundation row stitches in the back loops of the chain.
Row 2: fs, 37 tss, ls.
Row 3: fs, A-B1, 3 tss, B2, 27 tss, B1, 3 tss, B2-A, ls.
Row 4: fs, tss, 3 A, 29 tss, 3 A, tss, ls.
Row 5: fs, A, tss, B2-B1, 31 tss, B2-B1, tss, A, ls.
Row 6: fs, (tss, A) * 2, 7 tss, 7 A, tss, 7 A, 7 tss, (A, tss) * 2, ls.
Row 7: fs, (A, tss) * 3, D1, 3 tss, A, 5 tss, B1, 3 tss, B2, 5 tss, A, tss, D1, 3 tss, A, (tss, A) * 2, ls.
Row 8: fs, (tss, A) * 3, 3 tss, A, tss, 5 A, (tss, A) * 2, tss, 5 A, tss, A, 3 tss, (A, tss) * 3, ls.
Row 9: fs, (A, tss) * 3, C2-A, (tss, A) * 2, 3 tss, B1, tss, B1, 3 tss, B2, tss, B2, 3 tss, A, tss, C2-A, (tss, A) * 4, ls.
Row 10: fs, (tss, A) * 3, 3 tss, A, tss, (3 A, tss, A, tss) * 3, 2 tss, (A, tss) * 3, ls.
Row 11: fs, (A, tss) * 2, A-D1, 5 tss, C2-A, 5 tss, B2, tss, B2-B1, tss, B1, 5 tss, A-D1, 5 tss, C2-A, (tss, A) * 2, ls.
Row 12: fs, (tss, A) * 2, 7 tss, 5 A, (tss, A) * 2, tss, 5 A, 7 tss, (A, tss) * 2, ls.
Row 13: fs, A, tss, A, 11 tss, B1, 3t, B2-B1, 3 tss, B2, 11 tss, A, tss, A, ls.
Row 14: fs, tss, A, tss, 11 A, tss, (3 A, tss) * 2, 11 A, tss, A, tss, ls.
Row 15: fs, A, tss, A, 9 tss, B1, 3 tss, B2, 3 tss, B1, 3 tss, B2, 9 tss, A, tss, A, ls.
Row 16: fs, tss, A, tss, 5 A, (tss, 3 A) * 2, 5 tss, (3 A, tss) * 2, 5 A, tss, A, tss, ls.
Row 17: fs, A, tss, A, 3 tss, B1, tss, A, tss, B2-B1, 3 tss, B2, tss, A, tss, B2-B1, tss, A, tss, B1, 3 tss, B2-B1, tss, A, tss, B2, 3 tss, A, tss, A, ls.
Row 18: fs, tss, A, tss, 3 A, (tss, A) * 2, tss, 3 A, 3 tss, A, tss, A, 3 tss, 3 A, (tss, A) * 2, tss, 3 A, tss, A, tss, ls.
Row 19: fs, (A, tss) * 2, B1, tss, B1, 3 tss, B2, tss, (B2, tss, A, tss) * 2, B1, tss, A, tss, B1, tss, B1, 3 tss, B2, tss, B2, (tss, A) * 2, ls.
Row 20: fs, (tss, A) * 2, 3 tss, 3 A, 3 tss, A, tss, A, 5 tss, A, tss, A, 3 tss, 3 A, 3 tss, (A, tss) * 2, ls.
Row 21: fs, A, tss, A, 3 tss, B2, tss, B2-B1, tss, B1, 3 tss, A-B1, 3 tss, A, 3 tss, B2-A, 3 tss, B2, tss, B2-B1, tss, B1, 3 tss, A, tss, A, ls.
Row 22: fs, tss, A, tss, 3 A, (tss, A) * 2, tss, 3 A, 3 tss, A, tss, A, 3 tss, 3 A, (tss, A) * 2, tss, 3 A, tss, A, tss, ls.
Row 23: fs, A, tss, A, 5 tss, B2-A-B1, 3 tss, B2-B1, 3 tss, A-B1, 3 tss, B2-A, 3 tss, B2-B1, 3 tss, B2-A-B1, 5 tss, A, tss, A, ls.
Row 24: fs, tss, A, tss, 5 A, (tss, 3 A) * 2, 5 tss, (3 A, tss) * 2, 5 A, tss, A, tss, ls.
Row 25: fs, A, tss, A, 11 tss, B2-B1, 7 tss, B2-B1, 11 tss, A, tss, A, ls.
Row 26: fs, tss, A, tss, 11 A, (tss, 3 A) * 2, tss, 11 A, tss, A, tss , ls.
Row 27: fs, A, tss, A, 13 tss, B2-B1, 3 tss, B2-B1, 13 tss, A, tss, A, ls.
Row 28: fs, (tss, A) * 2, 7 tss, 5 A, (tss, A) * 2, tss, 5 A, 7 tss, (A, tss) * 2, ls.
Row 29: fs, (A, tss) * 3, D1, 3 tss, A, 3 tss, B1, tss, B1, 3 tss, B2, tss, B2, 3 tss, A, tss, D1, 3 tss, A, (tss, A) * 2, ls.
Row 30: fs, (tss, A) * 3, 3 tss, A, tss, (3 A, tss, A, tss) * 3, 2 tss, (A, tss) * 3, ls.
Row 31: fs, (A, tss) * 3, C2-A, (tss, A) * 2, 5 tss, B2, tss, B2-B1, tss, B1, 5 tss, A, tss, C2-A, (tss, A) * 4, ls.
Row 32: fs, (tss, A) * 3, 3 tss, A, tss, 5 A, (tss, A) * 2, tss, 5 A, tss, A, 3 tss, (A, tss) * 3, ls.
Row 33: fs, (A, tss) * 2, A-D1, 5 tss, C2-A, 7 tss, B2-B1, 7 tss, A-D1, 5 tss, C2-A, (tss, A) * 2, ls.
Row 34: fs, (tss, A) * 2, 7 tss, 7 A, tss, 7 A, 7 tss, (A, tss) * 2, ls.
Row 35: fs, A-B1, 3 tss, B2, 27 tss, B1, 3 tss, B2-A, ls.
Row 36: fs, tss, 3 A, 29 tss, 3 A, tss, ls.
Row 37: fs, A, tss, B2-B1, 31 tss, B2-B1, tss, A, ls
BOR: fs, 37 tss, ls.
This will be the bind off row. You will make a slip stitch every time you pick up a loop on your hook. Fasten off and weave in ends.

Large Square #25

Row 1 (FR): This is the Foundation Row.
Chain 39, make the foundation row stitches in the back loops of the chain.
Row 2: fs, 37 tss, ls.
Row 3: fs, A-B1, 3 tss, B2, 27 tss, B1, 3 tss, B2-A, ls.
Row 4: fs, tss, 3 A, 29 tss, 3 A, tss, ls.
Row 5: fs, A, tss, B2-B1, 31 tss, B2-B1, tss, A, ls.
Row 6: fs, tss, A, tss, 31 A, tss, A, tss, ls.
Row 7: fs, A, tss, A, 31 tss, A, tss, A, ls.
Row 8: fs, tss, A, tss, 3 A, 3 tss, A, 3 tss, 5 A, tss, 5 A, 3 tss, A, 3 tss, 3 A, tss, A, tss, ls.
Row 9: fs, A, tss, A, 3 tss, (A, tss) * 3, A, 5 tss, A, 5 tss, A, (tss, A) * 3, 3 tss, A, tss, A, ls.
Row 10: fs, tss, A, tss, 3 A, 3 tss, A, tss, A, 3 tss, 3 A, tss, 3 A, 3 tss, A, tss, A, 3 tss, 3 A, tss, A, tss, ls.
Row 11: fs, A, tss, A, 7 tss, B2-B1, 3 tss, A, tss, B1, 3 tss, B2, tss, A, 3 tss, B2-B1, 7 tss, A, tss, A, ls.
Row 12: fs, tss, A, tss, 3 A, 3 tss, A, tss, A, 3 tss, A, tss, 3 A, tss, A, 3 tss, A, tss, A, 3 tss, 3 A, tss, A, tss, ls.
Row 13: fs, A, tss, A, 3 tss, A, tss, B1, 3 tss, B2, 5 tss, B2-B1, 5 tss, B1, 3 tss, B2, tss, A, 3 tss, A, tss, A, ls.
Row 14: fs, tss, A, tss, 3 A, 3 tss, A, tss, A, 3 tss, 3 A, tss, 3 A, 3 tss, A, tss, A, 3 tss, 3 A, tss, A, tss, ls.
Row 15: fs, A, tss, A, 5 tss, (A, tss) * 3, A, 3 tss, A, 3 tss, A, (tss, A) * 3, 5 tss, A, tss, A, ls.
Row 16: fs, tss, A, tss, 5 A, 3 tss, A, 13 tss, A, 3 tss, 5 A, tss, A, tss, ls.
Row 17: fs, A, tss, A, 11 tss, A, tss, B2, 3 tss, B1, tss, A, 11 tss, A, tss, A, ls.
Row 18: fs, tss, A, tss, 7 A, tss, 3 A, tss, A, 5 tss, A, tss, 3 A, tss, 7 A, tss, A, tss, ls.
Row 19: fs, A, tss, A, 5 tss, B1, 3 tss, B2, (tss, A) * 2, 3 tss, (A, tss) * 2, B1, 3 tss, B2, 5 tss, A, tss, A, ls.
Row 20: fs, tss, A, tss, (3 A, 3 tss) * 2, A, tss, 3 A, tss, A, (3 tss, 3 A) * 2, tss, A, tss, ls.
Row 21: fs, A, tss, A, 7 tss, B2-B1, 3 tss, A, tss, A, 3 tss, A, tss, A, 3 tss, B2-B1, 7 tss, A, tss, A, ls.
Row 22: fs, tss, A, tss, 7 A, tss, 3 A, tss, A, 5 tss, A, tss, 3 A, tss, 7 A, tss, A, tss, ls.
Row 23: fs, A, tss, A, 11 tss, A-B1, 7 tss, B2-A, 11 tss, A, tss, A, ls.
Row 24: fs, tss, A, tss, 5 A, 3 tss, A, 13 tss, A, 3 tss, 5 A, tss, A, tss, ls.
Row 25: fs, A, tss, A, 5 tss, (A, tss) * 3, A, 3 tss, A, 3 tss, A, (tss, A) * 3, 5 tss, A, tss, A, ls.
Row 26: fs, tss, A, tss, 3 A, 3 tss, A, tss, A, 3 tss, 3 A, tss, 3 A, 3 tss, A, tss, A, 3 tss, 3 A, tss, A, tss, ls.
Row 27: fs, A, tss, A, 3 tss, A, 3 tss, B2-B1, 5 tss, B1, 3 tss, B2, 5 tss, B2-B1, 3 tss, A, 3 tss, A, tss, A, ls.
Row 28: fs, tss, A, tss, 3 A, 3 tss, A, tss, A, 3 tss, A, tss, 3 A, tss, A, 3 tss, A, tss, A, 3 tss, 3 A, tss, A, tss, ls.
Row 29: fs, A, tss, A, 5 tss, B1, 3 tss, B2, tss, A, 3 tss, B2-B1, 3 tss, A, tss, B1, 3 tss, B2, 5 tss, A, tss, A, ls.
Row 30: fs, tss, A, tss, 3 A, 3 tss, A, tss, A, 3 tss, 3 A, tss, 3 A, 3 tss, A, tss, A, 3 tss, 3 A, tss, A, tss ls.
Row 31: fs, A, tss, A, 3 tss, (A, tss) * 3, A, 5 tss, A, 5 tss, A, (tss, A) * 3, 3 tss, A, tss, A, ls.
Row 32: fs, tss, A, tss, 3 A, 3 tss, A, 3 tss, 5 A, tss, 5 A, 3 tss, A, 3 tss, 3 A, tss, A, tss, ls.
Row 33: fs, A, tss, A, 31 tss, A, tss, A, ls.
Row 34: fs, tss, A, tss, 31 A, tss, A, tss, ls.
Row 35: fs, A-B1, 3 tss, B2, 27 tss, B1, 3 tss, B2-A, ls.
Row 36: fs, tss, 3 A, 29 tss, 3 A, tss, ls.
Row 37: fs, A, tss, B2-B1, 31 tss, B2-B1, tss, A, ls
BOR: fs, 37 tss, ls.
This will be the bind off row. You will make a slip stitch every time you pick up a loop on your hook. Fasten off and weave in ends.

Small Square #1

Row 1 (FR): This is the Foundation Row.
Chain 19, make the foundation row stitches in the back loops of the chain.
Row 2: fs, 17 tss, ls.
Row 3: fs, A-B1, 15 tss, B2-A, ls.
Row 4: fs, (tss, 7 A) * 2, tss, ls.
Row 5: fs, (A, 7 tss) * 2, A, ls.
Row 6: fs, tss, 5 A, 5 tss, 5 A, tss, ls.
Row 7: fs, A, 5 tss, A, 3 tss, A, 5 tss, A, ls.
Row 8: fs, tss, 3 A, 3 tss, A, tss, A, 3 tss, 3 A, tss, ls.
Row 9: fs, (A, 3 tss) * 4, A, ls.
Row 10: fs, tss, A, 3 tss, A, 5 tss, A, 3 tss, A, tss, ls.
Row 11: fs, (A, 3 tss) * 4, A, ls.
Row 12: fs, tss, 3 A, 3 tss, A, tss, A, 3 tss, 3 A, tss, ls.
Row 13: fs, A, 5 tss, A, 3 tss, A, 5 tss, A, ls.
Row 14: fs, tss, 5 A, 5 tss, 5 A, tss, ls.
Row 15: fs, (A, 7 tss) * 2, A, ls.
Row 16: fs, (tss, 7 A) * 2, tss, ls.
Row 17: fs, A, tss, B2, 11 tss, B1, tss, A, ls.
BOR: fs, 17 tss, ls.
This will be the bind off row. You will make a slip stitch every time you pick up a loop on your hook. Fasten off and weave in ends.

Small Square #2

Row 1 (FR): This is the Foundation Row.
Chain 19, make the foundation row stitches in the back loops of the chain.
Row 2: fs, 17 tss, ls.
Row 3: fs, A-B1, 15 tss, B2-A, ls.
Row 4: fs, tss, 15 A, tss, ls.
Row 5: fs, A, 15 tss, A, ls.
Row 6: fs, tss, 3 A, 9 tss, 3 A, tss, ls.
Row 7: fs, A, 3 tss, A, 7 tss, A, 3 tss, A, ls.
Row 8: fs, tss, 3 A, tss, A, tss, 3 A, tss, A, tss, 3 A, tss, ls.
Row 9: fs, (A, 3 tss) * 2, B2-B1, (3 tss, A) * 2, ls.
Row 10: fs, (tss, 3 A) * 4, tss, ls.
Row 11: fs, A, 3 tss, A, tss, B1, 3 tss, B2, tss, A, 3 tss, A ls.
Row 12: fs, tss, (3 A, tss, A, tss) * 2, 3 A, tss, ls.
Row 13: fs, A, 3 tss, A, 7 tss, A, 3 tss, A, ls.
Row 14: fs, tss, 3 A, 9 tss, 3 A, tss, ls.
Row 15: fs, A, 15 tss, A, ls.
Row 16: fs, tss, 15 A, tss, ls.
Row 17: fs, A, tss, B2, 11 tss, B1, tss, A, ls.
BOR: fs, 17 tss, ls.
This will be the bind off row. You will make a slip stitch every time you pick up a loop on your hook. Fasten off and weave in ends.

Small Square #3

Row 1 (FR): This is the Foundation Row.
Chain 19, make the foundation row stitches in the back loops of the chain.
Row 2: fs, 17 tss, ls.
Row 3: fs, A-B1, 15 tss, B2-A, ls.
Row 4: fs, tss, 15 A, tss, ls.
Row 5: fs, A, 15 tss, A, ls.
Row 6: fs, tss, 5 A, tss, 3 A, tss, 5 A, tss, ls.
Row 7: fs, A, 7 tss, B2-B1, 7 tss, A, ls.
Row 8: fs, (tss, 3 A) * 4, tss, ls.
Row 9: fs, A, 5 tss, B2, 3 tss, B1, 5 tss, A, ls.
Row 10: fs, tss, 5 A, tss, 3 A, tss, 5 A, tss, ls.
Row 11: fs, A, 3 tss, B1, 7 tss, B2, 3 tss, A, ls.
Row 12: fs, (tss, 3 A) * 4, tss, ls.
Row 13: fs, A, 5 tss, B1, 3 tss, B2, 5 tss, A, ls.
Row 14: fs, tss, 5 A, tss, 3 A, tss, 5 A, tss, ls.
Row 15: fs, A, 15 tss, A, ls.
Row 16: fs, tss, 15 A, tss, ls.
Row 17: fs, A, tss, B2, 11 tss, B1, tss, A, ls.
BOR: fs, 17 tss, ls.
This will be the bind off row. You will make a slip stitch every time you pick up a loop on your hook. Fasten off and weave in ends.

Small Square #4

Row 1 (FR): This is the Foundation Row.
Chain 19, make the foundation row stitches in the back loops of the chain.
Row 2: fs, 17 tss, ls.
Row 3: fs, A-B1, 15 tss, B2-A, ls.
Row 4: fs, tss, (3 A, 3 tss) * 2, 3 A, tss, ls.
Row 5: fs, (A, 3 tss) * 2, B2-B1, (3 tss, A) * 2, ls.
Row 6: fs, tss, A, 5 tss, A, tss, A, 5 tss, A, tss, ls.
Row 7: fs, (A, tss) * 2, A, 7 tss, A, (tss, A) * 2, ls.
Row 8: fs, (tss, A) * 2, tss, 7 A, tss, (A, tss) * 2, ls.
Row 9: fs, A, 3 tss, B2, 7 tss, B1, 3 tss, A, ls.
Row 10: fs, tss, 3 A, tss, 7 A, tss, 3 A, tss, ls.
Row 11: fs, A, tss, B1, 11 tss, B2, tss, A, ls.
Row 12: fs, (tss, A) * 2, tss, 7 A, tss, (A, tss) * 2, ls.
Row 13: fs, (A, tss) * 2, A, 7 tss, A, (tss, A) * 2, ls.
Row 14: fs, tss, A, 5 tss, A, tss, A, 5 tss, A, tss, ls.
Row 15: fs, A, 3 tss, A, tss, B1, 3 tss, B2, tss, A, 3 tss, A, ls.
Row 16: fs, tss, (3 A, 3 tss) * 2, 3 A, tss, ls.
Row 17: fs, A, tss, B2, 11 tss, B1, tss, A, ls.
BOR: fs, 17 tss, ls.
This will be the bind off row. You will make a slip stitch every time you pick up a loop on your hook. Fasten off and weave in ends.

Small Square #5

Row 1 (FR): This is the Foundation Row.
Chain 19, make the foundation row stitches in the back loops of the chain.
Row 2: fs, 17 tss, ls.
Row 3: fs, A-B1, 15 tss, B2-A, ls.
Row 4: fs, tss, 5 A, tss, 3 A, tss, 5 A, tss, ls.
Row 5: fs, A, 3 tss, B1, 7 tss, B2, 3 tss, A, ls.
Row 6: fs, tss, 3 A, tss, 7 A, tss, 3 A, tss, ls.
Row 7: fs, A, tss, B1, 3 tss, B2, 3 tss, B1, 3 tss, B2, tss, A, ls.
Row 8: fs, tss, A, tss, 3 A, (tss, A) * 2, tss, 3 A, tss, A, tss, ls.
Row 9: fs, A, 5 tss, B1, 3 tss, B2, 5 tss, A, ls.
Row 10: fs, tss, 5 A, tss , 3 A, tss, 5 A, tss, ls.
Row 11: fs, A, 7 tss, B2-B1, 7 tss, A, ls.
Row 12: fs, tss, A, tss, 3 A, (tss, A) * 2, tss, 3 A, tss, A, tss, ls.
Row 13: fs, A, 3 tss, B2-B1, 7 tss, B2-B1, 3 tss, A, ls.
Row 14: fs, tss, 3 A, tss, 7 A, tss, 3 A, tss, ls.
Row 15: fs, A, 5 tss, B2, 3 tss, B1, 5 tss, A, ls.
Row 16: fs, tss, 5 A, tss, 3 A, tss, 5 A, tss, ls.
Row 17: fs, A, tss, B2, 11 tss, B1, tss, A, ls.
BOR: fs, 17 tss, ls.
This will be the bind off row. You will make a slip stitch every time you pick up a loop on your hook. Fasten off and weave in ends.

Small Square #6

Row 1 (FR): This is the Foundation Row.
Chain 19, make the foundation row stitches in the back loops of the chain.
Row 2: fs, 17 tss, ls.
Row 3: fs, A-B1, 15 tss, B2-A, ls.
Row 4: fs, tss, 3 A, 9 tss, 3 A, tss, ls.
Row 5: fs, A, 5 tss, B2, 3 tss, B1, 5 tss, A, ls.
Row 6: fs, tss, A, (tss, 3 A) * 3, tss, A, tss, ls.
Row 7: fs, (A, tss) * 2, B2-B1, 7 tss, B2-B1, (tss, A) * 2, ls.
Row 8: fs, (tss, A) * 3, tss, 3 A, tss, (A, tss) * 3, ls.
Row 9: fs, A, tss, A, 5 tss, B2-B1, 5 tss, A, tss, A, ls.
Row 10: fs, tss, A, (tss, 5 A) * 2, tss, A, tss, ls.
Row 11: fs, A, tss, A, 3 tss, B1, 3 tss, B2, 3 tss, A, tss, A, ls.
Row 12: fs, (tss, A) * 3, tss, 3 A, tss, (A, tss) * 3, ls.
Row 13: fs, A, tss, A-B1, 3 tss, B2, 3 tss, B1, 3 tss, B2-A, tss, A, ls.
Row 14: fs, tss, A, (tss, 3 A) * 3, tss, A, tss, ls.
Row 15: fs, A, 3 tss, B1, 7 tss, B2, 3 tss, A, ls.
Row 16: fs, tss, 3 A, 9 tss, 3 A, tss, ls.
Row 17: fs, A, tss, B2, 11 tss, B1, tss, A, ls.
BOR: fs, 17 tss, ls.
This will be the bind off row. You will make a slip stitch every time you pick up a loop on your hook. Fasten off and weave in ends.

Small Square #7

Row 1 (FR): This is the Foundation Row.
Chain 19, make the foundation row stitches in the back loops of the chain.
Row 2: fs, 17 tss, ls.
Row 3: fs, A-B1, 15 tss, B2-A, ls.
Row 4: fs, tss, A, 5 tss, 3 A, 5 tss, A, tss, ls.
Row 5: fs, A, tss, (A, 3 tss) * 3, A, tss, A, ls.
Row 6: fs, (tss, A) * 3, tss, 3 A, tss, (A, tss) * 3, ls.
Row 7: fs, A, tss, A, 3 tss, B2-A, 3 tss, A-B1, 3 tss, A, tss, A, ls.
Row 8: fs, tss, A, 5 tss, 3 A, 5 tss, A, tss, ls.
Row 9: fs, A, 15 tss, A, ls.
Row 10: fs, tss, 15 A, tss, ls.
Row 11: fs, A, 15 tss, A, ls.
Row 12: fs, tss, A, 5 tss, 3 A, 5 tss, A, tss, ls.
Row 13: fs, (A, tss) * 2, B1, tss, A, 3 tss, A, tss, B2, (tss, A) * 2, ls.
Row 14: fs, (tss, A) * 3, tss, 3 A, tss, (A, tss) * 3, ls.
Row 15: fs, A, tss, A, (3 tss, A) * 3, tss, A, ls.
Row 16: fs, tss, A, 5 tss, 3 A, 5 tss, A, tss, ls.
Row 17: fs, A, tss, B2, 11 tss, B1, tss, A, ls.
BOR: fs, 17 tss, ls.
This will be the bind off row. You will make a slip stitch every time you pick up a loop on your hook. Fasten off and weave in ends.

Small Square #8

Row 1 (FR): This is the Foundation Row.
Chain 19, make the foundation row stitches in the back loops of the chain.
Row 2: fs, 17 tss, ls.
Row 3: fs, A-B1, 15 tss, B2-A, ls.
Row 4: fs, tss, (3 A, tss, A, tss)* 2, 3 A, tss, ls.
Row 5: fs, A, 15 tss, A, ls.
Row 6: fs, tss, 15 A, tss, ls.
Row 7: fs, A, tss, C1, tss, C1, 3 tss, C1, tss, C1, 5 tss, A, ls.
Row 8: fs, (tss, A) * 2, tss, (3 A, tss, A, tss) * 2, ls.
Row 9: fs, A, 15 tss, A, ls.
Row 10: fs, tss, 15 A, tss, ls.
Row 11: fs, A, tss, C1, 3 tss, C1, tss, C1, 3 tss, C1, 3 tss, A, ls.
Row 12: fs, tss, A, tss, (3 A, tss, A, tss) * 2, A, tss, ls.
Row 13: fs, A, 15 tss, A, ls.
Row 14: fs, tss, 15 A, tss, ls.
Row 15: fs, A, 3 tss, C1, tss, C1, 3 tss, C1, tss, C1, 3 tss, A, ls.
Row 16: fs, tss, (3 A, tss, A, tss) * 2, 3 A, tss, ls.
Row 17: fs, A, tss, B2, 11 tss, B1, tss, A, ls.
BOR: fs, 17 tss, ls.
This will be the bind off row. You will make a slip stitch every time you pick up a loop on your hook. Fasten off and weave in ends.

Small Square #9

Row 1 (FR): This is the Foundation Row.
Chain 19, make the foundation row stitches in the back loops of the chain.
Row 2: fs, 17 tss, ls.
Row 3: fs, A-B1, 15 tss, B2-A, ls.
Row 4: fs, tss, (3 A, 3 tss) * 2, 3 A, tss, ls.
Row 5: fs, A, tss, B1, 5 tss, B2-B1, 5 tss, B2, tss, A, ls.
Row 6: fs, tss, A, tss, (5 A, tss) * 2, A, tss, ls.
Row 7: fs, A, tss, A, 3 tss, B1, 3 tss, B2, 3 tss, A, tss, A, ls.
Row 8: fs, tss, A, (tss, 3 A) * 3, tss, A, tss, ls.
Row 9: fs, A, 3 tss, B2-B1, 7 tss, B2-B1, 3 tss, A, ls.
Row 10: fs, tss, 3 A, tss, 7 A, tss, 3 A, tss, ls.
Row 11: fs, A, tss, B1, 3 tss, B2, 3 tss, B1, 3 tss, B2, tss, A, ls.
Row 12: fs, tss, A, (tss, 3 A) * 3, tss, A, tss, ls.
Row 13: fs, A, tss, A, 5 tss, B2-B1, 5 tss, A, tss, A, ls.
Row 14: fs, tss, A, (tss, 5 A) * 2, tss, A, tss, ls.
Row 15: fs, A, 3 tss, B2, tss, B1, 3 tss, B2, tss, B1, 3 tss, A, ls.
Row 16: fs, tss, (3 A, 3 tss) * 2, 3 A, tss, ls.
Row 17: fs, A, tss, B2, 11 tss, B1, tss, A, ls.
BOR: fs, 17 tss, ls.
This will be the bind off row. You will make a slip stitch every time you pick up a loop on your hook. Fasten off and weave in ends.

Small Square #10

Row 1 (FR): This is the Foundation Row.
Chain 19, make the foundation row stitches in the back loops of the chain.
Row 2: fs, 17 tss, ls.
Row 3: fs, A-B1, 15 tss, B2-A, ls.
Row 4: fs, (tss, 7 A) * 2, tss, ls.
Row 5: fs, A, 5 tss, B1, 3 tss, B2, 5 tss, A, ls.
Row 6: fs, tss, 5 A, tss, 3 A, tss, 5 A, tss, ls.
Row 7: fs, A, 3 tss, B1, 7 tss, B2, 3 tss, A, ls.
Row 8: fs, (tss, 3 A) * 4, tss, ls.
Row 9: fs, A, tss, (B1, 3 tss) * 2, B2, 3 tss, B2, tss, A, ls.
Row 10: fs, tss, A, (tss, 3 A) * 3, tss, A, tss, ls.
Row 11: fs, A, 3 tss, B2, 3 tss, B2-B1, 3 tss, B1, 3 tss, A, ls.
Row 12: fs, (tss, 3 A) * 4, tss, ls.
Row 13: fs, A, 5 tss, B2, 3 tss, B1, 5 tss, A, ls.
Row 14: fs, tss, 5 A, tss, 3 A, tss, 5 A, tss, ls.
Row 15: fs, A, 7 tss, B2-B1, 7 tss, A, ls.
Row 16: fs, (tss, 7 A) * 2, tss, ls.
Row 17: fs, A, tss, B2, 11 tss, B1, tss, A, ls.
BOR: fs, 17 tss, ls.
This will be the bind off row. You will make a slip stitch every time you pick up a loop on your hook. Fasten off and weave in ends.

Small Square #11

Row 1 (FR): This is the Foundation Row.
Chain 19, make the foundation row stitches in the back loops of the chain.
Row 2: fs, 17 tss, ls.
Row 3: fs, A-B1, 15 tss, B2-A, ls.
Row 4: fs, tss, (3 A, 3 tss) * 2, 3 A, tss, ls.
Row 5: fs, A, (3 tss, A, tss, A) * 2, 3 tss, A, ls.
Row 6: fs, tss, A, 3 tss, A, tss, 3 A, tss, A, 3 tss, A, tss, ls.
Row 7: fs, A, tss, A, 3 tss, B2, 3 tss, B1, 3 tss, A, tss, A, ls.
Row 8: fs, tss, A, 3 tss, A, tss, 3 A, tss, A, 3 tss, A, tss, ls.
Row 9: fs, A, 7 tss, B2-B1, 7 tss, A, ls.
Row 10: fs, (tss, 7 A) * 2, tss, ls.
Row 11: fs, A, 5 tss, B1, 3 tss, B2, 5 tss, A, ls.
Row 12: fs, tss, A, 3 tss, A, tss, 3 A, tss, A, 3 tss, A, tss, ls.
Row 13: fs, (A, tss) * 2, B1, 7 tss, B2, (tss, A) * 2, ls.
Row 14: fs, tss, A, 3 tss, A, tss, 3 A, tss, A, 3 tss, A, tss, ls.
Row 15: fs, A, (3 tss, A, tss, A) * 2, 3 tss, A, ls.
Row 16: fs, tss, (3 A, 3 tss) * 2, 3 A, tss, ls.
Row 17: fs, A, tss, B2, 11 tss, B1, tss, A, ls.
BOR: fs, 17 tss, ls.
This will be the bind off row. You will make a slip stitch every time you pick up a loop on your hook. Fasten off and weave in ends.

Small Square #12

Row 1 (FR): This is the Foundation Row.
Chain 19, make the foundation row stitches in the back loops of the chain.
Row 2: fs, 17 tss, ls.
Row 3: fs, A-B1, 15 tss, B2-A, ls.
Row 4: fs, (tss, 7 A) * 2, tss, ls.
Row 5: fs, A, 5 tss, B1, 3 tss, B2, 5 tss, A, ls.
Row 6: fs, tss, 5 A, tss, 3 A, tss, 5 A, tss, ls.
Row 7: fs, A, 7 tss, B2-B1, 7 tss, A, ls.
Row 8: fs, (tss, 3 A) * 4, tss, ls.
Row 9: fs, A, tss, B1, 3 tss, B2, 3 tss, B1, 3 tss, B2, tss, A, ls.
Row 10: fs, tss, A, (tss, 3 A) * 3, tss, A, tss, ls.
Row 11: fs, A, 3 tss, B2-B1, 7 tss, B2-B1, 3 tss, A, ls.
Row 12: fs, (tss, 3 A) * 4, tss, ls.
Row 13: fs, A, 5 tss, B1, 3 tss, B2, 5 tss, A, ls.
Row 14: fs, tss, 5 A, tss, 3 A, tss, 5 A, tss, ls.
Row 15: fs, A, 7 tss, B2-B1, 7 tss, A, ls.
Row 16: fs, (tss, 7 A) * 2, tss, ls.
Row 17: fs, A, tss, B2, 11 tss, B1, tss, A, ls.
BOR: fs, 17 tss, ls.
This will be the bind off row. You will make a slip stitch every time you pick up a loop on your hook. Fasten off and weave in ends.

Small Square #13

Row 1 (FR): This is the Foundation Row.
Chain 19, make the foundation row stitches in the back loops of the chain.
Row 2: fs, 17 tss, ls.
Row 3: fs, A-B1, 15 tss, B2-A, ls.
Row 4: fs, (tss, 7 A) * 2, tss, ls.
Row 5: fs, A, 5 tss, B1, 3 tss, B2, 5 tss, A, ls.
Row 6: fs, tss, 5 A, tss, 3 A, tss, 5 A, tss, ls.
Row 7: fs, A, 5 tss, A, 3 tss, A, 5 tss, A, ls.
Row 8: fs, tss, (3 A, 3 tss) * 2, 3 A, tss, ls.
Row 9: fs, A, tss, B1, 11 tss, B2, tss, A, ls.
Row 10: fs, tss, A, tss, 11 A, tss, A, tss, ls.
Row 11: fs, A, 3 tss, B2, 7 tss, B1, 3 tss, A, ls.
Row 12: fs, tss, (3 A, 3 tss) * 2, 3 A, tss, ls.
Row 13: fs, A, 5 tss, A, 3 tss, A, 5 tss, A, ls.
Row 14: fs, tss, 5 A, tss, 3 A, tss, 5 A, tss, ls.
Row 15: fs, A, 7 tss, B2-B1, 7 tss, A, ls.
Row 16: fs, (tss, 7 A) * 2, tss, ls.
Row 17: fs, A, tss, B2, 11 tss, B1, tss, A, ls.
BOR: fs, 17 tss, ls.
This will be the bind off row. You will make a slip stitch every time you pick up a loop on your hook. Fasten off and weave in ends.

Small Square #14

Row 1 (FR): This is the Foundation Row.
Chain 19, make the foundation row stitches in the back loops of the chain.
Row 2: fs, 17 tss, ls.
Row 3: fs, A-B1, 15 tss, B2-A, ls.
Row 4: fs, tss, 5 A, tss, A, tss, (3 A, tss) * 2, ls.
Row 5: fs, A, 7 tss, B2-A, tss, B1, 5 tss, A, ls.
Row 6: fs, (tss, A, tss, 5 A) * 2, tss, ls.
Row 7: fs, A, 3 tss, B2, 3 tss, A-B1, 7 tss, A, ls.
Row 8: fs, (tss, 3 A) * 2, tss, 5 A, tss, A, tss, ls.
Row 9: fs, A, 5 tss, B2, tss, A, 3 tss, B1, 3 tss, A, ls.
Row 10: fs, tss, A, 13 tss, A, tss, ls.
Row 11: fs, A, tss, B1, 5 tss, A, 3 tss, B2, 3 tss, A, ls.
Row 12: fs, tss, A, tss, 5 A, tss, (3 A, tss) * 2, ls.
Row 13: fs, A, 5 tss, B1, tss, A, 5 tss, B2, tss, A, ls.
Row 14: fs, tss, (5 A, tss, A, tss) * 2, ls.
Row 15: fs, A, 3 tss, B1, 3 tss, A, tss, B2, 5 tss, A, ls.
Row 16: fs, (tss, 3 A) * 2, tss, A, tss, 5 A, tss, ls.
Row 17: fs, A, tss, B2, 11 tss, B1, tss, A, ls.
BOR: fs, 17 tss, ls.
This will be the bind off row. You will make a slip stitch every time you pick up a loop on your hook. Fasten off and weave in ends.

Small Square #15
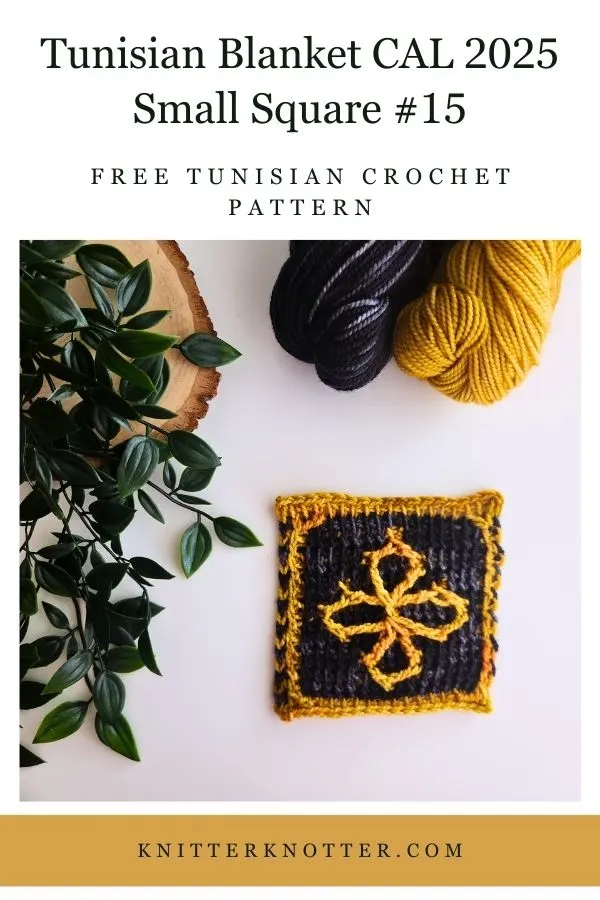
Row 1 (FR): This is the Foundation Row.
Chain 19, make the foundation row stitches in the back loops of the chain.
Row 2: fs, 17 tss, ls.
Row 3: fs, A-B1, 15 tss, B2-A, ls.
Row 4: fs, (tss, 7 A) * 2, tss, ls.
Row 5: fs, A, 5 tss, B1, 3 tss, B2, 5 tss, A, ls.
Row 6: fs, tss, 5 A, tss, 3 A, tss, 5 A, tss, ls.
Row 7: fs, A, 15 tss, A, ls.
Row 8: fs, tss, 3 A, tss, 7 A, tss, 3 A, tss, ls.
Row 9: fs, A, tss, B1, 5 tss, D2-C2-C1-D1, 5 tss, B2, tss, A, ls.
Row 10: fs, tss, A, (tss, 5 A) * 2, tss, A, tss, ls.
Row 11: fs, A, 3 tss, B2-D1, 7 tss, D2-B1, 3 tss, A, ls.
Row 12: fs, tss, 3 A, tss, 7 A, tss, 3 A, tss, ls.
Row 13: fs, A, 5 tss, C1, 3 tss, C2, 5 tss, A, ls.
Row 14: fs, tss, 5 A, tss, 3 A, tss, 5 A, tss, ls.
Row 15: fs, A, 7 tss, B2-B1, 7 tss, A, ls.
Row 16: fs, (tss, 7 A) * 2, tss, ls.
Row 17: fs, A, tss, B2, 11 tss, B1, tss, A, ls.
BOR: fs, 17 tss, ls.
This will be the bind off row. You will make a slip stitch every time you pick up a loop on your hook. Fasten off and weave in ends.

Small Square #16

Row 1 (FR): This is the Foundation Row.
Chain 19, make the foundation row stitches in the back loops of the chain.
Row 2: fs, 17 tss, ls.
Row 3: fs, A-B1, 15 tss, B2-A, ls.
Row 4: fs, tss, A, 3 tss, 7 A, 3 tss, A, tss, ls.
Row 5: fs, (A, tss) * 2, A, 7 tss, (A, tss) * 2, A, ls.
Row 6: fs, tss, A, 5 tss, 3 A, 5 tss, A, tss, ls.
Row 7: fs, A, (3 tss, A, tss, A) * 2, 3 tss, A, ls.
Row 8: fs, tss, 3 A, 3 tss, A, tss, A, 3 tss, 3 A, tss, ls.
Row 9: fs, (A, 7 tss) * 2, A, ls.
Row 10: fs, tss, 5 A, 5 tss, 5 A, tss, ls.
Row 11: fs, (A, 7 tss) * 2, A, ls.
Row 12: fs, tss, 3 A, 3 tss, A, tss, A, 3 tss, 3 A, tss, ls.
Row 13: fs, A, (3 tss, A, tss, A) * 2, 3 tss, A, ls.
Row 14: fs, tss, A, 5 tss, 3 A, 5 tss, A, tss, ls.
Row 15: fs, (A, tss) * 2, A, 7 tss, A, (tss, A) * 2, ls.
Row 16: fs, tss, A, 3 tss, 7 A, 3 tss, A, tss, ls.
Row 17: fs, A, tss, B2, 11 tss, B1, tss, A, ls.
BOR: fs, 17 tss, ls.
This will be the bind off row. You will make a slip stitch every time you pick up a loop on your hook. Fasten off and weave in ends.

Small Square #17

Row 1 (FR): This is the Foundation Row.
Chain 19, make the foundation row stitches in the back loops of the chain.
Row 2: fs, 17 tss, ls.
Row 3: fs, A-B1, 15 tss, B2-A, ls.
Row 4: fs, tss, 5 A, tss, 3 A, tss, 5 A, tss, ls.
Row 5: fs, A, 7 tss, B2-B1, 7 tss, A, ls.
Row 6: fs, (tss, 3 A) * 4, tss, ls.
Row 7: fs, A, 5 tss, B2, 3 tss, B1, 5 tss, A, ls.
Row 8: fs, tss, A, tss, 3 A, 5 tss, 3 A, tss, A, tss, ls.
Row 9: fs, A, 3 tss, B2, tss, A, 3 tss, A, tss, B1, 3 tss, A, ls.
Row 10: fs, tss, (3 A, tss, A, tss) * 2, 3 A, tss, ls.
Row 11: fs, A, tss, B1, (3 tss, A) * 2, 3 tss, B2, tss, A, ls.
Row 12: fs, tss, A, tss, 3 A, 5 tss, 3 A, tss, A, tss, ls.
Row 13: fs, A, 3 tss, B1, 7 tss, B2, 3 tss, A, ls.
Row 14: fs, (tss, 3 A) * 4, tss, ls.
Row 15: fs, A, 5 tss, B1, 3 tss, B2, 5 tss, A, ls.
Row 16: fs, tss, 5 A, tss, 3 A, tss, 5 A, tss, ls.
Row 17: fs, A, tss, B2, 11 tss, B1, tss, A, ls.
BOR: fs, 17 tss, ls.
This will be the bind off row. You will make a slip stitch every time you pick up a loop on your hook. Fasten off and weave in ends.

Small Square #18

Row 1 (FR): This is the Foundation Row.
Chain 19, make the foundation row stitches in the back loops of the chain.
Row 2: fs, 17 tss, ls.
Row 3: fs, A-B1, 15 tss, B2-A, ls.
Row 4: fs, tss, 11 A, tss, 3 A, tss, ls.
Row 5: fs, A, 7 tss, D1, 7 tss, A, ls.
Row 6: fs, (tss, A, tss, 5 A) * 2, tss, ls.
Row 7: fs, A, 3 tss, D1, 11 tss, A, ls.
Row 8: fs, tss, 3 A, tss, 11 A, tss, ls.
Row 9: fs, A, 3 tss, C2, 7 tss, C2, 3 tss, A, ls.
Row 10: fs, tss, 3 A, tss, 7 A, tss, 3 A, tss, ls.
Row 11: fs, A, 15 tss, A, ls.
Row 12: fs, tss, 11 A, tss, 3 A, tss, ls.
Row 13: fs, A, 5 tss, C2, tss, D1, 5 tss, C2, tss, A, ls.
Row 14: fs, tss, (5 A, tss, A, tss) * 2, ls.
Row 15: fs, A, 3 tss, D1, 11 tss, A, ls.
Row 16: fs, tss, 3 A, tss, 11 A, tss, ls.
Row 17: fs, A, tss, B2, 11 tss, B1, tss, A, ls.
BOR: fs, 17 tss, ls.
This will be the bind off row. You will make a slip stitch every time you pick up a loop on your hook. Fasten off and weave in ends.

Small Square #19

Row 1 (FR): This is the Foundation Row.
Chain 19, make the foundation row stitches in the back loops of the chain.
Row 2: fs, 17 tss, ls.
Row 3: fs, A-B1, 15 tss, B2-A, ls.
Row 4: fs, tss, 15 A, tss, ls.
Row 5: fs, A, 15 tss, A, ls.
Row 6: fs, tss, 3 A, 9 tss, 3 A, tss, ls.
Row 7: fs, A, 3 tss, A, 7 tss, A, 3 tss, A, ls.
Row 8: fs, (tss, 3 A) * 4, tss, ls.
Row 9: fs, A, 3 tss, A, tss, B1, 3 tss, B2, tss, A, 3 tss, A, ls.
Row 10: fs, tss, 3 A, tss, A, tss, 3 A, tss, A, tss, 3 A, tss, ls.
Row 11: fs, (A, 3 tss) * 2, B2-B1, (3 tss, A) * 2, ls.
Row 12: fs, (tss, 3 A) * 4, tss, ls.
Row 13: fs, A, 3 tss, A, 7 tss, A, 3 tss, A, ls.
Row 14: fs, tss, 3 A, 9 tss, 3 A, tss, ls.
Row 15: fs, A, 15 tss, A, ls.
Row 16: fs, tss, 15 A, tss, ls.
Row 17: fs, A, tss, B2, 11 tss, B1, tss, A, ls.
BOR: fs, 17 tss, ls.
This will be the bind off row. You will make a slip stitch every time you pick up a loop on your hook. Fasten off and weave in ends.

Small Square #20
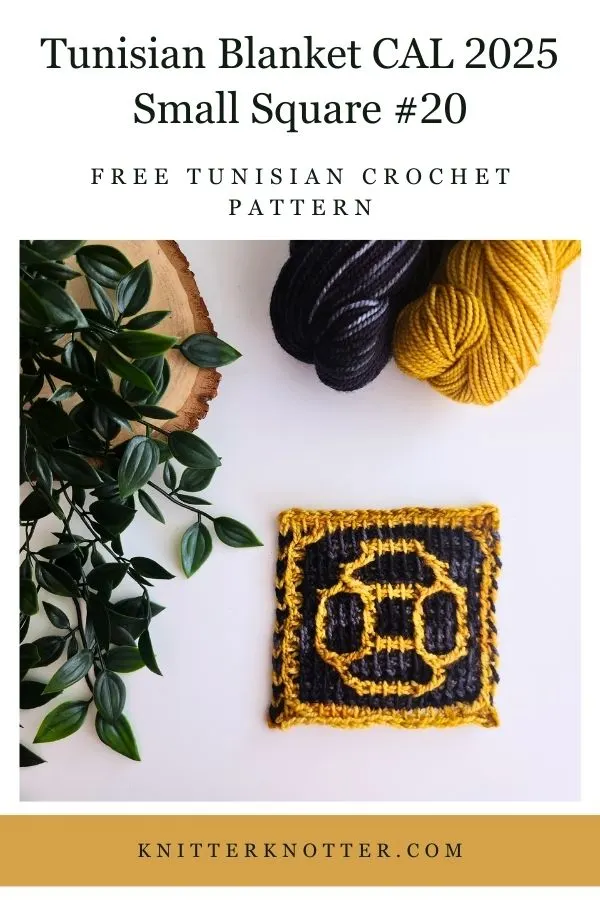
Row 1 (FR): This is the Foundation Row.
Chain 19, make the foundation row stitches in the back loops of the chain.
Row 2: fs, 17 tss, ls.
Row 3: fs, A-B1, 15 tss, B2-A, ls.
Row 4: fs, tss, 5 A, 5 tss, 5 A, tss, ls.
Row 5: fs, A, 3 tss, B1, 7 tss, B2, 3 tss, A, ls.
Row 6: fs, tss, 3 A, tss, 7 A, tss, 3 A, tss, ls.
Row 7: fs, A, tss, B1, 3 tss, B2, 3 tss, B1, 3 tss, B2, tss, A, ls.
Row 8: fs, tss, A, tss, 3 A, 5 tss, 3 A, tss, A, tss, ls.
Row 9: fs, A, tss, (A, 3 tss) * 3, A, tss, A, ls.
Row 10: fs, tss, A, (tss, 3 A) * 3, tss, A, tss, ls.
Row 11: fs, A, tss, A, (3 tss, A) * 3, tss, A, ls.
Row 12: fs, tss, A, tss, 3 A, 5 tss, 3 A, tss, A, tss, ls.
Row 13: fs, A, 3 tss, B2-B1, 7 tss, B2-B1, 3 tss, A, ls.
Row 14: fs, tss, 3 A, tss, 7 A, tss, 3 A, tss, ls.
Row 15: fs, A, 5 tss, B2, 3 tss, B1, 5 tss, A, ls.
Row 16: fs, tss, 5 A, 5 tss, 5 A, tss, ls.
Row 17: fs, A, tss, B2, 11 tss, B1, tss, A, ls.
BOR: fs, 17 tss, ls.
This will be the bind off row. You will make a slip stitch every time you pick up a loop on your hook. Fasten off and weave in ends.

Small Square #21

Row 1 (FR): This is the Foundation Row.
Chain 19, make the foundation row stitches in the back loops of the chain.
Row 2: fs, 17 tss, ls.
Row 3: fs, A-B1, 15 tss, B2-A, ls.
Row 4: fs, tss, 3 A, tss, 7 A, tss, 3 A, tss, ls.
Row 5: fs, A, 3 tss, A, 7 tss, A, 3 tss, A, ls.
Row 6: fs, tss, A, 3 tss, A, tss, 3 A, tss, A, 3 tss, A, tss, ls.
Row 7: fs, A, 7 tss, B2-B1, 7 tss, A, ls.
Row 8: fs, (tss, 3 A) * 4, tss, ls.
Row 9: fs, A, 5 tss, B2, 3 tss, B1, 5 tss, A, ls.
Row 10: fs, tss, 5 A, tss, 3 A, tss, 5 A, tss, ls.
Row 11: fs, A, 3 tss, B1, 7 tss, B2, 3 tss, A, ls.
Row 12: fs, (tss, 3 A) * 4, tss, ls.
Row 13: fs, A, 5 tss, B1, 3 tss, B2, 5 tss, A, ls.
Row 14: fs, tss, A, 3 tss, A, tss, 3 A, tss, A, 3 tss, A, tss, ls.
Row 15: fs, A, 3 tss, A, 7 tss, A, 3 tss, A, ls.
Row 16: fs, tss, 3 A, tss, 7 A, tss, 3 A, tss, ls.
Row 17: fs, A, tss, B2, 11 tss, B1, tss, A, ls.
BOR: fs, 17 tss, ls.
This will be the bind off row. You will make a slip stitch every time you pick up a loop on your hook. Fasten off and weave in ends.

Small Square #22

Row 1 (FR): This is the Foundation Row.
Chain 19, make the foundation row stitches in the back loops of the chain.
Row 2: fs, 17 tss, ls.
Row 3: fs, A-B1, 15 tss, B2-A, ls.
Row 4: fs, tss, A, 13 tss, A, tss, ls.
Row 5: fs, (A, tss) * 2, A, 7 tss, A, (tss, A) * 2, ls.
Row 6: fs, tss, A, 13 tss, A, tss, ls.
Row 7: fs, (A, tss) * 2, A, 7 tss, A, (tss, A) * 2, ls.
Row 8: fs, (tss, A) * 2, tss, 7 A, tss, (A, tss) * 2, ls.
Row 9: fs, (A, tss) * 2, A, 7 tss, A, (tss, A) * 2, ls.
Row 10: fs, (tss, A) * 2, tss, 7 A, tss, (A, tss) * 2, ls.
Row 11: fs, (A, tss) * 2, A, 7 tss, A, (tss, A) * 2, ls.
Row 12: fs, (tss, A) * 2, tss, 7 A, tss, (A, tss) * 2, ls.
Row 13: fs, (A, tss) * 2, A, 7 tss, A, (tss, A) * 2, ls.
Row 14: fs, tss, A, 13 tss, A, tss, ls.
Row 15: fs, (A, tss) * 2, A, 7 tss, A, (tss, A) * 2, ls.
Row 16: fs, tss, A, 13 tss, A, tss, ls.
Row 17: fs, A, tss, B2, 11 tss, B1, tss, A, ls.
BOR: fs, 17 tss, ls.
This will be the bind off row. You will make a slip stitch every time you pick up a loop on your hook. Fasten off and weave in ends.

Small Square #23
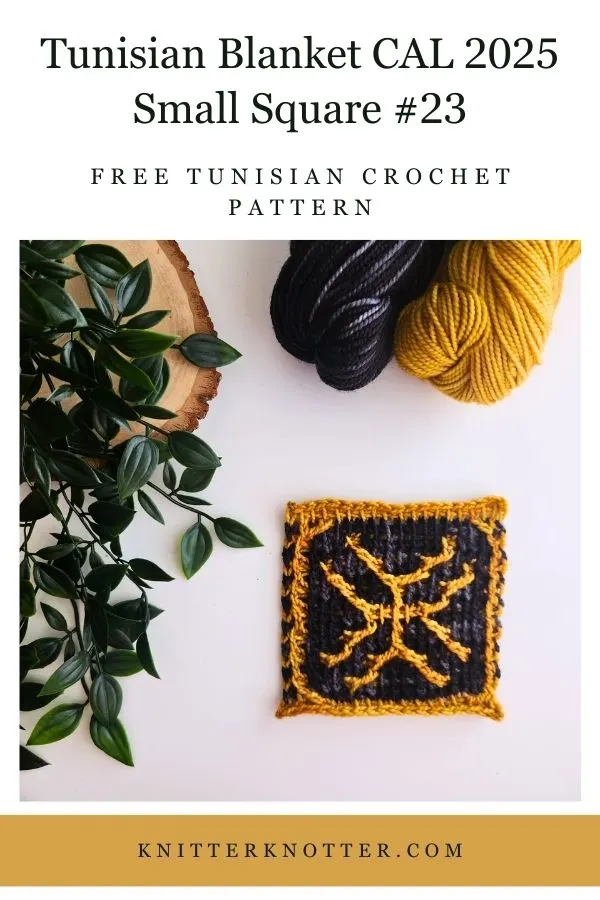
Row 1 (FR): This is the Foundation Row.
Chain 19, make the foundation row stitches in the back loops of the chain.
Row 2: fs, 17 tss, ls.
Row 3: fs, A-B1, 15 tss, B2-A, ls.
Row 4: fs, tss, 3 A, tss, 7 A, tss, 3 A, tss, ls.
Row 5: fs, A, 5 tss, B2, 3 tss, B1, 5 tss, A, ls.
Row 6: fs, tss, A, (tss, 3 A) * 3, tss, A, tss, ls.
Row 7: fs, A, 3 tss, B2, 3 tss, B2-B1, 3 tss, B1, 3 tss, A, ls.
Row 8: fs, (tss, 3 A) * 4, tss, ls.
Row 9: fs, A, 5 tss, B2, tss, A, tss, B1, 5 tss, A, ls.
Row 10: fs, tss, 5 A, 5 tss, 5 A, tss, ls.
Row 11: fs, A, 3 tss, B1, 3 tss, A, 3 tss, B2, 3 tss, A, ls.
Row 12: fs, (tss, 3 A) * 4, tss, ls.
Row 13: fs, A, tss, (B1, 3 tss) * 2, B2, 3 tss, B2, tss, A, ls.
Row 14: fs, tss, A, (tss, 3 A) * 3, tss, A, tss, ls.
Row 15: fs, A, 3 tss, B1, 7 tss, B2, 3 tss, A, ls.
Row 16: fs, tss, 3 A, tss, 7 A, tss, 3 A, tss, ls.
Row 17: fs, A, tss, B2, 11 tss, B1, tss, A, ls.
BOR: fs, 17 tss, ls.
This will be the bind off row. You will make a slip stitch every time you pick up a loop on your hook. Fasten off and weave in ends.

Small Square #24

Row 1 (FR): This is the Foundation Row.
Chain 19, make the foundation row stitches in the back loops of the chain.
Row 2: fs, 17 tss, ls.
Row 3: fs, A-B1, 15 tss, B2-A, ls.
Row 4: fs, (tss, 7 A) * 2, tss, ls.
Row 5: fs, A, 15 tss, A, ls.
Row 6: fs, tss, 15 A, tss, ls.
Row 7: fs, A, 5 tss, C1, 3 tss, C2, 5 tss, A, ls.
Row 8: fs, tss, 5 A, tss, 3 A, tss, 5 A, tss, ls.
Row 9: fs, A, tss, D1, 11 tss, D2, tss, A, ls.
Row 10: fs, tss, A, tss, 11 A, tss, A, tss, ls.
Row 11: fs, A, 5 tss, D2, 3 tss, D1, 5 tss, A, ls.
Row 12: fs, tss, 5 A, tss, 3 A, tss, 5 A, tss, ls.
Row 13: fs, A, 15 tss, A, ls.
Row 14: fs, tss, 15 A, tss, ls.
Row 15: fs, A, 7 tss, C2-C1, 7 tss, ls.
Row 16: fs, (tss, 7 A) * 2, tss, ls.
Row 17: fs, A, tss, B2, 11 tss, B1, tss, A, ls.
BOR: fs, 17 tss, ls.
This will be the bind off row. You will make a slip stitch every time you pick up a loop on your hook. Fasten off and weave in ends.

Small Square #25

Row 1 (FR): This is the Foundation Row.
Chain 19, make the foundation row stitches in the back loops of the chain.
Row 2: fs, 17 tss, ls.
Row 3: fs, A-B1, 15 tss, B2-A, ls.
Row 4: fs, tss, A, 13 tss, A, tss, ls.
Row 5: fs, (A, tss) * 2, A, 7 tss, A, (tss, A) * 2, ls.
Row 6: fs, tss, A, 13 tss, A, tss, ls.
Row 7: fs, (A, tss) * 3, B2, 3 tss, B1, (tss, A) * 3, ls.
Row 8: fs, (tss, A) * 3, 5 tss, (A, tss) * 3, ls.
Row 9: fs, (A, tss) * 8, A, ls.
Row 10: fs, (tss, A) * 3, 5 tss, (A, tss) * 3, ls.
Row 11: fs, (A, tss) * 8, A, ls.
Row 12: fs, (tss, A) * 3, 5 tss, (A, tss) * 3, ls.
Row 13: fs, (A, tss) * 2, A-B1, 7 tss, B2-A, (tss, A) * 2, ls.
Row 14: fs, tss, A, 13 tss, A, tss, ls.
Row 15: fs, (A, tss) * 2, A, 7 tss, A, (tss, A) * 2, ls.
Row 16: fs, tss, A, 13 tss, A, tss, ls.
Row 17: fs, A, tss, B2, 11 tss, B1, tss, A, ls.
BOR: fs, 17 tss, ls.
This will be the bind off row. You will make a slip stitch every time you pick up a loop on your hook. Fasten off and weave in ends.

Small Square #26
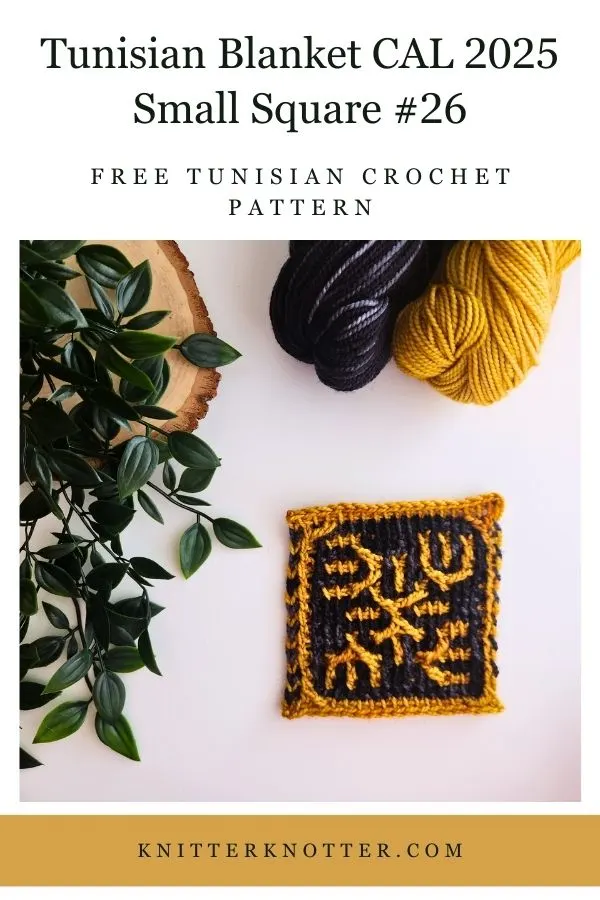
Row 1 (FR): This is the Foundation Row.
Chain 19, make the foundation row stitches in the back loops of the chain.
Row 2: fs, 17 tss, ls.
Row 3: fs, A-B1, 15 tss, B2-A, ls.
Row 4: fs, tss, A, 3 tss, 5 A, (tss, A) * 3, tss, ls.
Row 5: fs, A, 5 tss, B2, 3 tss, (A, tss) * 3, A, ls.
Row 6: fs, tss, A, 3 tss, (A, tss) * 6, ls.
Row 7: fs, A, 3 tss, B1, 3 tss, A, 3 tss, B2-B1, 3 tss, A, ls.
Row 8: fs, tss, A, 3 tss, (A, tss) * 4, 3 A, tss, ls.
Row 9: fs, A, 7 tss, B2-B1, 7 tss, A, ls.
Row 10: fs, tss, 3 A, 3 tss, A, tss, A, 3 tss, 3 A, tss, ls.
Row 11: fs, A, 5 tss, B1, 3 tss, B2, 5 tss, A, ls.
Row 12: fs, tss, 3 A, (tss, A) * 4, 3 tss, A, tss, ls.
Row 13: fs, A, tss, B1, 3 tss, B2, tss, A, tss, B1, 5 tss, A, ls.
Row 14: fs, (tss, A) * 6, 3 tss, A, tss, ls.
Row 15: fs, (A, tss) * 3, A, 5 tss, B2, 3 tss, A, ls.
Row 16: fs, (tss, A) * 3, tss, 5 A, 3 tss, A, tss, ls.
Row 17: fs, A, tss, B2, 11 tss, B1, tss, A, ls.
BOR: fs, 17 tss, ls.
This will be the bind off row. You will make a slip stitch every time you pick up a loop on your hook. Fasten off and weave in ends.

Small Square #27
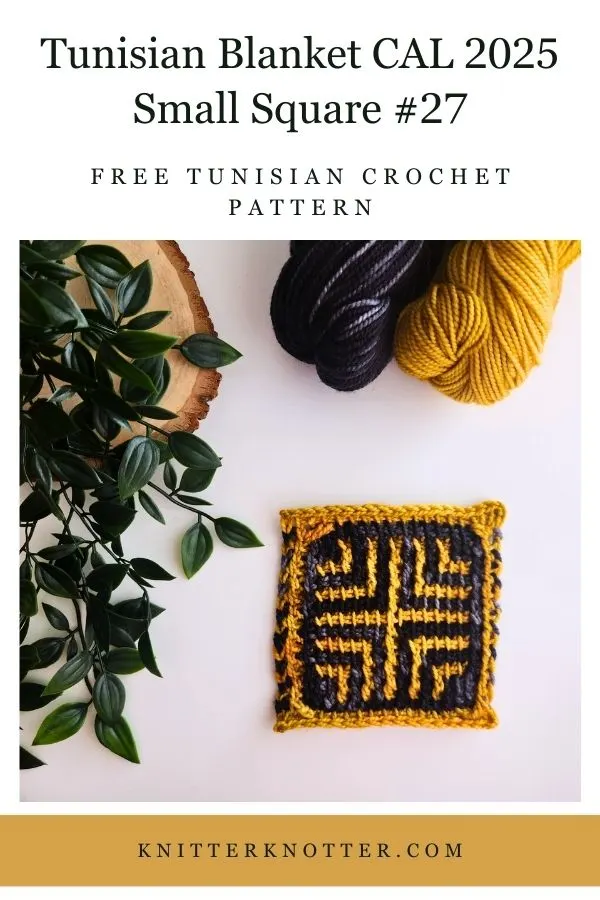
Row 1 (FR): This is the Foundation Row.
Chain 19, make the foundation row stitches in the back loops of the chain.
Row 2: fs, 17 tss, ls.
Row 3: fs, A-B1, 15 tss, B2-A, ls.
Row 4: fs, tss, 3 A, (tss, A) * 4, tss, 3 A, tss, ls.
Row 5: fs, A, 3 tss, (A, tss) * 4, A, 3 tss, A, ls.
Row 6: fs, tss, A, 3 tss, (A, tss) * 3, A, 3 tss, A, tss, ls.
Row 7: fs, A, 5 tss, (A, tss) * 2, A, 5 tss, A, ls.
Row 8: fs, tss, A, 5 tss, A, tss, A, 5 tss, A, tss, ls.
Row 9: fs, (A, 7 tss) * 2, A, ls.
Row 10: fs, tss, A, 13 tss, A, tss, ls.
Row 11: fs, (A, 7 tss) * 2, A, ls.
Row 12: fs, tss, A, 5 tss, A, tss, A, 5 tss, A, tss, ls.
Row 13: fs, A, 5 tss, (A, tss) * 2, A, 5 tss, A, ls.
Row 14: fs, tss, A, 3 tss, (A, tss) * 3, A, 3 tss, A, tss, ls.
Row 15: fs, A, 3 tss, (A, tss) * 4, A, 3 tss, A, ls.
Row 16: fs, tss, 3 A, (tss, A) * 4, tss, 3 A, ls.
Row 17: fs, A, tss, B2, 11 tss, B1, tss, A, ls.
BOR: fs, 17 tss, ls.
This will be the bind off row. You will make a slip stitch every time you pick up a loop on your hook. Fasten off and weave in ends.

Small Square #28

Row 1 (FR): This is the Foundation Row.
Chain 19, make the foundation row stitches in the back loops of the chain.
Row 2: fs, 17 tss, ls.
Row 3: fs, A-B1, 15 tss, B2-A, ls.
Row 4: fs, tss, A, 13 tss, A, tss, ls.
Row 5: fs, A, tss, A, 7 tss, D1, 3 tss, A, tss, A, ls.
Row 6: fs, tss, A, tss, 7 A, tss, 3 A, tss, A, tss, ls.
Row 7: fs, (A, tss) * 2, C2, tss, D1, 7 tss, A, tss, A, ls.
Row 8: fs, (tss, A) * 3, 5 tss, 3 A, tss, A, tss, ls.
Row 9: fs, A, tss, A, (3 tss, A) * 3, tss, A, ls.
Row 10: fs, tss, A, (tss, 3 A) * 3, tss, A, tss, ls.
Row 11: fs, A, tss, A, 3 tss, C2-A, 3 tss, A, tss, C2, (tss, A) * 2, ls.
Row 12: fs, tss, A, tss, 3 A, 5 tss, (A, tss) * 3, ls.
Row 13: fs, A, tss, A, 3 tss, D1, 7 tss, A, tss, A, ls.
Row 14: fs, tss, A, tss, 3 A, tss, 7 A, tss, A, tss, ls.
Row 15: fs, A, tss, A-D1, 11 tss, C2-A, tss, A, ls.
Row 16: fs, tss, A, 13 tss, A, tss, ls.
Row 17: fs, A, tss, B2, 11 tss, B1, tss, A, ls.
BOR: fs, 17 tss, ls.
This will be the bind off row. You will make a slip stitch every time you pick up a loop on your hook. Fasten off and weave in ends.

Small Square #29

Row 1 (FR): This is the Foundation Row.
Chain 19, make the foundation row stitches in the back loops of the chain.
Row 2: fs, 17 tss, ls.
Row 3: fs, A-B1, 15 tss, B2-A, ls.
Row 4: fs, tss, A, tss, 11 A, tss, A, tss, ls.
Row 5: fs, A, 5 tss, D2, 3 tss, D1, 5 tss, A, ls.
Row 6: fs, tss, 5 A, tss, 3 A, tss, 5 A, tss, ls.
Row 7: fs, A, 3 tss, C2, tss, A, 3 tss, A, tss, C1, 3 tss, A, ls.
Row 8: fs, tss, (3 A, 3 tss) * 2, 3 A, tss, ls.
Row 9: fs, A, 7 tss, B2-B1, 7 tss, A, ls.
Row 10: fs, (tss, 7 A) * 2, tss, ls.
Row 11: fs, A, 5 tss, B1, 3 tss, B2, 5 tss, A, ls.
Row 12: fs, tss, (3 A, 3 tss) * 2, 3 A, tss, ls.
Row 13: fs, A, 5 tss, A, 3 tss, A, 5 tss, A, ls.
Row 14: fs, tss, 5 A, tss, 3 A, tss, 5 A, tss, ls.
Row 15: fs, A, tss, C1-D1, 11 tss, D2-C2, tss, A, ls.
Row 16: fs, tss, A, tss, 11 A, tss, A, tss, ls.
Row 17: fs, A, tss, B2, 11 tss, B1, tss, A, ls.
BOR: fs, 17 tss, ls.
This will be the bind off row. You will make a slip stitch every time you pick up a loop on your hook. Fasten off and weave in ends.

Small Square #30
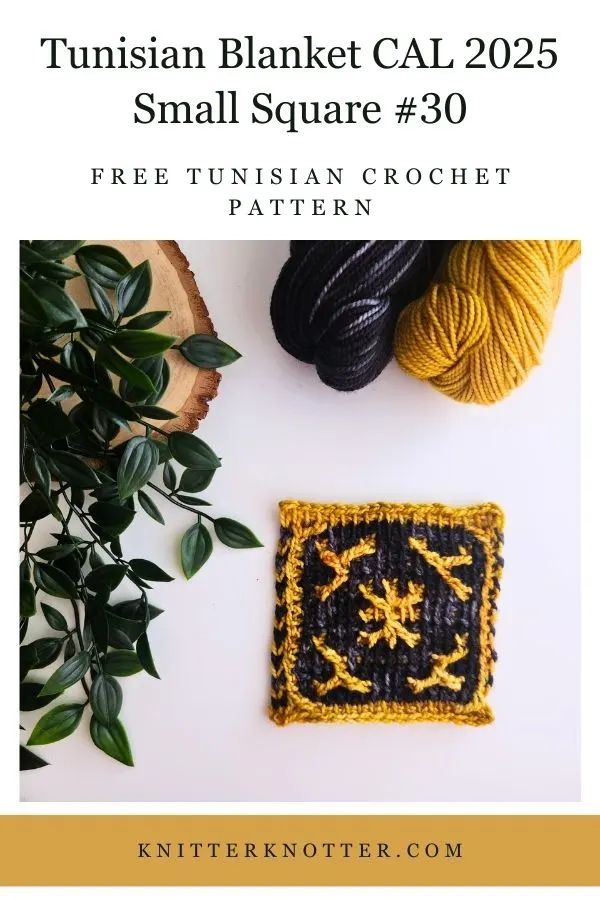
Row 1 (FR): This is the Foundation Row.
Chain 19, make the foundation row stitches in the back loops of the chain.
Row 2: fs, 17 tss, ls.
Row 3: fs, A-B1, 15 tss, B2-A, ls.
Row 4: fs, tss, A, (tss, 3 A) * 3, tss, A, tss, ls.
Row 5: fs, A, 3 tss, B2-B1, 7 tss, B2-B1, 3 tss, A, ls.
Row 6: fs, tss, 3 A, tss, 7 A, tss, 3 A, tss, ls.
Row 7: fs, A, tss, B1, 11 tss, B2, tss, A, ls.
Row 8: fs, tss, A, tss, 3 A, (tss, A) * 2, tss, 3 A, tss, A, tss, ls.
Row 9: fs, A, 7 tss, B2-A-B1, 7 tss, A, ls.
Row 10: fs, tss, 5 A, 5 tss, 5 A, tss, ls.
Row 11: fs, A, 5 tss, B1, tss, A, tss, B2, 5 tss, A, ls.
Row 12: fs, tss, A, tss, 3 A, (tss, A) * 2, tss, 3 A, tss, A, tss, ls.
Row 13: fs, A, 3 tss, B2, 7 tss, B1, 3 tss, A, ls.
Row 14: fs, tss, 3 A, tss, 7 A, tss, 3 A, tss, ls.
Row 15: fs, A, tss, B1, 3 tss, B2, 3 tss, B1, 3 tss, B2, tss, A, ls.
Row 16: fs, tss, A, (tss, 3 A) * 3, tss, A, tss, ls.
Row 17: fs, A, tss, B2, 11 tss, B1, tss, A, ls.
BOR: fs, 17 tss, ls.
This will be the bind off row. You will make a slip stitch every time you pick up a loop on your hook. Fasten off and weave in ends.

Small Square #31
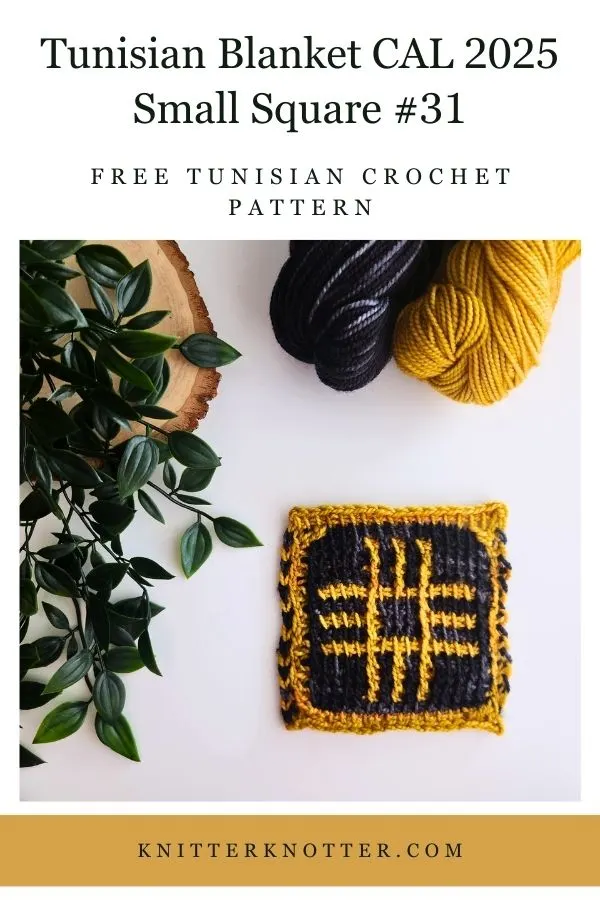
Row 1 (FR): This is the Foundation Row.
Chain 19, make the foundation row stitches in the back loops of the chain.
Row 2: fs, 17 tss, ls.
Row 3: fs, A-B1, 15 tss, B2-A, ls.
Row 4: fs, tss, 5 A, (tss, A) * 2, tss, 5 A, tss, ls.
Row 5: fs, A, 5 tss, (A, tss) * 2, A, 5 tss, A, ls.
Row 6: fs, tss, 5 A, (tss, A) * 2, tss, 5 A, tss, ls.
Row 7: fs, A, 5 tss, (A, tss) * 2, A, 5 tss, A, ls.
Row 8: fs, tss, A, 13 tss, A, tss, ls.
Row 9: fs, A, 5 tss, A, 3 tss, A, 5 tss, A, ls.
Row 10: fs, tss, A, 5 tss, 3 A, 5 tss, A, tss, ls.
Row 11: fs, A, 5 tss, A, 3 tss, A, 5 tss, A, ls.
Row 12: fs, tss, A, 13 tss, A, tss, ls.
Row 13: fs, A, 5 tss, (A, tss) * 2, A, 5 tss, A, ls.
Row 14: fs, tss, 5 A, (tss, A) * 2, tss, 5 A, tss, ls.
Row 15: fs, A, 5 tss, (A, tss) * 2, A, 5 tss, A, ls.
Row 16: fs, tss, 5 A, (tss, A) * 2, tss, 5 A, tss, ls.
Row 17: fs, A, tss, B2, 11 tss, B1, tss, A, ls.
BOR: fs, 17 tss, ls.
This will be the bind off row. You will make a slip stitch every time you pick up a loop on your hook. Fasten off and weave in ends.

Small Square #32
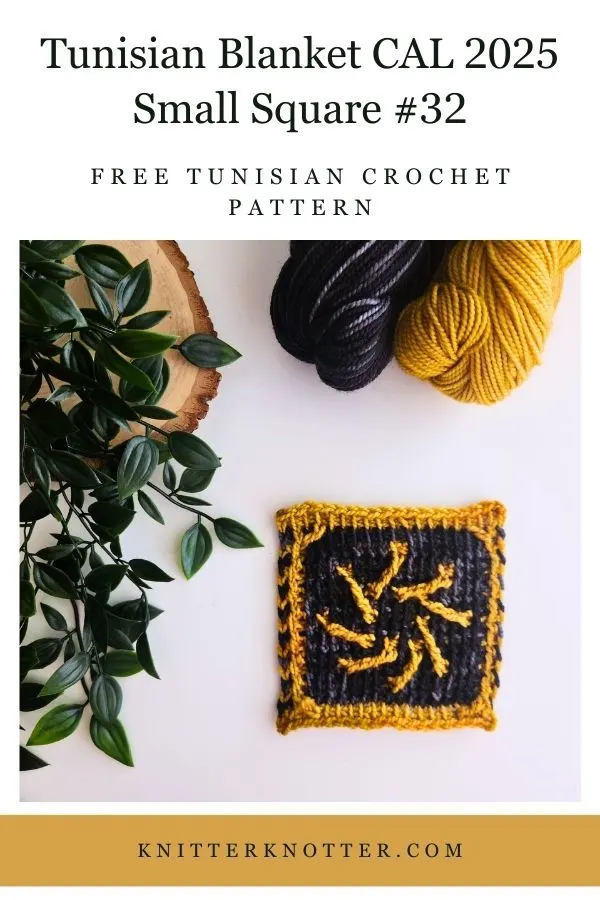
Row 1 (FR): This is the Foundation Row.
Chain 19, make the foundation row stitches in the back loops of the chain.
Row 2: fs, 17 tss, ls.
Row 3: fs, A-B1, 15 tss, B2-A, ls.
Row 4: fs, (tss, 7 A) * 2, tss, ls.
Row 5: fs, A, 15 tss, A, ls.
Row 6: fs, tss, 3 A, tss, 7 A, tss, 3 A, tss, ls.
Row 7: fs, A, 5 tss, C1, tss, D1, 7 tss, A, ls.
Row 8: fs, tss, 5 A, (tss, A) * 2, tss, 5 A, tss, ls.
Row 9: fs, A, 5 tss, C2, 7 tss, D2, tss, A, ls.
Row 10: fs, tss, A, (tss, 3 A) * 3, tss, A, tss, ls.
Row 11: fs, A, 5 tss, D2, 9 tss, A, ls.
Row 12: fs, tss, 5 A, (tss, A) * 2, tss, 5 A, tss, ls.
Row 13: fs, A, 3 tss, D1, 7 tss, C2, 3 tss, A, ls.
Row 14: fs, tss, 3 A, tss, 7 A, tss, 3 A, tss, ls.
Row 15: fs, A, 7 tss, C1, 7 tss, A, ls.
Row 16: fs, (tss, 7 A) * 2, tss, ls.
Row 17: fs, A, tss, B2, 11 tss, B1, tss, A, ls.
BOR: fs, 17 tss, ls.
This will be the bind off row. You will make a slip stitch every time you pick up a loop on your hook. Fasten off and weave in ends.

Small Square #33

Row 1 (FR): This is the Foundation Row.
Chain 19, make the foundation row stitches in the back loops of the chain.
Row 2: fs, 17 tss, ls.
Row 3: fs, A-B1, 15 tss, B2-A, ls.
Row 4: fs, tss, A, 5 tss, 3 A, 5 tss, A, tss, ls.
Row 5: fs, (A, tss) * 2, B1, 7 tss, B2, (tss, A) * 2, ls.
Row 6: fs, (tss, A) * 3, 5 tss, (A, tss) * 3, ls.
Row 7: fs, A, tss, A-B1, 11 tss, B2-A, tss, A, ls.
Row 8: fs, (tss, A) * 2, tss, 7 A, tss, (A, tss) * 2, ls.
Row 9: fs, A, 3 tss, A, 7 tss, A, 3 tss, A, ls.
Row 10: fs, tss, 3 A, tss, 7 A, tss, 3 A, tss, ls.
Row 11: fs, A, 3 tss, A, 7 tss, A, 3 tss, A, ls.
Row 12: fs, (tss, A) * 2, tss, 7 A, tss, (A, tss) * 2, ls.
Row 13: fs, (A, tss) * 2, B2, 7 tss, B1, (tss, A) * 2, ls.
Row 14: fs, (tss, A) * 3, 5 tss, (A, tss) * 3, ls.
Row 15: fs, A, tss, A, 3 tss, B2, 3 tss, B1, 3 tss, A, tss, A, ls.
Row 16: fs, tss, A, 5 tss, 3 A, 5 tss, A, tss, ls.
Row 17: fs, A, tss, B2, 11 tss, B1, tss, A, ls.
BOR: fs, 17 tss, ls.
This will be the bind off row. You will make a slip stitch every time you pick up a loop on your hook. Fasten off and weave in ends.

Small Square #34
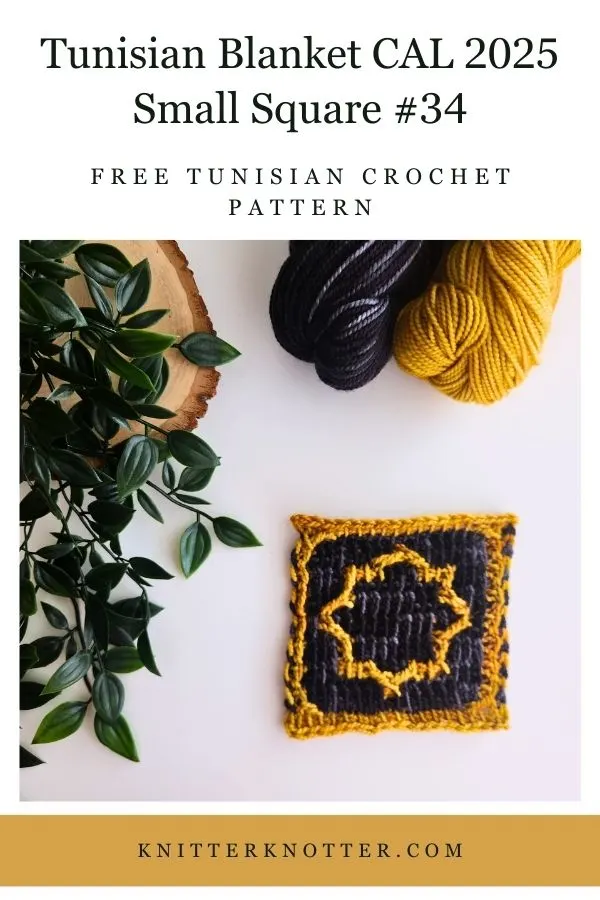
Row 1 (FR): This is the Foundation Row.
Chain 19, make the foundation row stitches in the back loops of the chain.
Row 2: fs, 17 tss, ls.
Row 3: fs, A-B1, 15 tss, B2-A, ls.
Row 4: fs, (tss, 7 A) * 2, tss, ls.
Row 5: fs, A, 5 tss, B1, 3 tss, B2, 5 tss, A, ls.
Row 6: fs, tss, (3 A, 3 tss) * 2, 3 A, tss, ls.
Row 7: fs, A, 3 tss, A, 7 tss, A, 3 tss, A, ls.
Row 8: fs, tss, 3 A, tss, 7 A, tss, 3 A, tss, ls.
Row 9: fs, A, tss, B1, 11 tss, B2, tss, A, ls.
Row 10: fs, tss, A, tss, 11 A, tss, A, tss, ls.
Row 11: fs, A, 3 tss, B2, 7 tss, B1, 3 tss, A, ls.
Row 12: fs, tss, 3 A, tss, 7 A, tss, 3 A, tss, ls.
Row 13: fs, A, 3 tss, A, 7 tss, A, 3 tss, A, ls.
Row 14: fs, tss, (3 A, 3 tss) * 2, 3 A, tss, ls.
Row 15: fs, A, 7 tss, B2-B1, 7 tss, A, ls.
Row 16: fs, (tss, 7 A) * 2, tss, ls.
Row 17: fs, A, tss, B2, 11 tss, B1, tss, A, ls.
BOR: fs, 17 tss, ls.
This will be the bind off row. You will make a slip stitch every time you pick up a loop on your hook. Fasten off and weave in ends.

Small Square #35
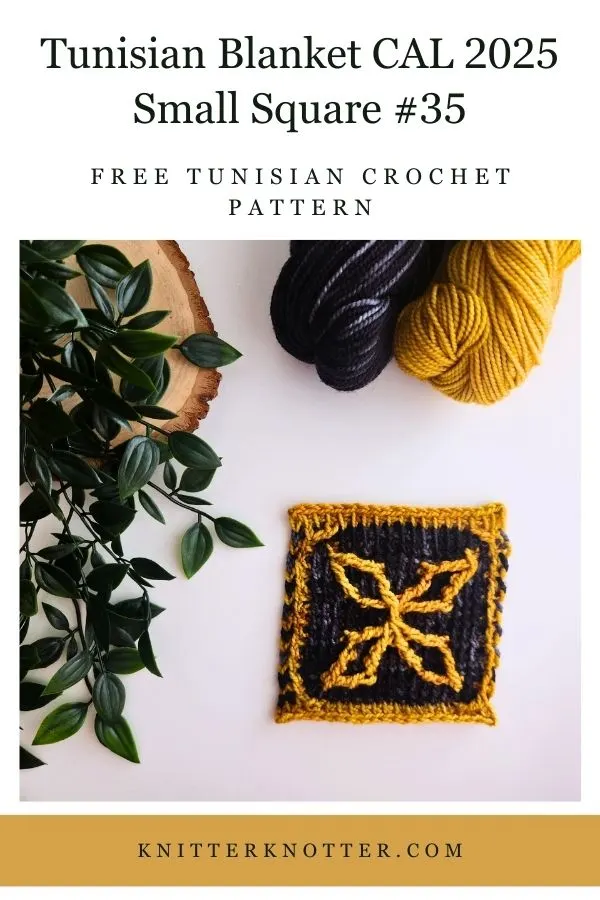
Row 1 (FR): This is the Foundation Row.
Chain 19, make the foundation row stitches in the back loops of the chain.
Row 2: fs, 17 tss, ls.
Row 3: fs, A-B1, 15 tss, B2-A, ls.
Row 4: fs, tss, A, tss, 11 A, tss, A, tss, ls.
Row 5: fs, A, 5 tss, D2, 3 tss, D1, 5 tss, A, ls.
Row 6: fs, tss, 5 A, tss, 3 A, tss, 5 A, tss, ls.
Row 7: fs, A, 3 tss, C2, 7 tss, C1, 3 tss, A, ls.
Row 8: fs, tss, 3 A, tss, 7 A, tss, 3 A, tss, ls.
Row 9: fs, A, 7 tss, D2-C2-C1-D1, 7 tss, A, ls.
Row 10: fs, (tss, 7 A) * 2, tss, ls.
Row 11: fs, A, 3 tss, D1, 7 tss, D2, 3 tss, A, ls.
Row 12: fs, tss, 3 A, tss, 7 A, tss, 3 A, tss, ls.
Row 13: fs, A, 5 tss, C1, 3 tss, C2, 5 tss, A, ls.
Row 14: fs, tss, 5 A, tss, 3 A, tss, 5 A, tss, ls.
Row 15: fs, A, tss, C1-D1, 11 tss, D2-C2, tss, A, ls.
Row 16: fs, tss, A, tss, 11 A, tss, A, tss, ls.
Row 17: fs, A, tss, B2, 11 tss, B1, tss, A, ls.
BOR: fs, 17 tss, ls.
This will be the bind off row. You will make a slip stitch every time you pick up a loop on your hook. Fasten off and weave in ends.

Small Square #36

Row 1 (FR): This is the Foundation Row.
Chain 19, make the foundation row stitches in the back loops of the chain.
Row 2: fs, 17 tss, ls.
Row 3: fs, A-B1, 15 tss, B2-A, ls.
Row 4: fs, tss, 15 A, tss, ls.
Row 5: fs, A, 15 tss, A, ls.
Row 6: fs, tss, 5 A, (tss, A) * 2, tss, 5 A, tss, ls.
Row 7: fs, A, (7 tss, A) * 2, ls.
Row 8: fs, (tss, 3 A) * 4, tss, ls.
Row 9: fs, A, 7 tss, D2-C2-A-C1-D1, 7 tss, A, ls.
Row 10: fs, tss, 3 A, 9 tss, 3 A, tss, ls.
Row 11: fs, A, 3 tss, D1, 3 tss, A, 3 tss, D2, 3 tss, A, ls.
Row 12: fs, (tss, 3 A) * 4, tss, ls.
Row 13: fs, A, 5 tss, C1, tss, A, tss, C2, 5 tss, A, ls.
Row 14: fs, tss, 5 A, (tss, A) * 2, tss, 5 A, tss, ls.
Row 15: fs, A, 15 tss, A, ls.
Row 16: fs, tss, 15 A, tss, ls.
Row 17: fs, A, tss, B2, 11 tss, B1, tss, A, ls.
BOR: fs, 17 tss, ls.
This will be the bind off row. You will make a slip stitch every time you pick up a loop on your hook. Fasten off and weave in ends.

Small Square #37

Row 1 (FR): This is the Foundation Row.
Chain 19, make the foundation row stitches in the back loops of the chain.
Row 2: fs, 17 tss, ls.
Row 3: fs, A-B1, 15 tss, B2-A, ls.
Row 4: fs, tss, A, 13 tss, A, tss, ls.
Row 5: fs, A, tss, A-B1, 11 tss, B2-A, tss, A, ls.
Row 6: fs, tss, A, tss, 11 A, tss, A, tss, ls.
Row 7: fs, A, tss, A, 11 tss, A, tss, A, ls.
Row 8: fs, tss, A, tss, 3 A, 5 tss, 3 A, tss, A, tss, ls.
Row 9: fs, A, tss, (A, 3 tss) * 3, A, tss, A, ls.
Row 10: fs, tss, A, (tss, 3 A) * 3, tss, A, tss, ls.
Row 11: fs, A, tss, (A, 3 tss) * 3, A, tss, A, ls.
Row 12: fs, tss, A, tss, 3 A, 5 tss, 3 A, tss, A, tss, ls.
Row 13: fs, A, tss, A, 11 tss, A, tss, A, ls.
Row 14: fs, tss, A, tss, 11 A, tss, A, tss, ls.
Row 15: fs, (A, tss) * 2, B2, 7 tss, B1, (tss, A) * 2, ls.
Row 16: fs, tss, A, 13 tss, A, tss, ls.
Row 17: fs, A, tss, B2, 11 tss, B1, tss, A, ls.
BOR: fs, 17 tss, ls.
This will be the bind off row. You will make a slip stitch every time you pick up a loop on your hook. Fasten off and weave in ends.

Small Square #38
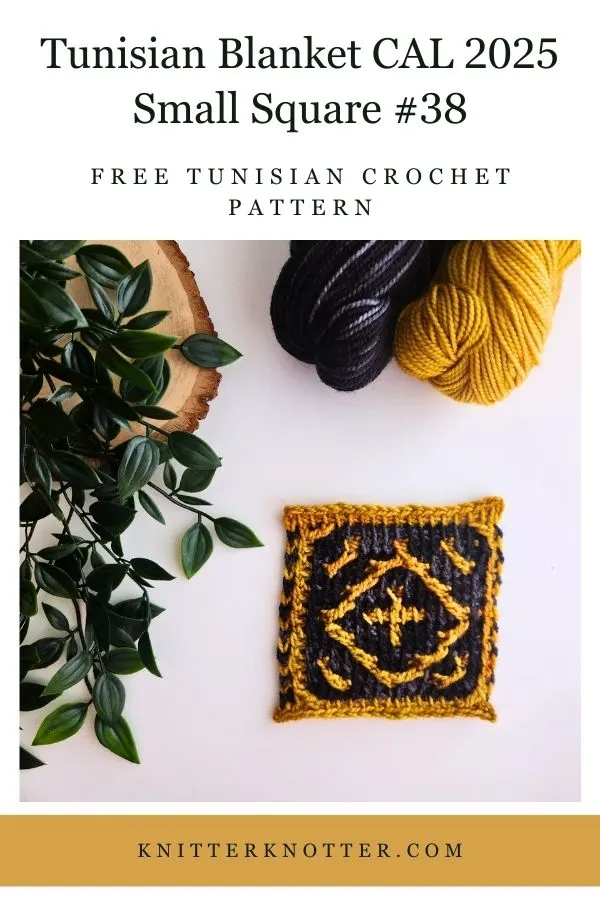
Row 1 (FR): This is the Foundation Row.
Chain 19, make the foundation row stitches in the back loops of the chain.
Row 2: fs, 17 tss, ls.
Row 3: fs, A-B1, 15 tss, B2-A, ls.
Row 4: fs, (tss, 3 A) * 4, tss, ls.
Row 5: fs, A, tss, (B1, 3 tss) * 2, B2, 3 tss, B2, tss, A, ls.
Row 6: fs, tss, A, (tss, 3 A) * 3, tss, A, tss, ls.
Row 7: fs, A, 3 tss, B1, 7 tss, B2, 3 tss, A, ls.
Row 8: fs, (tss, 3 A) * 4, tss, ls.
Row 9: fs, A, tss, B1, 5 tss, A, 5 tss, B2, tss, A, ls.
Row 10: fs, tss, A, tss, 3 A, 5 tss, 3 A, tss, A, tss, ls.
Row 11: fs, A, 3 tss, B2, 3 tss, A, 3 tss, B1, 3 tss, A, ls.
Row 12: fs, (tss, 3 A) * 4, tss, ls.
Row 13: fs, A, 5 tss, B2, 3 tss, B1, 5 tss, A, ls.
Row 14: fs, tss, A, (tss, 3 A) * 3, tss, A, tss, ls.
Row 15: fs, A, 3 tss, B2, 3 tss, B2-B1, 3 tss, B1, 3 tss, A, ls.
Row 16: fs, (tss, 3 A) * 4, tss, ls.
Row 17: fs, A, tss, B2, 11 tss, B1, tss, A, ls.
BOR: fs, 17 tss, ls.
This will be the bind off row. You will make a slip stitch every time you pick up a loop on your hook. Fasten off and weave in ends.

Small Square #39

Row 1 (FR): This is the Foundation Row.
Chain 19, make the foundation row stitches in the back loops of the chain.
Row 2: fs, 17 tss, ls.
Row 3: fs, A-B1, 15 tss, B2-A, ls.
Row 4: fs, tss, 3 A, (tss, A) * 4, tss, 3 A, tss, ls.
Row 5: fs, A, 3 tss, (A, tss) * 4, A, 3 tss, A, ls.
Row 6: fs, tss, A, 3 tss, (A, tss) * 3, A, 3 tss, A, tss, ls.
Row 7: fs, A, 15 tss, A, ls.
Row 8: fs, tss, A, 3 tss, A, 5 tss, A, 3 tss, A, tss, ls.
Row 9: fs, A, 5 tss, (A, tss) * 2, A, 5 tss, A, ls.
Row 10: fs, tss, A, 3 tss, A, 5 tss, A, 3 tss, A, tss, ls.
Row 11: fs, A, 5 tss, (A, tss) * 2, A, 5 tss, A, ls.
Row 12: fs, tss, A, 3 tss, A, 5 tss, A, 3 tss, A, tss, ls.
Row 13: fs, A, 15 tss, A, ls.
Row 14: fs, tss, A, 3 tss, (A, tss) * 3, A, 3 tss, A, tss, ls.
Row 15: fs, A, 3 tss, (A, tss) * 4, A, 3 tss, A, ls.
Row 16: fs, tss, 3 A, (tss, A) * 4, tss, 3 A, tss, ls.
Row 17: fs, A, tss, B2, 11 tss, B1, tss, A, ls.
BOR: fs, 17 tss, ls.
This will be the bind off row. You will make a slip stitch every time you pick up a loop on your hook. Fasten off and weave in ends.

Small Square #40
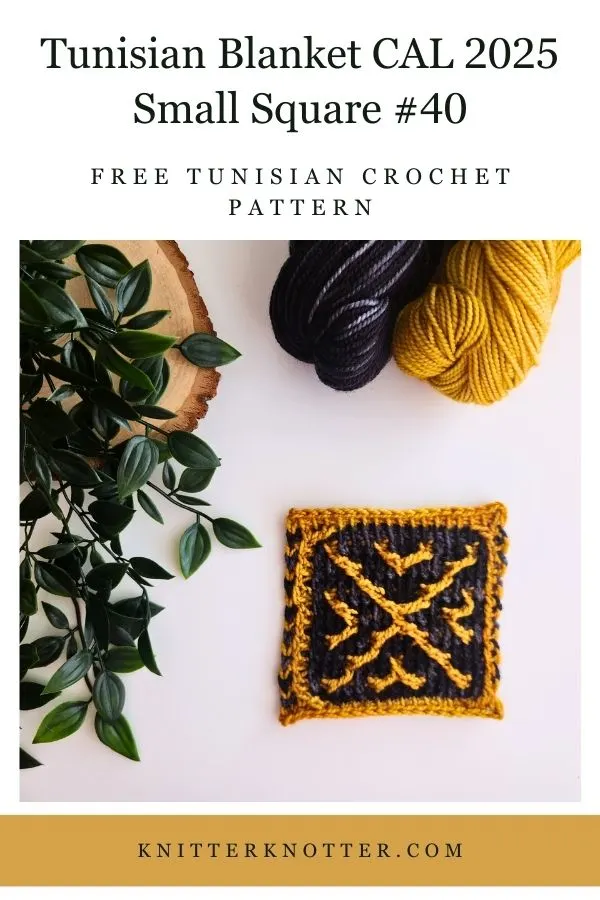
Row 1 (FR): This is the Foundation Row.
Chain 19, make the foundation row stitches in the back loops of the chain.
Row 2: fs, 17 tss, ls.
Row 3: fs, A-B1, 15 tss, B2-A, ls.
Row 4: fs, tss, A, (tss, 3 A) * 3, tss, A, tss, ls.
Row 5: fs, A, 3 tss, B2, 3 tss, B2-B1, 3 tss, B1, 3 tss, A, ls.
Row 6: fs, (tss, 3 A) * 4, tss, ls.
Row 7: fs, A, 5 tss, B2, 3 tss, B1, 5 tss, A, ls.
Row 8: fs, tss, A, (tss, 3 A) * 3, tss, A, tss, ls.
Row 9: fs, A, 3 tss, B2, 3 tss, B2-B1, 3 tss, B1, 3 tss, A, ls.
Row 10: fs, (tss, 3 A) * 4, tss, ls.
Row 11: fs, A, tss, (B1, 3 tss) * 2, B2, 3 tss, B2, tss, A, ls.
Row 12: fs, tss, A, (tss, 3 A) * 3, tss, A, tss, ls.
Row 13: fs, A, 3 tss, B1, 7 tss, B2, 3 tss, A, ls.
Row 14: fs, (tss, 3 A) * 4, tss, ls.
Row 15: fs, A, tss, (B1, 3 tss) * 2, B2, 3 tss, B2, tss, A, ls.
Row 16: fs, tss, A, (tss, 3 A) * 3, tss, A, tss, ls.
Row 17: fs, A, tss, B2, 11 tss, B1, tss, A, ls.
BOR: fs, 17 tss, ls.
This will be the bind off row. You will make a slip stitch every time you pick up a loop on your hook. Fasten off and weave in ends.

Small Square #41

Row 1 (FR): This is the Foundation Row.
Chain 19, make the foundation row stitches in the back loops of the chain.
Row 2: fs, 17 tss, ls.
Row 3: fs, A-B1, 15 tss, B2-A, ls.
Row 4: fs, tss, 15 A, tss, ls.
Row 5: fs, A, 15 tss, A, ls.
Row 6: fs, tss, (3 A, 3 tss) * 2, 3 A, tss, ls.
Row 7: fs, A, (3 tss, A, tss, A) * 2, 3 tss, A, ls.
Row 8: fs, tss, 3 A, 9 tss, 3 A, tss, ls.
Row 9: fs, A, 5 tss, A, 3 tss, A, 5 tss, A, ls.
Row 10: fs, tss, 5 A, tss, 3 A, tss, 5 A, tss, ls.
Row 11: fs, A, 5 tss, A, 3 tss, A, 5 tss, A, ls.
Row 12: fs, tss, 3 A, 9 tss, 3 A, tss, ls.
Row 13: fs, A, (3 tss, A, tss, A,) * 2, 3 tss, A, ls.
Row 14: fs, tss, (3 A, 3 tss) * 2, 3 A, tss, ls.
Row 15: fs, A, 15 tss, A, ls.
Row 16: fs, tss, 15 A, tss, ls.
Row 17: fs, A, tss, B2, 11 tss, B1, tss, A, ls.
BOR: fs, 17 tss, ls.
This will be the bind off row. You will make a slip stitch every time you pick up a loop on your hook. Fasten off and weave in ends.

Small Square #42

Row 1 (FR): This is the Foundation Row.
Chain 19, make the foundation row stitches in the back loops of the chain.
Row 2: fs, 17 tss, ls.
Row 3: fs, A-B1, 15 tss, B2-A, ls.
Row 4: fs, tss, 5 A, tss, 3 A, tss, 5 A, tss, ls.
Row 5: fs, A, 3 tss, B1, 7 tss, B2, 3 tss, A, ls.
Row 6: fs, tss, 3 A, tss, 7 A, tss, 3 A, tss, ls.
Row 7: fs, A, tss, B1, 5 tss, C2-C1, 5 tss, B2, tss, A, ls.
Row 8: fs, tss, A, tss, (5 A, tss) * 2, A, tss, ls.
Row 9: fs, A, 5 tss, D2, 3 tss, D1, 5 tss, A, ls.
Row 10: fs, tss, 5 A, tss, 3 A, tss, 5 A, tss, ls.
Row 11: fs, A, tss, D1, 11 tss, D2, tss, A, ls.
Row 12: fs, tss, A, (tss, 5 A) * 2, tss, A, tss, ls.
Row 13: fs, A, 3 tss, B2, 7 tss, B1, 3 tss, A, ls.
Row 14: fs, tss, 3 A, tss, 7 A, tss, 3 A, tss, ls.
Row 15: fs, A, 5 tss, B2-C1, 3 tss, C2-B1, 5 tss, A, ls.
Row 16: fs, tss, 5 A, tss, 3 A, tss, 5 A, tss, ls.
Row 17: fs, A, tss, B2, 11 tss, B1, tss, A, ls.
BOR: fs, 17 tss, ls.
This will be the bind off row. You will make a slip stitch every time you pick up a loop on your hook. Fasten off and weave in ends.

Small Square #43
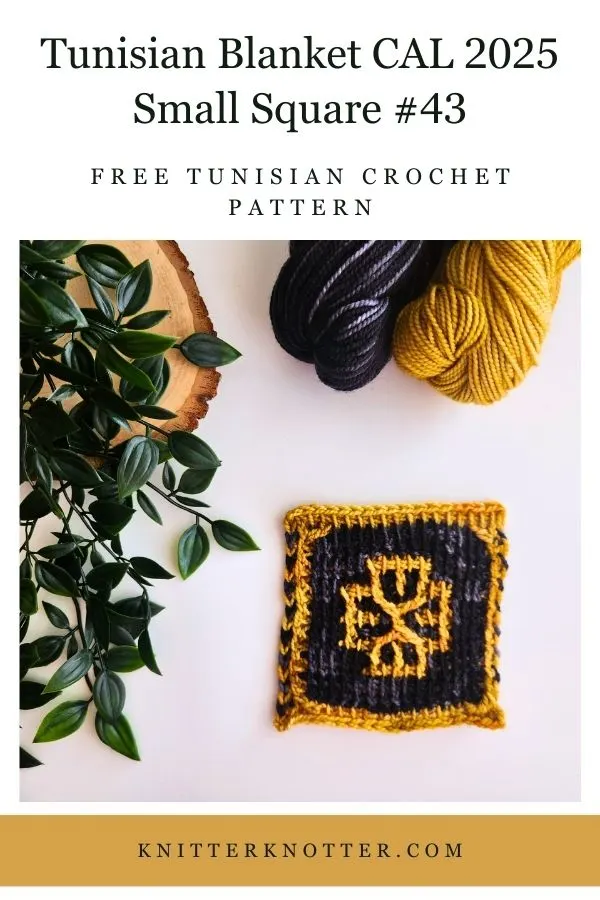
Row 1 (FR): This is the Foundation Row.
Chain 19, make the foundation row stitches in the back loops of the chain.
Row 2: fs, 17 tss, ls.
Row 3: fs, A-B1, 15 tss, B2-A, ls.
Row 4: fs, tss, 15 A, tss, ls.
Row 5: fs, A, 15 tss, A, ls.
Row 6: fs, tss, 5 A, 5 tss, 5 A, tss, ls.
Row 7: fs, A, 5 tss, (A, tss) * 2, A, 5 tss, A, ls.
Row 8: fs, tss, 3 A, 3 tss, A, tss, A, 3 tss, 3 A, tss, ls.
Row 9: fs, (A, 3 tss) * 2, B2-B1, (3 tss, A) * 2, ls.
Row 10: fs, tss, 3 A, 3 tss, A, tss, A, 3 tss, 3 A, tss, ls.
Row 11: fs, A, 3 tss, A, tss, B1, 3 tss, B2, tss, A, 3 tss, A, ls.
Row 12: fs, tss, 3 A, 3 tss, A, tss, A, 3 tss, 3 A, tss, ls.
Row 13: fs, A, 5 tss, (A, tss) * 2, A, 5 tss, A, ls.
Row 14: fs, tss, 5 A, 5 tss, 5 A, tss, ls.
Row 15: fs, A, 15 tss, A, ls.
Row 16: fs, tss, 15 A, tss, ls.
Row 17: fs, A, tss, B2, 11 tss, B1, tss, A, ls.
BOR: fs, 17 tss, ls.
This will be the bind off row. You will make a slip stitch every time you pick up a loop on your hook. Fasten off and weave in ends.

Small Square #44

Row 1 (FR): This is the Foundation Row.
Chain 19, make the foundation row stitches in the back loops of the chain.
Row 2: fs, 17 tss, ls.
Row 3: fs, A-B1, 15 tss, B2-A, ls.
Row 4: fs, tss, A, 5 tss, 3 A, 5 tss, A, tss, ls.
Row 5: fs, A, tss, A, 5 tss, B2-B1, 5 tss, A, tss, A, ls.
Row 6: fs, tss, A, (tss, 5 A) * 2, tss, A, tss, ls.
Row 7: fs, A, tss, A, 11 tss, A, tss, A, ls.
Row 8: fs, tss, A, tss, 11 A, tss, A, tss, ls.
Row 9: fs, A, 3 tss, B2, 7 tss, B1, 3 tss, A, ls.
Row 10: fs, tss, 3 A, tss, 7 A, tss, 3 A, tss, ls.
Row 11: fs, A, tss, B1, 11 tss, B2, tss, A, ls.
Row 12: fs, tss, A, tss, 11 A, tss, A, tss, ls.
Row 13: fs, A, tss, A, 11 tss, A, tss, A, ls.
Row 14: fs, tss, A, (tss, 5 A) * 2, tss, A, tss, ls.
Row 15: fs, A, tss, A, 3 tss, B1, 3 tss, B2, 3 tss, A, tss, A, ls.
Row 16: fs, tss, A, 5 tss, 3 A, 5 tss, A, tss, ls.
Row 17: fs, A, tss, B2, 11 tss, B1, tss, A, ls.
BOR: fs, 17 tss, ls.
This will be the bind off row. You will make a slip stitch every time you pick up a loop on your hook. Fasten off and weave in ends.

Joining Instructions
The squares in the Sona Blanket are joined using the Zig Zag Slip Stitch join method. While there aren’t any written instructions for this technique, I’ve created a video tutorial that shows you exactly how I joined my squares. You can find both the left-handed and right-handed videos above.
Placement of Squares
You can arrange your squares in any configuration you prefer, but if you’d like your blanket to look like mine, the chart below shows how I placed the squares in my version.
Please note that the border design depends on this specific layout. You can swap any of the small squares with each other and any of the large squares with each other without affecting the border. However, if you choose a completely different layout, the border may not fit as intended.

Border Instructions
The border of the Sona Blanket is made in two parts. First, a Tunisian Blackwork Frame is created separately and then attached around the joined squares. This is followed by a finishing round of Crab Stitch. For a detailed tutorial, check the link in the Resources section.
Notes:
- You will need a long cord to accommodate 265 stitches while making the frame.
- The border instructions are provided in written format only. There is no chart available for this section.
- The color for every row are mentioned in brackets at the beginning of every row.
- I strongly recommend watching the support video for this before starting your border – Click here for the dedicated playlist.
Step 1: Base / Bottom
[BC] Row 1 (FR): This is the Foundation Row.
Chain 265, make the foundation row stitches in the back loops of the chain.
[FC] Row 2: fs, 263 tss, ls.
[BC] Row 3: fs, A, 261 tss, A, ls.
[FC] Row 4: fs, tss, 261 A, tss, ls.
[BC] Row 5: fs, A, 261 tss, A, ls.
[FC] Row 6: fs, tss, 5 A, tss, 3 A, tss, (A, 7 tss) * 30, A, tss, 3 A, tss, 5 A, tss, ls.
[BC] Row 7: fs, A, 5 tss, A, tss, B2-B1, tss, A, (tss, A, tss, B2, tss, B1, tss, A) * 30, tss, A, tss, B2-B1, tss, A, 5 tss, A, ls.
[FC] Row 8: fs, tss, 3 A, 3 tss, (A, tss) * 2, (2 tss, A, 3 tss, A, tss) * 30, 2 tss, A, tss, A, 3 tss, 3 A, tss, ls.
[BC] Row 9: fs, A, 5 tss, B2, tss, B2-A-B1, 2 tss, (3 tss, B2-A, tss, A-B1, 2 tss) * 30, 3 tss, B2-A-B1, tss, B1, 5 tss, A, ls.
[FC] Row 10: fs, tss, 5 A, 5 tss, (4 tss, A, 3 tss) * 30, 6 tss, 5 A, tss, ls.
[BC] Row 11: fs, A, 3 tss, (B1, tss) * 2, A, 245 tss, A, (tss, B2) * 2, 3 tss, A, ls.
[FC] Row 12: fs, tss, 3 A, 3 tss, A, tss, 245 A, tss, A, 3 tss, 3 A, tss, ls.
[BC] Row 13: fs, A, 5 tss, A, tss, A, 245 tss, A, tss, A, 5 tss, A, ls.
Step 2: Side A
Note: We split the left and right sides here. This is the right side for right-handed crocheters, and the left side for left-handed crocheters.
[FC] Row 14: fs, tss, 3 A, 3 tss, A, tss, 3 A, tss.
[BC] Row 15: fs, A, 3 tss, A, tss, B2, tss, B2-A, 3 tss, ls.
[FC] Row 16: fs, tss, 3 A, tss, A, 3 tss, 3 A, ls.
[BC] Row 17: fs, A, 3 tss, A, tss, A, 5 tss, ls.
[FC] Row 18: fs, tss, 3 A, tss, A, 3 tss, 3 A, ls.
[BC] Row 19: fs, A, 3 tss, A-B1, tss, B1, tss, A, 3 tss, ls.
[FC] Row 20: fs, tss, 3 A, 3 tss, A, tss, 3 A, ls.
[BC] Row 21: fs, A, 5 tss, A, tss, A, 3 tss, ls.
[FC] Row 22: fs, tss, 3 A, 3 tss, A, tss, 3 A, ls.
Rows 23 – 238: Repeat rows 15 – 22 (27 times).
Rows 239 – 242: Repeat rows 15 – 18.
Do not complete the RP of the last row. Pause and save the stitches on a cord or stitch holder.
Step 3: Side B
Note: This is the left side for right-handed crocheters, and the right side for left-handed crocheters.
Attach [BC] at the 14th stitch of Row 13. Bind off 238 sts, switch to [FC] at the last bind off.
[FC] Row 14: fs, 3 A, tss, A, 3 tss, 3 A, tss, ls.
[BC] Row 15: fs, 3 tss, A-B1, tss, B1, tss, A, 3 tss, A, ls.
[FC] Row 16: fs, 3 A, 3 tss, A, tss, 3 A, tss, ls.
[BC] Row 17: fs, 5 tss, A, tss, A, 3 tss, A, ls.
[FC] Row 18: fs, 3 A, 3 tss, A, tss, 3 A, tss, ls.
[BC] Row 19: fs, 3 tss, A, tss, B2, tss, B2-A, 3 tss, A, ls.
[FC] Row 20: fs, 3 A, tss, A, 3 tss, 3 A, tss, ls.
[BC] Row 21: fs, 3 tss, A, tss, A, 5 tss, A, ls.
[FC] Row 22: fs, 3 A, tss, A, 3 tss, 3 A, tss, ls.
Rows 23 – 238: Repeat rows 15 – 22 (27 times).
Rows 239 – 242: Repeat rows 15 – 18.
Step 4: Top
After completing the last row of Side B, with [BC] make 237 chains. Switch to [FC] and complete the RP for the side panel.
[BC] Row 243: fs, A, 3 tss, A-B1, tss, B1, tss, A, 4 tss, (237 stitches in the chain, pick up stitches in the back loop), 4 tss, A, tss, B2, tss, B2-A, 3 tss, A, ls.
[FC] Row 244: fs, tss, 3 A, 3 tss, A, tss, 4 A, 237 tss, 4 A, tss, A, 3 tss, 3 A, tss, ls.
[BC] Row 245: fs, A, 5 tss, A, tss, A, 245 tss, A, tss, A, 5 tss, A, ls.
[FC] Row 246: fs, tss, 3 A, 3 tss, A, tss, 245 A, tss, A, 3 tss, 3 A, tss, ls.
[BC] Row 247: fs, A, 5 tss, B2, tss, B2-A, 2 tss, (8 tss) * 30, 3 tss, A-B1, tss, B1, 5 tss, A, ls.
[FC] Row 248: fs, tss, 5 A, 9 tss, A, (7 tss, A) * 29, 9 tss, 5 A, tss, ls.
[BC] Row 249: fs, A, 3 tss, (B1, tss) * 2, (A, tss, B2, tss, B1, tss, A, tss) * 31, B2, tss, B2, 3 tss, A, ls.
[FC] Row 250: fs, tss, 3 A, 3 tss, A, (tss, A, 3 tss, A, 2 tss) * 30, tss, A, 3 tss, A, tss, A, 3 tss, 3 A, tss, ls.
[BC] Row 251: fs, A, 5 tss, A-B1, tss, (2 tss, B2-A, tss, A-B1, 3 tss) * 31, B2-A, 5 tss, A, ls.
[FC] Row 252: fs, tss, 5 A, tss, 3 A, tss, (A, 7 tss) * 30, A, tss, 3 A, tss, 5 A, tss, ls.
[BC] Row 253: fs, A, 261 tss, A, ls.
[FC] Row 254: fs, tss, 261 A, tss, ls.
[BC] Row 255: fs, A, 261 tss, A, ls.
[BC] BOR: fs, 263 tss, ls.
This will be the bind off row. You will make a slip stitch every time you pick up a loop on your hook. Fasten off and weave in ends.
Step 5: Crab Stitch Border
Once the frame is complete, use a 5.5 mm (I-9) hook to add a Crab Stitch border around it. After finishing the border, attach the completed frame to the joined squares using the Zig Zag Slip Stitch Join me

Share your pictures with me!
I really hope you liked this pattern. I would love to see your version of this design so please share your pictures with me!
– Share them on Instagram with the tags #knitterknotter, #madewithknitterknotter, and @knitterknotter
– Share them in my Facebook Group
– Create a project on Ravelry
I strive to offer my patterns for free and that is possible only with your support. Please share this pattern and your pictures as much as possible. Every share counts 🙂
Copyright and Terms of Use
This pattern is for personal use only. You are welcome to make and sell handmade items using this pattern but you are required to credit the design to Arunima Goel @ KnitterKnotter by linking back to https://knitterknotter.com. Do not publish or sell this pattern, in part or in full and do not make any video tutorials of this pattern without my permission. When featuring KnitterKnotter in pattern roundups, blog articles or Facebook posts, you may use one of my photos and provide a link back to the original source.
Disclosure
This page may contain affiliate links where I earn a small commission. While using these links doesn’t cost you more, it helps me continue to offer patterns for free. Thank you for your continued support!
SUBSCRIBE TO OUR FREE NEWSLETTER
You will receive alerts for new patterns and sneak peeks of my future patterns. I also share deals with my subscribers that you won’t get elsewhere!!